
If you’ve been in the real estate game as long as I have, over 14 years and 10,000+ homes, you’ve seen plenty of trends come and go. But vertical video isn’t just a trend; it’s a massive shift in how our clients (the agents) get their listings seen.
Back in the day, everything was horizontal. We shot for the MLS and maybe a YouTube link. Today? If an agent isn’t posting to Instagram Reels, TikTok, or YouTube Shorts, they feel like they’re invisible.
The good news? Adding vertical video (9:16) to your services is one of the easiest ways to increase your “revenue per shoot” without spending four extra hours at the property. In this guide, I’m going to show you the exact workflow I use to capture high-end vertical video alongside my photography, the gear you actually need, and how to price it so it’s a win-win for everyone.
Why Vertical Video is the “Easy Win” for Photographers
Most photographers overcomplicate video. They think they need a Hollywood production crew or a separate day to shoot it.
Here is the reality: Vertical video is meant to feel more “social” and immediate. It’s shorter, punchier, and focuses on the “vibe” of a house rather than every single square inch. Because it’s consumed on phones, you can get away with a faster, more streamlined workflow than traditional horizontal walkthroughs.
By offering Real Estate Videography in a vertical format, you solve a major pain point for your clients: they don’t know how to make Reels, but they know they need them. You become the hero who provides the content, and you get paid more for every house you’re already visiting.
The Vertical Video Gear Kit
You don’t need a whole new bag of gear. If you’re already shooting with a modern mirrorless system, you’re 90% of the way there.

1. The Camera
I’m a big fan of the Sony ecosystem (check out my Sony A7 V review if you want to see why). For vertical video, you want a body that handles 4K and has solid autofocus.
2. The Wide-Angle Lens
Vertical video crops your field of view significantly. To make a room look spacious in 9:16, you need to go wide. I recommend something in the 12-24mm or 16-35mm range.
3. The Secret Weapon: The L-Bracket
If you want to shoot vertical video on a tripod or gimbal without flipping the whole head over, an L-bracket is a lifesaver. It allows you to mount your camera vertically in seconds, keeping the weight centered and your horizons level.
4. The Gimbal
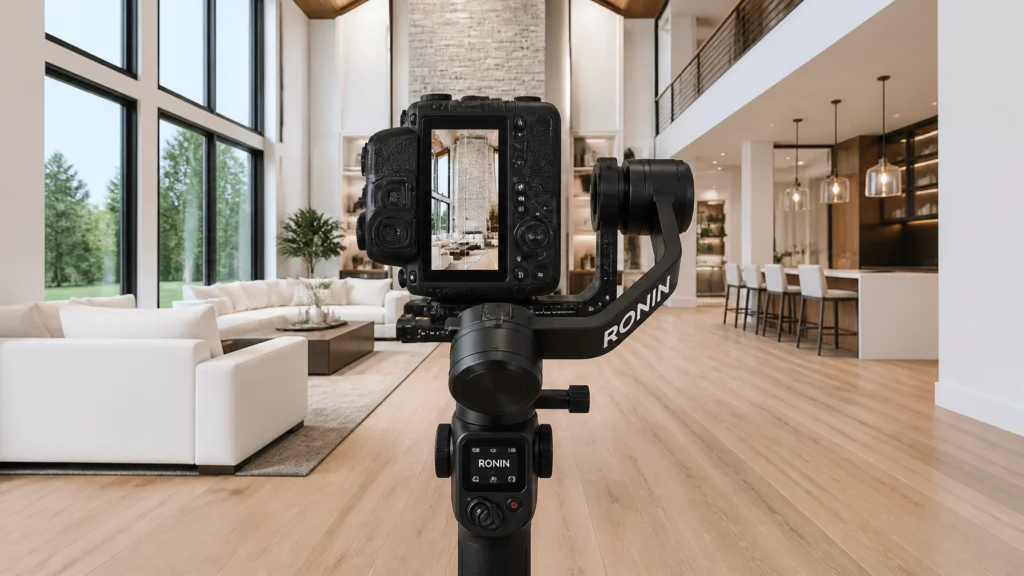
While I love handheld shots for “lifestyle” details, a gimbal (like the DJI Ronin series) is essential for those smooth, buttery walkthroughs. Many modern gimbals now have a “Native Vertical” mode that rotates the mount for you.
The Integrated Workflow: How to Shoot Faster
The biggest mistake I see photographers make is doing a “photo lap” and then a “video lap.” That kills your hourly rate. Instead, I use what I call the Integrated Workflow.

Step 1: The Prep
Walk through the house just like you would for photos. Turn on the lights, open the blinds, and declutter. While you’re doing this, identify the 5-7 “Hero Shots” that will make the best video clips.
Step 2: The Room-by-Room Toggle
Once a room is ready for photos, I set up my tripod and knock out my bracketed HDR shots. Before I move to the next room, I grab my camera (or my second body on a gimbal) and spend 60 seconds capturing 3 short clips:
- The Reveal: Pushing through a doorway into the room.
- The Pan: A slow, sweeping view of the main feature (e.g., the kitchen island).
- The Detail: A tight shot of a high-end finish (e.g., the backsplash or a view from the window).
Step 3: Keep it Short
For vertical video, you only need 3-5 seconds per clip. You aren’t making a movie; you’re providing the raw materials for a 30-second Reel. By shooting these while you’re already in the room for photos, you save the time of walking through the house twice.
Editing for Social Media Speed
If you spend three hours editing a $150 video add-on, you’re losing money. The goal is efficiency.

The “9:16 Sequence”
When you drop your footage into your editing software (I use Premiere Pro, but CapCut is incredibly powerful and fast for this), make sure your sequence is set to 1080×1920.
Focus on the Hook
The first 2 seconds of a Real Estate Video are everything. Start with the most impressive part of the house, the pool, the massive kitchen, or a stunning front view. Don’t save the best for last; on social media, “last” never happens because people swipe away.
Music and Transitions
Use trending audio if you can, or keep it clean with upbeat, modern tracks. Avoid the “corporate cheesy” music. Keep your transitions simple, straight cuts are almost always better than flashy wipes for high-end properties.
Business Strategy: How to Sell and Price Vertical Video
Don’t just give this away. Vertical video is a high-value marketing asset for agents.

1. The “Social Media Bundle”
Instead of selling “one video,” sell a bundle. Tell the agent: “I’ll give you one 30-second highlight Reel and 3-5 ‘B-roll’ clips you can use for your own stories.” This sounds like a massive amount of content, but for you, it’s just the raw footage you already shot.
2. Pricing
In most markets, a vertical video add-on can range from $125 to $250. If it takes you an extra 15 minutes on-site and 20 minutes to edit, that’s a massive boost to your hourly earnings.
3. Educate Your Clients
Show them the numbers. Reels get significantly more reach than static posts. When you provide the video, you aren’t just giving them a file; you’re giving them a way to get more eyes on their listing and more leads in their inbox.
FAQ: Vertical Video for Real Estate
Q: Can I just crop my horizontal video to make it vertical?
A: You can, but it usually looks like an afterthought. Shooting vertically allows you to compose the shot properly, keeping the ceiling and floor in a balanced perspective.
Q: Do I need a drone for vertical video?
A: It helps! Many DJI drones (like the Mini 3/4 Pro) can rotate the camera 90 degrees for true vertical 4K. If your drone doesn’t do that, shoot wide in horizontal and crop in post.
Q: What frame rate should I shoot at?
A: I recommend 30fps or 60fps. 60fps allows you to slow the footage down in a 30fps timeline for that “dreamy” slow-motion look that works so well for luxury homes.
Q: Should the agent be in the video?
A: If they are willing, yes! Having an agent do a quick “3 tips for this house” intro adds a personal touch that performs very well on social media.
Q: Is 1080p enough, or should I shoot 4K?
A: 1080p is fine for Instagram, but 4K gives you room to “punch in” or stabilize the footage in post without losing quality.
Q: How do I handle white balance?
A: Set it manually! Don’t use Auto White Balance, or the colors will shift as you move from a warm kitchen to a daylight-balanced window.
Q: What is the ideal length for a Reel?
A: 15 to 30 seconds is the “sweet spot” for engagement.
Q: Should I use a microphone?
A: If the agent is speaking, yes. A simple wireless lavalier mic (like the DJI Mic or Rode Wireless GO) is essential. For property-only videos, the on-camera mic is fine for capturing ambient “lifestyle” sounds.
Q: How do I deliver the files?
A: I use specialized delivery platforms or simple Google Drive/Dropbox links. Make sure the agent can download them directly to their phone easily.
Q: Do I need an L-bracket for a gimbal?
A: Most modern gimbals come with a way to mount vertically, but a dedicated L-bracket makes switching back to your tripod for photos much faster.
Final Recommendation: Start Today
If you aren’t offering vertical video yet, you’re leaving money on the table. My advice? The very next house you shoot, capture 5 vertical clips for free. Edit them into a quick 20-second Reel and send it to the agent as a “thank you” gift.
Once they see the engagement it gets on their Instagram, they’ll never want to shoot a house without it again.
Vertical video is about speed, efficiency, and meeting the market where it is. Use the Integrated Workflow, keep your gear simple, and focus on those “Hero” moments. You’ll shoot faster, earn more, and build a much stronger business.
Ready to upgrade your gear?
Check out my Recommended Gear Page for the exact cameras, gimbals, and L-brackets I use for every shoot.