
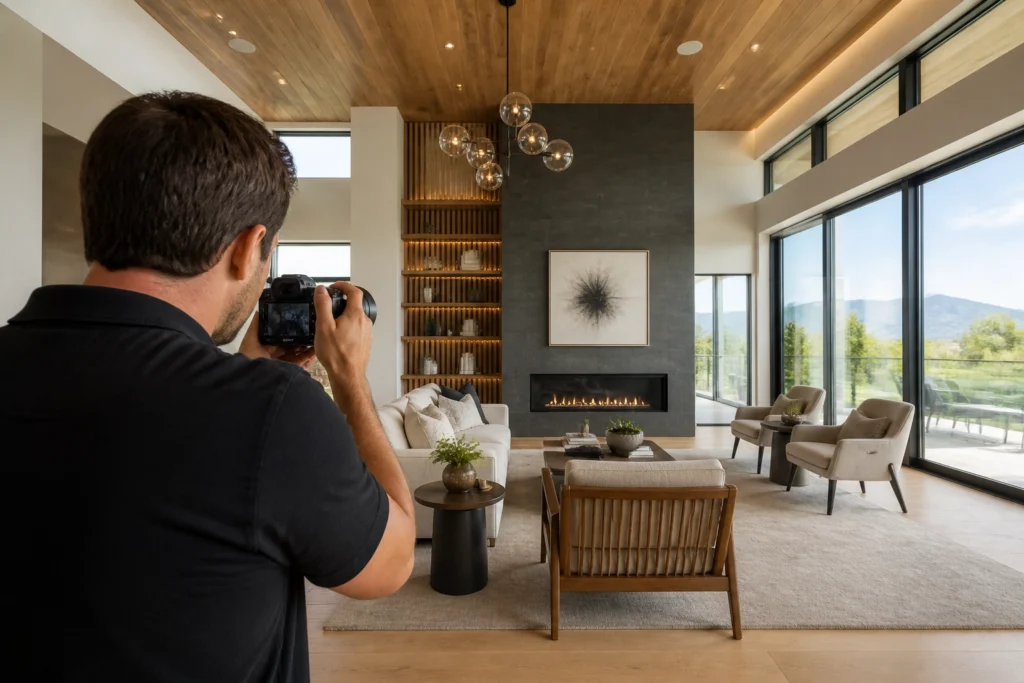
If you’re still spending two hours at a standard residential listing, you’re not just tired, you’re losing money.
In this industry, time is the only thing you can’t buy back. After 14 years and more than 10,000 homes photographed, I’ve learned that the “starving artist” approach to real estate photography is a one-way ticket to burnout. The agents don’t want you there for three hours, the homeowners definitely don’t want you there for three hours, and your bank account is screaming for you to leave.
My name is Scott Prokop, and in 2024, I was named the PFRE Photographer of the Year. I didn’t get there by being the slowest guy in the room. I got there by developing a real estate photography workflow that allows me to capture a full media package, stills, floor plans, and drone, in under 60 minutes without sacrificing an ounce of quality.
This isn’t about cutting corners. It’s about cutting the friction.
Quick Verdict: The ROI of Efficiency
Efficiency is the difference between a $50,000-a-year hobby and a $200,000-a-year business. By mastering a 60-minute workflow, you double your daily capacity. If you can move from two shoots a day to four, you’ve just doubled your revenue while keeping your overhead virtually the same. This guide will show you exactly how to do it.
Why Your Current Workflow is Killing Your Profit (The Tripod Trap)
Let’s talk about the elephant in the room: the tripod.
For years, we were told that a tripod was non-negotiable. And back in the days of the Nikon D800 with zero dynamic range and no stabilization, that was true. But we aren’t shooting in 2012 anymore.
If you are still carrying a tripod into every bedroom of a 2,000-square-foot bungalow, you’re paying for your own workout. Every time you set those legs, level the head, and check your frame, you’re losing 30 to 60 seconds. Multiply that by 25 shots, and you’ve just wasted 20 minutes of your life on “setup.”
Field Note: The “Anchor” Theory
“I shoot handheld for 95% of my homes. If you have a modern mirrorless camera with IBIS (In-Body Image Stabilization), your tripod is just a $500 anchor slowing you down. I only break mine out for extremely dark basements or specialized bracketed shots where I need absolute bracket-to-bracket alignment for manual blending, which, thanks to AutoHDR, is almost never.”
When you ditch the tripod, you regain your agility. You can find better angles faster, move furniture with one hand while holding the camera in the other, and maintain a pace that keeps the “flow” in your workflow.
Phase 1: The 5-Minute Arrival & Walkthrough (Setting the Stage)
The moment you pull into the driveway, the clock starts. But the 60-minute workflow doesn’t mean you start clicking immediately. The first five minutes are the most important for your mental map.

The Greet and Recon
I walk in, greet the agent or homeowner, and ask one simple question: “Are there any specific features or upgrades you want to make sure I highlight?” This does two things: it makes you look like a pro who cares about their marketing, and it prevents you from having to redo a shot later because they “really wanted that custom pantry” you missed.
The Lighting Rule
As I walk through the house to plan my route, I’m doing one thing: Lights ON. Always.
Field Note: Let There Be Light
“Lights ON. Always. It makes the home feel warmer, and modern HDR handles the color temp mixed bag better than ever before. We aren’t doing ‘Pure Flambient’ here where we’re worried about every stray bulb. We want the home to look inviting, and ‘lights off’ often looks cold and sterile in a residential listing.”
During this walkthrough, I’m also opening every blind and curtain. If the view outside is terrible (looking at a brick wall), I’ll tilt the blinds up to let light in but hide the eyesore. If it’s a beautiful backyard, those curtains are wide open.
Phase 2: The Photography Sequence (Handheld HDR Mastery)
Once the lights are on and the walkthrough is done, it’s time to shoot. My sequence is always the same: Exterior -> Main Floor -> Upper Floor -> Basement -> Garage. Consistency is the enemy of mistakes.
The Equipment
I use a Sony A7 IV (or the A7 V) paired with the Sony FE 16-35mm f/2.8 GM II. This setup, combined with a fast SD card, is the Ferrari of real estate photography.
The Settings
- Mode: Aperture Priority (A) or Manual (M).
- Aperture: f/8 for maximum sharpness and depth of field.
- ISO: 100-400 (Auto ISO with a cap works great).
- Bracketing: 3 shots, 2 stops apart (-2, 0, +2).
- Drive Mode: Continuous Bracketing.
The Execution
I stand in the corner, level my camera (using the built-in electronic level), and fire. Click-click-click. Done. I don’t look at the screen for more than a second. I move to the next angle.

In a standard kitchen, I’m looking for two wide angles and maybe one detail shot of the island or appliances. By shooting handheld, I can get those three shots in under two minutes.
Watch: Shoot a House in 30 Minutes (NO TRIPOD!)
Phase 3: The Add-on Integration (CubiCasa & Drone in 15 minutes)
This is where you make the “Earn More” part of the title happen. If you only sell photos, you’re a commodity. If you sell a Media Package, you’re a partner.
CubiCasa: The 5-Minute Floor Plan
After I finish the interior photos, I pull out my phone and open the CubiCasa app (integrated through HDPhotoHub). I walk through the house one more time: this time just scanning. It takes me 5 minutes to scan a 2,500-square-foot home.

I charge $50-$100 for this. My cost is minimal, and my time investment is practically zero because I’m already walking through the rooms to check that I turned the lights off.
Drone: The 10-Minute Aerial
I head outside, grab my DJI Air 3S, and pop it in the air.
- Shot 1: The “Hero” front exterior.
- Shot 2: Top-down “Lot Line” shot.
- Shot 3: High-angle rear exterior showing the neighborhood context.
- Shot 4: “Orbit” of the property.
With the Air 3S, I don’t need a tripod or a complex setup. It’s up, captured, and down in under 10 minutes.
Phase 4: The 5-Minute Exit & On-Site Quality Control
Before I leave, I do a “Final Five.”
- The Light Check: Did I turn off all the lights? (Nothing annoys a homeowner more than coming home to a $400 power bill because you left the basement lights on).
- The Lock Check: Is the back door locked? Is the lockbox secure?
- The Card Check: I quickly scroll through my thumbnails to ensure I didn’t have a massive exposure fail or a blurry shot in a key room.
- The Client Connection: If the agent is there, I let them know the photos look “incredible” and tell them exactly when to expect the delivery email.
The Post-Shoot: Automating the Deliverables
The 60-minute workflow doesn’t end at the front door; it ends when the client pays you. If you spend three hours editing, you’ve just ruined your hourly rate.
AutoHDR: Your AI Editor
I don’t manually blend exposures anymore. I use AutoHDR. I upload my brackets, and the AI handles the window pulls, color correction, and vertical alignment. It delivers a finished product that looks like I spent 20 minutes per photo in Photoshop.
HDPhotoHub: The Delivery Engine
Once the photos are back from AutoHDR, I upload them to HDPhotoHub.
- Automated Invoicing: The client can’t download the photos until they pay.
- Property Websites: It automatically generates a beautiful site for the listing.
- Marketing Materials: It creates flyers and social media posts instantly.
This system saves me hours of administrative “busy work.”

Internal Guides to Help You Scale
- The Complete HDR Real Estate Photography Guide
- The Ultimate Real Estate Photography Gear Guide (2026)
- The Ultimate Real Estate Photography Editing Workflow
- Real Estate Photography Pricing Guide (2026)
FAQ: Mastering the 60-Minute Workflow
1. Isn’t handheld photography less sharp than tripod photography?
Not with modern IBIS. If you’re shooting at 1/60th or faster on a wide-angle lens, your images will be tack sharp. The slight “micro-movements” actually help some HDR algorithms align better than static shots.
2. What if the house is a mess?
I tell my agents upfront: “I am a photographer, not a stager.” I will move a tissue box or a trash can, but I won’t clean a kitchen. If the house isn’t ready, I shoot it as-is or offer to reschedule for a fee. Don’t let a messy house break your workflow.
3. Do I really need a Sony A7 IV?
You need a camera with good In-Body Image Stabilization and fast bracketing. The Sony A7 IV and Canon R6 II are the gold standards right now.
4. How many photos should I take?
For a standard 2,000 sq ft home, 25-35 photos is the sweet spot. Anything more is redundant; anything less feels “cheap” to the agent.
5. Why CubiCasa over Matterport?
Speed. A Matterport scan of a large home can take 45-60 minutes on its own. A CubiCasa scan takes 5. For most residential listings, a 2D floor plan is all the agent wants.
6. What about “Flambient”?
Flambient (Flash + Ambient) is great for high-end luxury, but it’s a profit-killer for standard listings. If you’re charging $200, you can’t afford the time Flambient takes. High-quality HDR is more than enough for 90% of the market.
7. Do you shoot RAW or JPEG?
Always RAW. It gives AutoHDR the data it needs to recover those bright windows and dark corners.
8. How do you handle “Verticals” without a geared head?
I use the electronic level in my viewfinder. It takes half a second to line up. Any minor errors are fixed instantly by AutoHDR or Lightroom’s “Auto Transform.”
9. What lens do you recommend for the 60-minute flow?
The Sony 16-35mm f/2.8 GM II is my workhorse. If you’re on a budget, the Tamron 17-28mm f/2.8 is a fantastic alternative.
10. When should I use a tripod?
I use a Manfrotto 055 only for:
- Virtual Twilight (long exposures).
- Extremely dark rooms where my shutter speed drops below 1/10th.
- Video walkthroughs if I’m not using a gimbal.
11. How do you price a “Media Package”?
I bundle. Photos + Floor Plan + Drone = $X. It’s always cheaper than buying them separately, which encourages the agent to spend more per shoot.
12. Is the DJI Air 3S overkill?
No. Its dual-camera system and omnidirectional obstacle sensing make it the safest and fastest drone to deploy in tight neighborhoods.
13. How do you handle “Window Pulls”?
I let the AI do it. By shooting a 3-bracket set with a -2 EV shot, there is usually enough data for the software to pull the exterior detail into the window frame automatically.
14. What is the biggest time waster on site?
Talking. Be polite, but stay focused. I often wear headphones (even if no music is playing) to signal that I’m “in the zone.”
15. How do I start transitioning to this workflow?
Start by shooting your next “low-stakes” listing handheld. You’ll be nervous for the first five minutes, but once you see the results and realize you finished 30 minutes early, you’ll never go back.
Final Recommendation: Systemize or Suffer
The “starving artist” stage of your career should be short. If you want to build a real business, you need to stop thinking like a photographer and start thinking like a systems engineer.
My 60-minute real estate photography workflow isn’t about working harder; it’s about working smarter. By leveraging the right gear (Sony, DJI), the right software (AutoHDR, HDPhotoHub), and the right techniques (Handheld HDR), you can reclaim your time and significantly increase your income.
Ready to take your business to the next level?
Stop being an anchor to your own success. Put the tripod away and start shooting.tem for professional real estate photographers to capture high-quality photos, floor plans, and drone shots in under 60 minutes.