
For over 13 years, I was a true believer. I wouldn’t step foot into a property without my tripod. I treated it like a sacred object, convinced that if I didn’t level every leg and lock every knob, I wasn't being a "professional."
After 14 years in the industry and more than 10,000 homes photographed, I realized something that completely changed my business: Your tripod is likely the most expensive piece of gear you own.
It isn't because of the price tag you paid at the store. The real cost hits you every single time you walk into a house. Every setup, every leveling adjustment, and every repositioning of those three metal legs is time you are bleeding. And in the real estate media business, time is your hourly rate.
In this guide, I’m going to show you how I ditched the tripod to reduce interior setup time, increase daily capacity, and improve the economics of each shoot.
The Math: Why Your Tripod is a Financial Trap
Most photographers never actually sit down to calculate the "tripod tax."
If you are a traditional tripod shooter, you likely spend 60 to 90 minutes on an interior shoot. You’re moving through the house, unfolding legs, leveling the head, shooting a bracket, folding it back up, and walking to the next room.
Let’s look at the numbers:
- Tripod Workflow: $350 shoot / 1.5 hours on-site = $233/hr (before drive time/editing).
- Handheld Workflow: $350 shoot / 45 minutes on-site = $466/hr (before drive time/editing).
When I moved to a fully handheld HDR real estate photography workflow, I didn’t just save a few minutes; I halved my time on-site. By saving 45 minutes per shoot, I could suddenly fit in an extra appointment every single day.
One extra shoot per day at $350 = $1,750 per week in additional revenue.
You don’t need to raise your prices or find high-end luxury clients to see this growth. You just need to stop letting your gear dictate your speed.
Watch the full breakdown on YouTube: Stop Letting Your Tripod Eat Your Hourly Rate!
The Death of the "Blur" Objection
The number one reason photographers stay tethered to a tripod is the fear of motion blur. In 2010, that fear was justified. In 2026, it’s an outdated myth.
Modern camera technology has solved the problems that tripods were designed to fix. Specifically, In-Body Image Stabilization (IBIS) and advanced high-ISO performance have made handheld shooting remarkably reliable.

The Gear That Makes it Possible
To pull this off consistently, you need a system you can trust. Here is the setup I use daily:
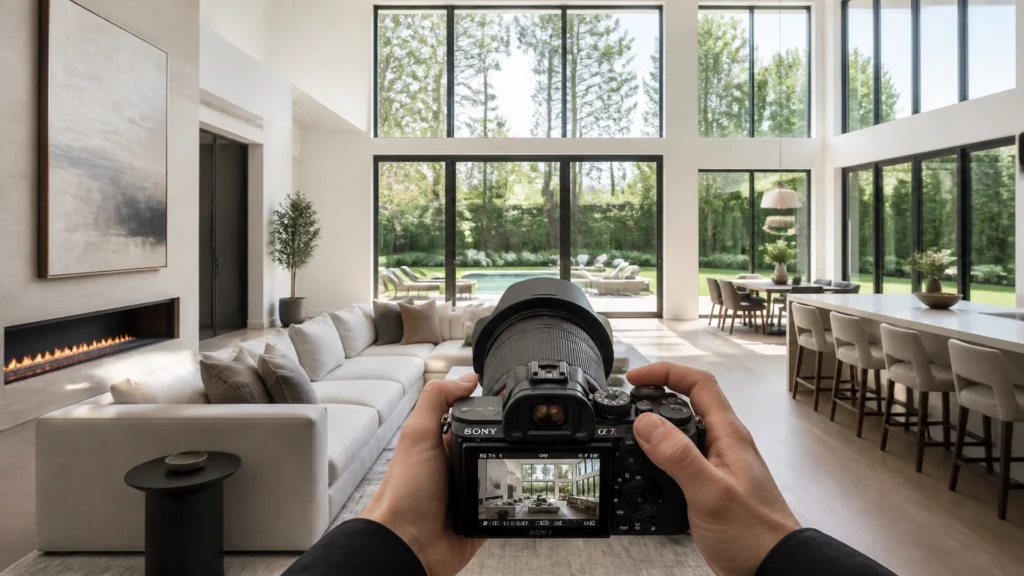
- Camera: Sony A7 IV or A7 V (The IBIS on these bodies is incredible).
- Lens: Sigma 14-24mm f/2.8 or the Sigma 16-28mm f/2.8. These lenses provide the wide-angle look realtors want without the soft edges or heavy distortion of cheaper glass.
- Software: AutoHDR. This is the "secret sauce" that makes handheld photography viable at scale.
For more gear recommendations, check out The Ultimate Real Estate Photography Gear Guide.
The Handheld HDR Shooting System
Shooting handheld isn't just about holding the camera and hoping for the best. It’s a systematic approach to stability and exposure.
1. The Three-Point Contact Technique
When you shoot handheld, you want to "become the tripod." I use a camera strap around my neck. By pulling the camera away from my body until the strap is taut, I create a third point of contact. This tension dampens micro-movements and keeps the camera steady during a rapid-fire bracket.
2. The 3-Bracket Setup
Instead of overcomplicating your exposure, keep it simple. I shoot a 3-bracket system at:
- -2 EV (Highlights/Windows)
- 0 EV (Midtones)
- +2 EV (Shadows/Dark corners)
Using Continuous High-Speed Drive mode, I fire all three shots in less than a second. The camera captures the sequence so fast that there is virtually no movement between frames for the software to worry about.
3. Auto ISO: Your Best Friend
In dark basements or small bathrooms, your shutter speed can drop dangerously low. I use Auto ISO with a minimum shutter speed limit (usually 1/60s or 1/100s). This ensures that even in low light, my brackets stay sharp. Modern sensors handle ISO 800 or 1600 so well that any minor noise is easily cleaned up in post.
Solving the "Verticals" Problem
"But Scott, how do you keep your walls straight without a leveled tripod?"
This is where AutoHDR comes in. Traditional editing involves manually pulling geometry sliders in Lightroom to fix "converging verticals" caused by a tilted camera.
When you use an AI-driven tool like AutoHDR, the software automatically detects the vertical lines in your bracketed frames and corrects them during the blending process. You don’t need to be perfectly level on-site because the software is smarter than your tripod head.

For a deeper dive into the technical side of processing these files, see our Real Estate Photography Editing Workflow.
Accessibility: Reaching the "Un-shootable" Angles
Think about that tiny half-bath under the stairs or the cramped galley kitchen. A tripod physically cannot reach into the deepest corners of these rooms. You’re often left compromising on the angle or skipping the shot entirely.
When you are handheld, your body is the only footprint. You can tuck yourself into a corner, hold the camera above your head, or drop it low to the ground to find the perfect composition.

This flexibility allows you to deliver better compositions that tripod-bound photographers simply can't get. You aren't just faster; you're more creative.
What Realtors Actually Care About
I hear this a lot: "If I don't use a tripod, I won't look professional."
Here is the truth after 10,000 homes: Realtors do not care about your gear. They care about their inbox.
If you show up on time, move through the home efficiently (so the homeowner isn't inconvenienced), and deliver high-quality, perfectly vertical images the next morning, you are a hero.
The agent is focused on getting the listing live. They want speed, consistency, and reliability. If you can deliver photos in an hour because your workflow is so fast, you can even offer Rush Delivery as a premium service, another way to increase your revenue without working more hours.
Learn more about optimizing your entire business in The 60-Minute Real Estate Photography Workflow.
Workflow Advantages: Speed as a Business Strategy
When you combine handheld shooting with automated editing, you change your business from a "job" into a "system."
- On-Site: 30–45 minutes for a 2,500 sq ft home.
- Offload: Drop files into AutoHDR.
- Processing: Software aligns, blends, and corrects verticals while you grab a coffee.
- Delivery: Quality check and send.
You are no longer spending 3 hours at your desk for every 1 hour on-site. This is how you scale a real estate media business beyond a solo operator.
Quick Verdict: Is Handheld HDR for You?
- Who is it for? High-volume photographers, those shooting standard residential listings, and anyone looking to increase their hourly rate.
- Who should skip it? If you are shooting $10M luxury estates where you need to do complex "flambient" (flash + ambient) lighting or architectural work for magazines, keep the tripod.
- Is it worth it? Absolutely. For 95% of the homes on the market, this is the most profitable way to shoot.
Final Recommendation
Right now, your tripod is capping your income. I want you to try something on your next shoot: Leave the tripod in the car. Run a full handheld HDR bracket session using the 3-point contact method.
Track your time. Compare the results. Once you see that the quality meets your standards and you are finishing faster, you’ll never go back.
Ready to take your business to the next level? Explore The Complete HDR Real Estate Photography Guide to master the art of the bracket.
Ready to shoot faster and earn more?
- Software: Try AutoHDR for automated blending.
- Gear: Check out the Sigma 14-24mm f/2.8.
- Training: Subscribe to our newsletter for more workflow tips.
FAQ: Handheld HDR Real Estate Photography
1. Is handheld HDR sharp enough for large prints?
Yes. With modern IBIS and high shutter speeds, the images are indistinguishable from tripod shots at standard print sizes.
2. What is the best minimum shutter speed for handheld HDR?
I recommend keeping your slowest bracket at 1/60s or faster. If it drops lower, increase your ISO.
3. Does AutoHDR handle the alignment of handheld shots?
Yes, it is designed to align bracketed frames with sub-pixel accuracy, compensating for the natural movement of your hands.
4. Should I use a flash when shooting handheld?
Generally, no. This workflow is built around the efficiency of pure HDR. If you use flash, you typically need to slow down, which defeats the purpose of this specific speed-focused system.
5. How do I keep the camera level without a tripod?
Use your camera's built-in electronic level (horizon line) in the viewfinder. However, don't obsess over it; AutoHDR will fix minor tilts automatically.
6. Won't high ISO make my photos grainy?
Modern cameras like the Sony A7 IV are incredibly clean up to ISO 3200. Plus, HDR blending naturally reduces noise.
7. How many brackets should I shoot?
For most rooms, 3 brackets (-2, 0, +2) are plenty. For rooms with extremely bright windows, you might occasionally use 5.
8. Can I use this for video too?
Handheld video is a different beast. For video, you’ll want a gimbal like the DJI RS 5.
9. What if the realtor is watching me?
Act with confidence. Your "gear" is your expertise and your results. When they see the final photos the next morning, they won't care how you took them.
10. Is the Sony a7S still good for this in 2026?
It’s a workhorse. While the newer A7 IV has more megapixels, the a7S series still has some of the best low-light performance ever made.