
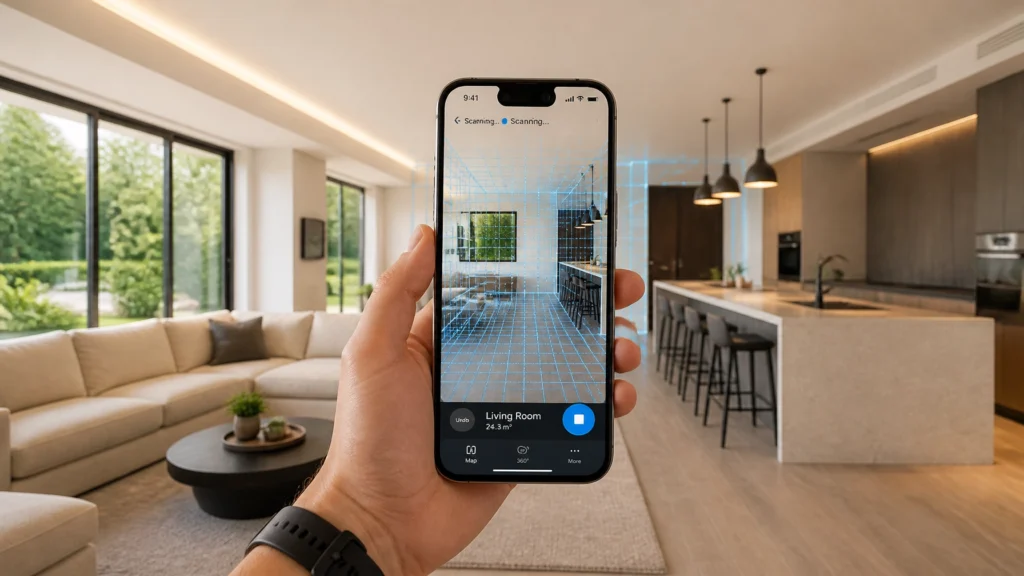
After photographing more than 10,000 homes over the last 14 years, I’ve seen technology go from “clunky and impossible” to “seamless and essential.” If you’ve been following RE Media Systems for a while, you know I’m a huge advocate for systems that allow you to shoot faster and earn more.
In the early days, if a client wanted a floor plan, I had to break out a laser measure, a notepad, and spend an hour (or pay a drafter) to get a mediocre result. Today, floor plans have officially become the #2 most requested asset on a listing, right after high-quality photos. In fact, as I mentioned in my comparison of CubiCasa, Matterport, and iGUIDE, most buyers won’t even look at a listing if it doesn’t have a clear layout.
But here’s the problem: just because the technology is on your phone doesn’t mean it’s foolproof. I see photographers struggling with “re-scan” errors, processing failures, and inaccurate dimensions all the time.
That’s why I developed the CubiCasa Pro Workflow. This is the exact 5-step system I use on every single shoot. It has cut my scan errors by over 90% and ensures that I’m in and out of a 2,500-square-foot home in under 10 minutes.
If you want to turn a $10 expense into a $100 profit center without losing your mind, this is for you.
Step 1: The Open-Path Preparation
The biggest mistake you can make with CubiCasa is starting the scan before the house is ready. Your phone’s camera and AI sensors are essentially “mapping” the geometry of the room. If that geometry changes while you’re scanning, the AI gets confused, and that’s where those dreaded “Orientation Error” messages come from.
Lights and 200+ Lux
Before you even open the app, walk through the house and turn on every single light. You need a minimum of 200 Lux for the sensors to track accurately. If a room is too dark, the AI loses its “anchor points” on the floor and walls. Think of it like a GPS losing satellite signal.
The “Doorway Trap”
This is the #1 reason scans fail. Listen closely: Never open or close a door while the camera is pointed at it.
In the eyes of the CubiCasa AI, a door is a moving wall. If you walk up to a closed door and push it open while the camera is recording, you’ve just told the AI that a wall has physically moved in space. This breaks the spatial loop.
The Solution: Open all interior doors to exactly 90 degrees before you start. If you encounter a door that was accidentally left closed, use my “Floor-Pivot” technique:
- Point the camera directly at your feet (the floor).
- Open the door.
- Wait 2 seconds for the movement to stop.
- Bring the camera back up and continue.

Step 2: Establish the Vertical Anchor
Orientation is everything. When you start your scan, you are setting the “ground truth” for the entire model.
The Starting Point
I always recommend starting at the front door or at the base of the main staircase. Why? Because these areas usually have the most architectural “anchors”: corners, door frames, and clear floor-to-ceiling lines.
Portrait Mode is King
Hold your phone vertically (Portrait). I know we’re used to shooting wide-angle landscapes, but for CubiCasa, vertical is better. It allows the sensor to see the floor (for dimensions) and the ceiling/walls (for orientation) simultaneously. Hold the phone at chest height and tilt it slightly downward: about 15 to 20 degrees. You want the floor to take up the bottom third of your screen.
Multi-Story Alignment
If you’re scanning a two-story home, the staircase is your “home base.” As you transition between floors, keep your movement slow and your camera steady. The AI uses the vertical rise of the stairs to calculate the height difference between levels. If you rush the stairs, your second floor might end up “floating” in the final render.
Step 3: The Baseboard Strategy
Speed kills… your accuracy. I’ve seen some guys practically running through a house like they’re in a 100-meter dash. That’s a recipe for a “Processing Failed” email four hours later.
The Museum Pace
Walk at what I call a “museum pace”: roughly 3 feet per second. You want to be smooth and deliberate. Imagine there’s a glass of water on top of your phone, and you can’t spill a drop.
Follow the Baseboards
Keep the camera pointed about 5 to 10 feet ahead of you, focused on the baseboards. The intersection of the floor and the wall is the most important data point for the AI. It uses this line to calculate square footage.
Pro Tip for Clutter: If a room is packed with furniture (like a kid’s bedroom or a hoarder-lite situation) and you can’t see the baseboards, don’t panic. Simply tilt the camera up briefly to capture the ceiling-wall junction. The AI is smart enough to infer the floor dimensions from the ceiling dimensions as long as it has a clear look at the corners.
Step 4: The Doorway Peek for Small Spaces
You don’t actually need to walk into every single room. In fact, walking into small bathrooms or cramped walk-in closets often leads to “spinning” errors.
The “No-Spin” Rule
Rapid rotation is the enemy of SLAM (Simultaneous Localization and Mapping) technology. If you walk into a 4×4 powder room and spin 360 degrees to see all the walls, the sensors will likely lose their orientation.
The Pro Technique:
- Stand at the threshold of the bathroom.
- Slowly pan the camera from left to right, ensuring you capture all four corners of the room from the doorway.
- If the room is deep (like a master closet), walk straight in, capture the back corners, and then walk backward out.
By walking backward, you keep the camera facing the same general direction as when you entered, which maintains the spatial “chain” without a disorienting rotation.
Step 5: Voice-Tagging & Data Integrity
One of the coolest features of the modern CubiCasa app is the integrated voice recognition. As you enter a room, simply say “Kitchen” or “Primary Bedroom.”
Room Labeling
The AI will transcribe your voice and automatically label the rooms on your final floor plan. This saves me 10 minutes of manual editing in the back-office portal later. It’s a small step that makes you look like a tech-savvy pro to your clients.
The Upload Trap
Don’t be in a rush to upload while you’re on your cellular data in a basement with one bar of service. Large scans can be 100MB to 500MB. If your connection drops a single “packet” of data during the upload, the entire file can become corrupted.
My Rule: I wait until I’m back in my van or at my home office with a stable Wi-Fi connection before hitting that upload button. It’s better to wait 20 minutes for a safe upload than to have to drive back to a property because the file failed.
Quick Technical Specs Table
To keep things simple, here are the “hard rules” for a successful CubiCasa scan. I’ve lived by these across thousands of properties.
| Feature | Requirement | Why it Matters |
|---|---|---|
| Minimum Light | 200+ Lux | Prevents sensor “drift” and tracking loss. |
| Movement Speed | ~3 feet per second | Ensures the AI can map textures accurately. |
| Optimal Distance | 5-8 feet from walls | Provides the best balance of detail and scale. |
| Phone Orientation | Portrait (Vertical) | Maximizes visibility of floor/ceiling anchors. |
| Compliance | ANSI Z765 / RICS | Ensures your GLA reports are legally defensible. |
Bonus Pro Tips: 2026 Updates
If you haven’t checked your CubiCasa dashboard lately, things have changed: mostly for the better.
The Canadian CAD Price Drop
We just got word from Sonny at CubiCasa about a massive pricing update for the Canadian market. If you are a high-volume shooter, this is a game-changer.
- Standard Floor Plans: Now only $10 CAD.
- PLUS Floor Plans (with furniture/details): Only $15 CAD.
At these rates, your margins are insane. If you aren’t including a floor plan with every single shoot, you’re leaving money on the table.
The Preferred Pro Program
I highly recommend joining the CubiCasa Preferred Pro program. It gives you a badge for your website and, more importantly, puts you in a priority queue for processing. When I upload a scan at 4:00 PM, I often have the finished floor plan in my inbox before I finish my morning coffee the next day.
The Asset Remix
This is my favorite “secret weapon.” One 5-minute scan can now generate five different assets:
- 2D Floor Plan (Standard)
- 3D Floor Plan (Visual)
- GLA Report (For Appraisers/Compliance)
- CAD Files (For Renovations/Interior Design)
- Interactive Virtual Tour (Linking your photos to the plan)
I call this the “Scan Once, Sell Five Times” model. You do the work once, and you can upsell different tiers to your client based on their needs.

Pricing & Profitability: The Math
I’m always honest about the business side of things. If you follow my Ultimate Pricing Guide, you know that “add-on” services are where the real profit lives.
Here is the breakdown for a typical 2,000 sq. ft. home:
- Your Cost (CubiCasa Plus): $15 CAD
- On-Site Time: 5-8 Minutes
- Client Price: $75 – $100 CAD
- Net Profit: $60 – $85
If you do 5 shoots a week with a floor plan add-on, that’s an extra $1,200 to $1,700 per month in pure profit for an extra 40 minutes of total work. It’s the easiest “yes” in the business.
Conclusion: Speed is the New Currency
After scanning more than 10,000 homes, I can tell you that this CubiCasa Pro Workflow isn’t just about avoiding errors: it’s about consistency. When you have a system, you don’t have to think. You walk in, you execute, and you move to the next shoot.
This workflow saves me an average of 5 to 10 minutes per property compared to the “winging it” method. Over a busy week, that’s an extra hour saved. That’s time I can spend finding new clients, or better yet, getting home to my family.
Remember the RE Media Systems mission: Shoot faster, earn more, and build a better business.
What to do next:
- Subscribe to the Newsletter for weekly workflow hacks.
- Join the Preferred Pro Program to lock in those Canadian CAD rates.
- Grab the Recommended Gear list to make sure your phone and lighting are up to spec.
Go out there, stop the “spinning,” avoid the “doorway trap,” and start turning those scans into serious revenue!