
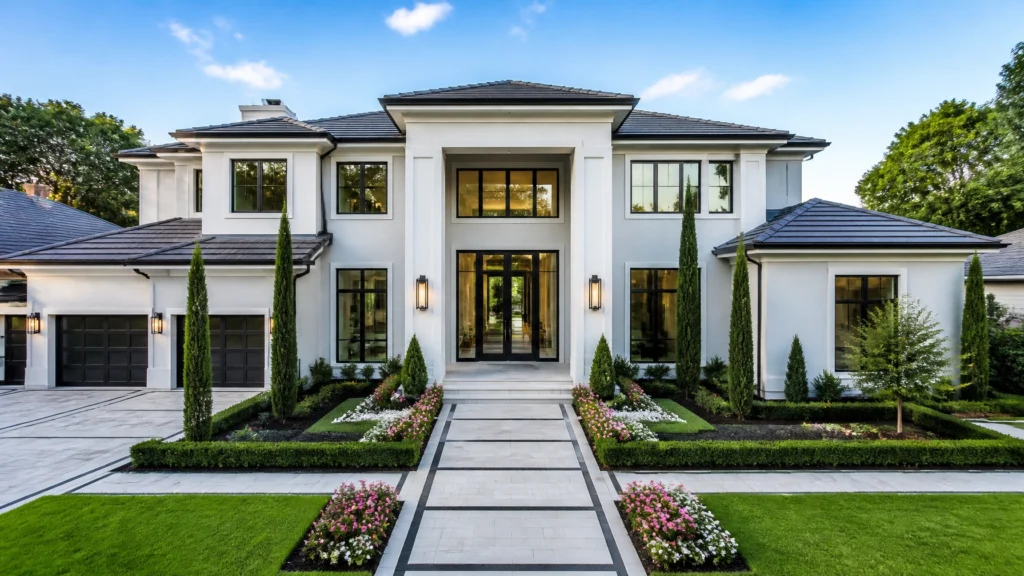
After 14 years in this business and over 10,000 homes photographed, I’ve learned one thing: the drone isn't just a "cool extra." It’s an essential tool for telling the story of a property. Today, I fly my drone on the vast majority of my bookings. Why? Because top-producing Realtors don't just want a "view from the sky": they want specific shots that demonstrate value, scale, and lifestyle.
If you’re just flying up and "taking a few pictures," you’re leaving money on the table and failing to provide the level of service that keeps clients coming back.
In this guide, I’m breaking down the exact 6-shot drone checklist I use on every single shoot. These are the "secret" shots that high-end agents demand. Best of all? Using the systems I teach here at RE Media Systems, you can nail this entire list in about five minutes.
Why Drone Photography is Non-Negotiable
In today’s market, home buyers start their journey online. They want to know more than what the kitchen looks like; they want to see the roof, the lot size, and how close the house is to the local elementary school.
By mastering real estate drone photography, you aren't just a photographer; you're a marketing partner for your agents. You’re providing the data and visual proof they need to justify a high asking price.
Ready to upgrade your bird? I recommend the DJI Air 3S for its reliability and dual focal lengths, or the DJI Mini 5 Pro for tight neighborhoods.
The 6-Shot Drone Checklist
1. The Money Shot: The Front Hero
This is your most important aerial image. It’s the one the agent will likely use as the primary listing photo.
- The Goal: A clean, balanced view of the front of the home that feels grounded but elevated.
- The Setup: Fly the drone to roughly 10–30 feet in altitude (just above the gutter line).
- The Technique: Center the drone on the front entrance. Use your grid lines to ensure your vertical lines are perfectly straight. Angle the camera slightly downward.
- Pro Tip: Don't go too high. If you're at 100 feet, you lose the "grandeur" of the architecture. Stay low to make the house look impressive.
2. Curb Appeal: The Front Yard Overview
Buyers want to see the neighborhood "vibe." This shot pulls back to show how the home sits on the street.
- The Goal: Show the yard and the connection to the street.
- The Setup: Pull back further and rise to 20–40 feet.
- The Technique: Minimize clutter. If there are trash bins or old cars in the way, try to angle them out of the frame. Including a bit of the street gives the buyer a sense of the "curb appeal."
3. The Back Hero: Rear Architecture
Don't neglect the back of the house. Many homes have architectural features in the rear that are just as beautiful as the front.
- The Goal: Frame the entire back of the home.
- The Setup: Fly to the back of the property at a medium height (10–30 feet).
- The Technique: Show how the home connects to the backyard. If there are large windows or sliding doors, make sure they are visible to suggest that indoor-outdoor flow.
4. Lifestyle Shot: The Backyard Oasis
This is where you sell the "dream." Is there a pool? A fire pit? A massive deck? This shot is about lifestyle.

- The Goal: Make the backyard features "pop."
- The Setup: Use a lower altitude. Get close to the features.
- The Technique: If you’re shooting late in the day, ask the agent to turn on the pool lights or the patio string lights. It adds an incredible "lifestyle" feel that buyers love.
5. The Data Shot: Top-Down (Bird’s Eye)
This is the shot that often sells the lot. It provides information that no other angle can.

- The Goal: Show the lot size, shape, and layout.
- The Setup: Fly straight up over the center of the house and point the gimbal 90 degrees straight down.
- The Technique: This shot clearly displays property boundaries, fences, driveways, and proximity to neighbors. It’s an essential part of any real estate photography shot list.
6. The Context Shot: The Neighborhood Overview
Top agents want to show where the house is located in relation to the community.

- The Goal: Capture nearby schools, parks, golf courses, or waterfronts.
- The Setup: Rise to a medium or high altitude (staying within legal limits).
- The Technique: Leave some "negative space" (the sky or a field) in the corner of the frame. This allows the agent to add text overlays or "pins" to show exactly where the school or shopping center is located.
Speed & Workflow: 5 Minutes to Done
One of the core pillars of RE Media Systems is teaching you how to shoot faster. You shouldn't be spending 30 minutes flying a drone for a standard listing.
When I arrive on site, the drone is usually the first thing I do (or the last, depending on the sun). Because I use this 6-shot checklist, I can have the drone in the air and back on the ground in under 5 minutes.
DJI Auto Settings are Your Friend
You don't need fancy manual settings for 95% of real estate work. I use DJI Auto Settings. Whether you shoot JPEG or Raw, the modern sensors on the DJI Air 3S handle the dynamic range beautifully. If you're using a workflow like AutoHDR for your editing, the process is even faster.
Stay Legal and Safe
Before you ever take off, you must ensure you are operating legally.
- US: You must have your Part 107 Commercial Drone Pilot certificate.
- Canada: You must comply with Transport Canada regulations.
- Safety: Always maintain a visual line of sight (VLOS), respect neighbor privacy, and never fly over crowds or moving vehicles.
For more on the business side of drones, check out our Complete Guide to Real Estate Media Services.
Final Thoughts
Mastering these 6 shots will immediately elevate your professional standing with your clients. You’re no longer just providing "photos": you’re providing a comprehensive media package that helps agents sell homes faster.
If you want to see exactly how I fly these shots on location, check out my full video on YouTube: The Secret Drone Shots That Top Realtors Demand.
Ready to Build a Better Business?
Check out our Ultimate Real Estate Photography Gear Guide to see the exact drones and accessories we use every day to stay efficient and profitable.