
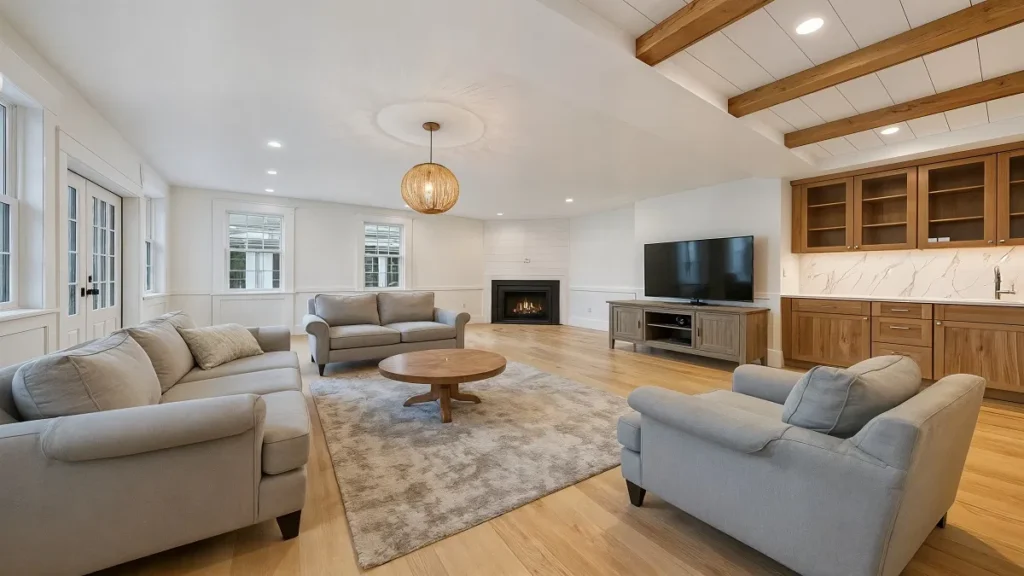
A tripod is still one of the most useful tools in real estate photography. It helps you keep your camera level, maintain consistent framing, and capture longer exposures without camera shake.
But there are situations where a handheld-only workflow makes more sense.
You may be photographing a smaller home where moving a tripod from room to room slows you down. You may be working in a tight bathroom, narrow hallway, or furnished room where tripod placement is awkward. You may also be shooting a high volume of homes and need a faster system that still produces consistent results.
After more than 14 years as a full-time real estate photographer and photographing over 10,000 homes, I’ve learned that speed is not created by rushing. Speed comes from removing unnecessary decisions.
A repeatable shot list gives you that structure.
You know which rooms require coverage, which angles matter most, and when you have enough images. You spend less time wandering around the property and more time capturing the images your client actually needs.
This guide gives you my practical room-by-room handheld shot list, along with the settings and stabilization techniques that make the workflow reliable.
Important: Handheld shooting is not automatically better than using a tripod. It is simply another tool. If a room is too dark, the property requires absolute maximum image quality, or you cannot keep the bracket sharp, use a tripod. The goal is to shoot faster while still delivering professional results.
How to Use This Shot List
Throughout this guide, a “shot” means one finished image created from a bracketed set of exposures.
For example:
- One handheld HDR shot may consist of three frames at -2, 0, and +2 EV.
- Those three frames are blended into one final photograph.
- The checklist tells you how many finished compositions to capture, not how many individual shutter presses to make.
Most standard homes do not need five different angles of every room. A useful real estate gallery usually needs:
- One strong establishing view of each important room
- A second angle when it clarifies the layout
- A feature image when the room has a meaningful selling point
- Additional coverage for unusual layouts, views, upgrades, or amenities
The exact number depends on the home, the listing package, the local market, and what the agent has promised the seller.
My basic rule is simple:
Capture enough images to explain the property clearly, but do not create extra work that does not improve the buyer’s understanding of the home.
Before entering the property, make sure your camera is configured consistently. Check that:
- The battery is charged.
- You have enough card space.
- The lens is clean.
- RAW capture is enabled.
- Auto-bracketing is configured.
- Image stabilization is enabled when appropriate.
- The camera is set to continuous shooting.
- Your white balance strategy is consistent.
- You have a wide enough lens for the property without creating distracting distortion.
For more preparation and equipment guidance, see the Ultimate Real Estate Photography Gear Guide.
Handheld HDR Camera Settings
Your settings will vary depending on the camera, lens, available light, and how well the camera handles high ISO. Treat the following as a starting point rather than a rule that applies to every property.
File format
Shoot RAW whenever possible.
RAW files give you more flexibility when correcting exposure, white balance, and color during the HDR editing process. They also provide more room to recover shadows and highlights than a compressed JPEG.
Aperture
Start around f/7.1 to f/8 for most interior real estate images.
This usually provides a useful balance between sharpness and depth of field. You want the foreground and background to appear acceptably sharp, especially in wide interior compositions.
In a very dark room, you may need to open the aperture slightly. That is a practical compromise if the alternative is allowing the bracket’s bright frame to become too slow to handhold.
ISO
Start at a moderate ISO such as ISO 400, then adjust based on shutter speed.
If the room is dark and your shutter speed becomes too slow, raising ISO can produce a sharper final image than keeping ISO low and allowing the camera to capture a long, blurry exposure.
Noise can often be managed during editing. Motion blur cannot always be corrected.
Bracketing
For a typical interior, start with:
- Three frames
- Two-stop spacing
- A bracket of -2, 0, and +2 EV
- Continuous burst shooting
Use five frames only when the room has particularly difficult contrast, such as:
- Large bright windows
- Direct sunlight
- Dark wood or cabinetry
- Strong shadows
- A view that must be preserved outside the windows
More frames are not automatically better. Every additional exposure creates another opportunity for movement, ghosting, or a slow shutter speed.
Shutter speed
For the middle, or base, exposure, try to keep your shutter speed around 1/20 to 1/30 of a second or faster when working handheld.
Some photographers and camera systems can produce sharp results at 1/15 second or slower, particularly with wide lenses and effective stabilization. However, your results depend on your technique, the camera, the lens, and what is moving in the scene.
Remember that in a bracket, the brighter exposure may use a much slower shutter speed than the middle exposure. If the +2 frame drops to one second, stabilization may not be enough to prevent blur.
If the bracket is too slow:
- Raise ISO.
- Open the aperture slightly if necessary.
- Reduce the number of bracketed frames if the camera can still capture the required dynamic range.
- Use a tripod if the room still cannot be captured sharply.
Stabilization
Turn on in-body image stabilization and lens stabilization when your camera and lens support them.
Stabilization helps reduce camera movement, but it does not stop:
- Curtains moving in a breeze
- Leaves moving outside windows
- Ceiling fans
- People walking through the room
- Reflections changing between frames
- The camera shifting during the bracket
Use stabilization as support, not as a replacement for good technique.

Your Handheld Technique
The quality of handheld HDR starts with how you hold the camera.
Keep both hands on the camera and bring your elbows close to your body. Stand with your feet approximately shoulder-width apart. If possible, lean lightly against a wall, door frame, or other stable surface without damaging the property.
You can also create tension with the camera strap by pulling the camera slightly forward while the strap remains around your neck. This gives you another point of stability.
Before pressing the shutter:
- Check the vertical lines.
- Confirm that important furniture is not cut off.
- Make sure the frame is not excessively wide.
- Look for distractions near the edges.
- Focus once.
- Hold still through the entire bracket.
Do not move immediately after the first exposure. Stay in position until the camera finishes the complete sequence.
The wider your lens, the more important your camera position becomes. A small tilt can make walls appear to lean, and a low camera position can make the room feel distorted.
When possible, keep the camera level and use a rectilinear wide-angle lens. You can correct minor perspective issues in post, but it is better to create a clean composition in the room.
The Room-by-Room Handheld Shot List
1. Exterior Front
The front exterior is usually one of the most important images in the gallery. It often becomes the listing’s primary photo, social media thumbnail, or online advertisement image.
Capture:
- Straight-on front exterior
- Angled view showing the house, driveway, and front yard
- Additional angle showing the garage, landscaping, porch, or architectural feature
- Detail or alternate view if the entry, siding, stonework, or landscaping is a selling feature
For most homes, two or three finished exterior images are enough.
Try to keep the camera level and avoid pointing sharply upward. If the home is tall, step farther back rather than tilting the camera excessively.
Watch for:
- Cars blocking the driveway
- Garbage bins
- Open garage doors
- Harsh shadows across the front elevation
- Overgrown landscaping
- Bright skies that need a darker bracket
If you are also providing aerial media, capture the exterior first or last depending on the light and your schedule. For aerial work, the DJI Air 3S is my primary drone recommendation because it is reliable and fast to deploy. For tight neighborhoods or travel-focused work, the DJI Mini 5 Pro is a more lightweight option.
2. Entryway and Foyer
The entryway helps the viewer understand how the property flows from the front door into the main living spaces.
Capture:
- View from the front door looking into the home
- Opposite angle showing the entryway and connection to nearby rooms
- Staircase, chandelier, built-in storage, or other feature if present
A small foyer may only need one image. A large entrance with a staircase or open sightline may deserve two.
Do not automatically photograph every hallway. Photograph it when it explains the layout or connects important spaces. A long, empty hallway rarely needs multiple frames unless it has architectural interest.
For your first image inside the home, prioritize orientation. Ask yourself: “Does this image help a buyer understand where they are and where the next rooms connect?”
3. Living Room or Family Room
The living room usually needs two to four finished images.
Capture:
- Wide view from the entry or hallway
- Opposite corner showing the room’s full layout
- View toward the kitchen or dining area in an open-concept plan
- Fireplace, built-ins, large windows, ceiling detail, or feature wall
Your first living room image should generally be the strongest composition: the one that communicates the room’s size and purpose immediately.
When shooting from a corner, avoid placing the camera so close to furniture that the foreground dominates the image. Take a step back when possible, even if that means capturing a little more of the doorway.
For open-concept spaces, do not treat the living room, kitchen, and dining area as completely separate rooms. Capture individual views for each function, then add one or two compositions that show how the spaces connect.

4. Kitchen
The kitchen is often one of the highest-value areas in the home, so it deserves careful coverage.
Capture:
- Wide view from one corner showing the overall layout
- Opposite angle showing the other side of the kitchen
- View toward the island, countertops, and appliances
- View showing the kitchen’s connection to the living or dining area
- Detail of a standout feature such as the range, backsplash, island, pendants, or cabinetry
A typical kitchen needs three or four images. A large luxury kitchen may need five or more if the extra views reveal meaningful features.
Keep an eye on reflections in:
- Stainless steel appliances
- Glossy cabinets
- Glass doors
- Polished countertops
- Pendant lights
Before shooting, turn on the lights if they improve the room’s appearance. However, be aware that mixing daylight and artificial light can create different color temperatures. Consistent white balance and careful editing become particularly important in these spaces.

5. Dining Room and Eating Area
A separate dining room may need one or two images.
Capture:
- Wide view showing the table, lighting, and room shape
- View showing the relationship between the dining area and kitchen or living room
- Chandelier, built-in storage, feature wall, or view if it is important
For an eat-in kitchen, the dining area can often be included in an open-concept composition. Do not create multiple nearly identical images simply because there is a table in another part of the room.
The goal is to show how the space can be used.
6. Primary Bedroom
The primary bedroom usually needs two to four finished images.
Capture:
- Wide view from the doorway or corner showing the bed and main wall
- Opposite angle showing windows, floor space, and room depth
- View toward the ensuite entrance or sitting area if relevant
- Feature image for a fireplace, accent wall, vaulted ceiling, or notable view
Start with the composition that shows the room’s scale. If the bed blocks too much of the room, change your height or position rather than forcing an extremely wide lens.
Keep vertical lines straight and avoid making the bed appear unnaturally stretched at the edge of the frame.
If the bedroom has a strong window view, create a bracket that preserves both the interior and exterior detail. If the window occupies only a small part of the frame, do not sacrifice the entire room’s exposure just to preserve it.
7. Primary Bathroom
Bathrooms are small, reflective, and often difficult to photograph handheld.
Capture:
- Wide view showing the vanity, shower, and tub if possible
- Second angle showing the opposite side or room layout
- Detail of tile, fixtures, freestanding tub, double vanity, or upgraded finishes
Use the widest practical composition, but avoid making the room look distorted. In a very small bathroom, one strong image may communicate more than three cramped angles.
Watch your reflection in mirrors. Before shooting, check:
- Your body is not visible in the mirror
- The camera is not creating an unwanted reflection
- Towels and toilet lids are positioned neatly
- Shower doors and glass are clean
- Personal products are removed
If you cannot capture the entire room without tilting the camera, prioritize straight verticals and accept that some floor or ceiling may be cropped. A natural-looking image is better than an exaggerated one.
8. Secondary Bedrooms
For each secondary bedroom, start with one strong wide image.
Capture:
- Main angle from the doorway or corner
- Second angle only if it clarifies the layout or shows a meaningful feature
- View of a walk-in closet or special built-in if included in the listing
Most standard bedrooms need one or two images. Photograph additional angles when the room is unusually large, has a unique layout, or includes a valuable feature.
Avoid using the same composition in every bedroom if it causes the gallery to feel repetitive. The shot list provides consistency, but you should still respond to the room.
9. Secondary Bathrooms
Capture:
- Main wide showing the vanity, toilet, and tub or shower
- Second angle for larger bathrooms or upgraded finishes
- Detail of tile, fixtures, or a distinctive design element
As with the primary bathroom, check mirrors and reflective surfaces before triggering the bracket.
10. Basement
Basements often have the biggest exposure differences in the home. They may combine small windows, dark corners, artificial lighting, low ceilings, and large open areas.
Capture:
- Wide view from the stairway or entrance showing the main basement area
- Opposite angle showing the room’s depth and usable floor space
- Family room, recreation area, or home theater
- Bedroom or office if legally and functionally presented as one
- Bathroom
- Storage room or utility area only if it is relevant to the listing
- Walkout, windows, fireplace, bar, gym, or other feature
For an unfinished basement, focus on accurately showing the size, layout, ceiling height, and access points. Do not make it look brighter or larger than it is.
In a dark basement, your base shutter speed may become too slow for handheld shooting. Raise ISO and check the bright bracket carefully. If the images are soft, use a tripod rather than trying to rescue blurry files during editing.
11. Laundry and Mudroom
Capture:
- Wide view showing appliances and storage
- Connection to the garage, entry, or backyard
- Built-in lockers, sink, folding counter, or upgraded storage
One image is usually enough unless the mudroom is a significant selling feature.
12. Garage
Capture:
- Wide view showing the garage size and vehicle capacity
- Second angle for a three-car, tandem, workshop, or storage area
- Built-in shelving, workbench, epoxy flooring, or special feature
Keep the composition honest. Garage interiors are often visually plain, but buyers still need to understand the available space.
13. Backyard and Rear Exterior
The backyard should explain how the outdoor space can be used.
Capture:
- Wide view from the rear of the yard facing the home
- View of the patio, deck, or covered outdoor area
- View showing the yard’s depth and boundaries
- Pool, hot tub, firepit, garden, mature trees, or landscaping feature
- View from the home toward the yard if it explains the indoor-outdoor connection
If the yard is small, two well-composed images may be enough. If it includes several distinct areas, capture each one only when it adds information.
Pay attention to the sun’s direction and the movement of trees. For handheld HDR, leaves moving between bracketed frames can create ghosting. If the wind is strong, consider capturing a single well-exposed frame for foliage or using a tripod and a longer exposure strategy.
Use the Right Lens for the Property
A handheld workflow does not require an extreme ultra-wide lens.
Choose a lens that allows you to show the room while keeping lines and proportions believable.
For full-frame Sony cameras, common options include:
- Sony FE 16-35mm f/2.8 GM II for a flexible, high-end wide-angle range
- Sony FE 12-24mm for very tight spaces and expansive views
For Canon RF systems:
For Nikon Z systems:
For APS-C or third-party systems, options such as the Tamron 11-20mm f/2.8, Tokina 11-18mm f/2.8, and Sigma 16-28mm f/2.8 may be worth considering depending on your camera mount.
The best lens is not necessarily the widest or most expensive one. It is the lens that lets you show the room clearly while maintaining natural-looking proportions.
A Fast Handheld Workflow from Room to Room
Once you arrive in a room, follow the same sequence every time:
- Turn on or adjust lights if they improve the presentation.
- Remove distractions such as bins, cords, personal products, and open toilet lids.
- Choose the primary composition based on the room’s purpose.
- Level the camera and check verticals.
- Focus once on an appropriate area of the room.
- Check the shutter speed for the base exposure.
- Raise ISO if necessary rather than accepting a blurry bracket.
- Fire the complete bracket without moving.
- Review the image quickly for blur, clipped highlights, and distracting edges.
- Move on when the room is covered.
Do not spend several minutes trying to perfect a composition that is only marginally better than the first one. The shot list helps you decide when the room is finished.
For a more complete process, use the 60-Minute Real Estate Photography Workflow as a framework for planning the entire appointment.
Editing Handheld HDR Files
Handheld brackets can be edited using the same general HDR principles as tripod-captured brackets, but alignment deserves extra attention.
Look for:
- Slight shifts between frames
- Ghosting in curtains, trees, or reflections
- Moving ceiling fans
- Misaligned edges
- Softness in the brightest exposure
- Excessive noise in the shadow frame
A good HDR workflow should preserve natural contrast. The goal is not to make every shadow perfectly bright or every window completely blue. The goal is to create a believable image that shows the property accurately.
For a detailed overview, read the Complete HDR Real Estate Photography Guide.
You can also use AutoHDR to speed up the blending and editing stage. The value of an automated tool is not simply that it produces an image quickly. The real value is consistency across a high volume of properties.
Still review every image before delivery. Automation can save time, but it does not replace judgment.
The Real Estate Photography Editing Workflow can help you build a repeatable process from import through delivery.

Common Handheld Mistakes
Shooting too slowly
A stabilized camera can still produce soft images if the subject or bracket moves. Check the slowest frame, not just the base exposure.
Using the widest lens for every room
Extreme wide angles can make small rooms look unnatural and stretch furniture near the edges. Use the widest lens only when the space requires it.
Forgetting the layout
A beautiful detail image does not replace a clear image showing how the rooms connect. Always capture establishing views first.
Tilting the camera
Tilting up or down causes vertical lines to converge. Keep the camera level and correct your position instead.
Capturing too many nearly identical images
More photos do not necessarily mean more value. If two images communicate the same thing, keep the stronger one.
Trusting stabilization without reviewing files
Stabilization is helpful, but every camera and lens combination performs differently. Test your setup before relying on it for paid work.
Overprocessing HDR
A bright, crunchy, haloed image can make an expensive home look artificial. Use HDR to manage contrast, not to create an effect.
Handheld-Only Pre-Delivery Checklist
Before leaving the property, confirm that you have:
- Front exterior
- Entryway or foyer
- Living or family room
- Kitchen
- Dining area
- Primary bedroom
- Primary bathroom
- Secondary bedrooms
- Secondary bathrooms
- Basement or lower level
- Laundry or mudroom
- Garage
- Backyard
- Patio, deck, pool, or other outdoor features
- Unique architectural or lifestyle features
- Clear images of important room connections
- Sharp bracketed images
- Straight vertical lines
- No obvious reflections of yourself
- No major distractions left in the frame
Final Recommendation
A handheld-only shoot can be fast, practical, and professional when you treat it as a system rather than a shortcut.
The essential ingredients are:
- A repeatable room-by-room shot list
- A wide-angle lens with realistic perspective
- A fast bracket sequence
- A shutter speed that keeps the full bracket sharp
- Stabilization combined with good body mechanics
- Careful attention to vertical lines and composition
- An editing workflow that preserves natural detail
The biggest advantage is not that you can leave the tripod in the vehicle. The advantage is that you reduce setup time and decision fatigue while maintaining consistent coverage.
That can help you shoot faster, process more efficiently, and take on more work without lowering your standards.
Start with this checklist on your next appointment. After a few homes, adjust the number of images for your property type, client expectations, and delivery package.
Then compare your results with your tripod workflow. Keep the method that produces the best balance of speed, quality, and profitability for your business.
For more practical systems, explore the RE Media Systems guides, review the Recommended Gear, and subscribe to the newsletter for new real estate photography workflows and training.