
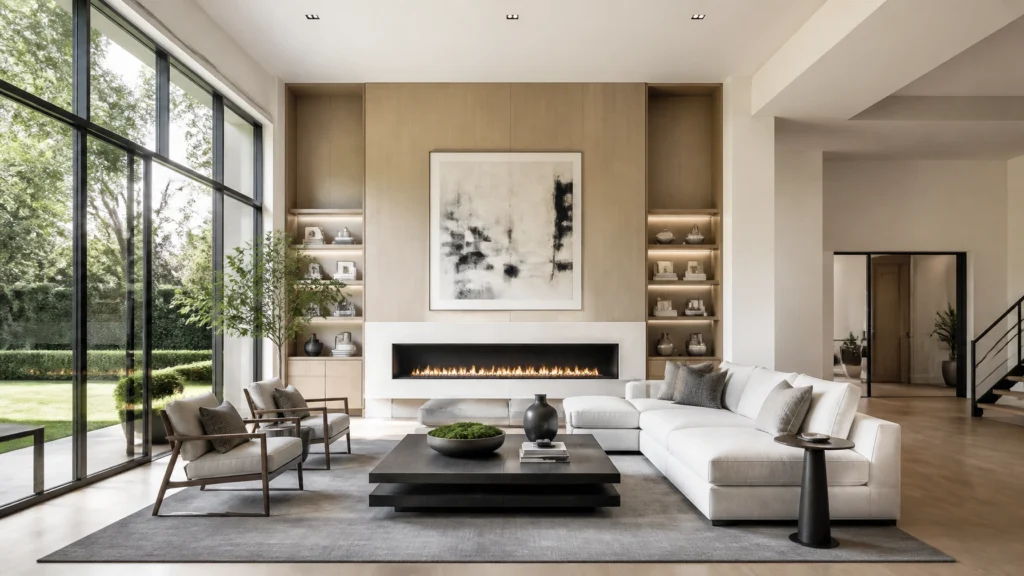
If you’ve been in this industry for more than a minute, you know the biggest bottleneck isn’t usually the shoot itself, it’s the post-processing. Or, it’s the time you spend on-site lugging around five flashes, trying to balance a window view that just won’t cooperate.
I’ve been a full-time real estate photographer for over 14 years. I’ve shot more than 10,000 homes. And if there is one thing I’ve learned, it’s that speed is the only way to scale. If you’re spending three hours on a shoot and another four hours in Photoshop, you don’t have a business; you have a very stressful hobby.
This guide is about the system I use to shoot high-end, professional images without the “flambient” headache. We’re talking about a high-dynamic-range (HDR) workflow that allows you to walk into a house, shoot a full media package in under 60 minutes, and deliver magazine-quality results the next morning.
Quick Verdict: The ROI of HDR
Is HDR still the best way to shoot real estate in 2026?
The answer is a resounding yes. But not the HDR you remember from 2010 with the “clown vomit” colors and halos. Modern HDR, powered by AI-blending tools like AutoHDR, is indistinguishable from high-end flash photography to 99% of agents and buyers.
Who is this for?
- Beginners: Who want professional results without a $5,000 lighting kit.
- Pros: Who are tired of the “flambient” grind and want to increase their daily shoot volume.
- Business Owners: Looking to standardize their look across multiple photographers.
The Verdict: If you want to shoot faster, earn more per hour, and maintain a high-quality standard, a professional HDR workflow is your best path to a six-figure real estate media business.
Why I Recommend HDR: Speed and Consistency
The “Flambient” vs. HDR debate has been raging for years. Flambient (Flash + Ambient) involves taking one shot with a flash and another with natural light, then blending them in Photoshop. It looks great, but it’s slow.
When I started, I did it all. But after a few thousand homes, I realized my bank account didn’t care if I spent 20 minutes light-painting a kitchen or 2 minutes shooting an HDR bracket. The client wanted the same thing: a bright, clean, inviting photo delivered fast.
1. The 60-Minute Shoot Philosophy
My goal for every standard residential property is to be in and out in 60 minutes. That includes photos, a floor plan, and a drone flight. You simply cannot do that if you are setting up light stands in every room. HDR allows you to move as fast as you can walk.
2. Consistency Across the Team
As you grow and hire other photographers, training them to use flash consistently is a nightmare. Different ceilings, different wall colors, and different equipment lead to a fragmented look. With a standardized HDR bracket setting and an AI-editing pipeline, every shoot looks like it was shot by the same person.
3. Better Window Views
Back in the day, HDR struggled with “blown-out” windows. Not anymore. Modern sensors and advanced blending algorithms can pull detail out of the brightest sun without making the interior look like a cave.
Scott’s Field Note: I stopped using 5-bracket sets years ago. For 99% of homes, a 3-bracket set with +/- 2 stops is the sweet spot for speed and file management. It captures all the dynamic range you need without cluttering your SD card.
Camera Settings & Bracketing (The Setup)
To get the most out of HDR, your camera needs to be set up correctly before you even step through the front door.
1. Auto Exposure Bracketing (AEB)
This is the heart of the HDR workflow. You want your camera to take multiple shots at different exposures automatically.
- The Set: 3 Brackets.
- The Increment: 2.0 EV (stops).
- The Logic: One “0” exposure (what the camera thinks is right), one at “-2” (to save the window views), and one at “+2” (to pull detail out of the dark corners).
2. Aperture and ISO
- Aperture: f/7.1 to f/9.0. This ensures a deep depth of field so the entire room is in focus.
- ISO: Keep it as low as possible (ISO 100-400). Modern cameras like the Sony A7 IV are clean at higher ISOs, but for real estate, we want that “clinical perfection” with zero noise.
3. Drive Mode
Set your camera to Continuous Bracketing. This allows you to hold the shutter button down once, and the camera fires all three shots in a quick burst.

The Workflow: On-site Techniques
This is where the “Shoot Faster” part of our mission comes into play. Most photographers are taught that a tripod is mandatory. I’m going to tell you why it’s often your biggest enemy.
Handheld vs. Tripod
I shoot handheld HDR for about 80% of my residential work. Why? Because it’s faster. If I can save 10 seconds per shot by not adjusting tripod legs, and I take 40 shots a house, that’s almost 7 minutes saved per house. Over 5 houses a day, that’s half an hour of my life back.
- When to shoot Handheld: Bright days, standard rooms, and high-volume shoots. Modern AI tools like AutoHDR will automatically align the frames for you.
- When to use a Tripod: Extremely dark basements, tight bathrooms where you need to be perfectly level, or when shooting high-end luxury homes where you have the time to be meticulous.
Vertical Alignment
The #1 rule of real estate photography: Keep your verticals straight. Your camera should be level. If you tilt it up or down, the walls will appear to lean. Even though software can fix this, getting it right in-camera saves you from losing valuable pixels during the crop.

Composition Basics
- Height: Usually around 44 inches (light switch height). This gives a natural balance between the floor and ceiling.
- Corner Shots: Shoot into the corners to show the most space.
- Straight-on Shots: Use these for fireplaces, kitchen islands, or symmetrical living rooms to give a “hero” feel.
HDR vs. Flash: The “Flambient” Debate
If you go on any real estate photography forum, you’ll see people swearing that flambient is the only “professional” way to shoot. Here’s the truth from 10,000 homes of experience: The client doesn’t care.
| Feature | HDR (The Scott Way) | Flambient (Flash/Ambient) |
|---|---|---|
| Setup Time | Zero | 5-10 minutes per room |
| Equipment | Camera + Lens | Camera + Flash + Stands + Triggers |
| Editing Time | Automated (AI) | Manual (Photoshop Layers) |
| Color Accuracy | Natural (if processed right) | Excellent (best for color casts) |
| Daily Volume | 5-8 homes | 2-3 homes |
Why HDR wins for speed:
In the time it takes a flambient photographer to set up their first light stand, I’ve already finished the entire main floor. My business systems are built around high-efficiency. I’d rather shoot three $250 HDR jobs in a morning than one $400 flambient job that takes all day.
AI-Powered Editing: The Secret Sauce
Ten years ago, HDR editing meant sitting at a computer for hours, moving sliders in Photomatix. Today, we use AI.
The core of my workflow is AutoHDR. This tool has completely changed the game.
- Import: I take my SD card, dump the brackets into a folder.
- Upload: I send them to AutoHDR.
- The AI Magic: It blends the brackets, corrects the colors, fixes the vertical lines, and even cleans up the window views.
- Delivery: I get back finished JPEGs that are ready for my client.
By removing the manual editing step, I can spend my time on what actually makes money: shooting more houses and acquiring more clients.
Scott’s Field Note: I always tell people, “Don’t eat your hourly rate.” If you spend an hour editing a $200 shoot, you just cut your pay in half. Use automation to keep your margins high.
Common HDR Mistakes (And How to Avoid Them)
We’ve all seen “Bad HDR.” It gives the technique a bad name. Here is how to avoid the “clown vomit” look:
1. Over-Saturation
A common mistake is cranking the saturation to make colors pop. This makes wood floors look orange and grass look radioactive. Keep it natural.
2. Halos
If you see a glow around the roofline or furniture, your HDR software is being pushed too hard. This is why using a dedicated real estate AI like AutoHDR or professional tools like Adobe Lightroom is vital, they are designed to avoid these artifacts.
3. Gray Whites
Sometimes HDR processing turns white ceilings and walls gray. You want to ensure your final images have a true white point. A quick levels adjustment in Lightroom can fix this in seconds.
4. Not Checking Verticals
Even with the best software, you must quality-check your vertical lines. Leaning walls scream “amateur.”
Recommended Gear for HDR Real Estate Photography
You don’t need the most expensive gear, but you do need the right gear. Here is the kit I recommend for a professional HDR workflow.
Cameras (The “Brain”)
- Sony A7 IV: My top pick. Fast, reliable, and incredible dynamic range. [Link: https://geni.us/HJnpG0h]
- Canon R6 Mark II: A great alternative for Canon users. [Link: https://geni.us/canon-r6]
- Nikon Z6 III: Fantastic for handheld work. [Link: https://geni.us/nikon-z6]
Lenses (The “Eye”)
- Sony 16-35mm f/2.8 GM II: The gold standard for real estate. [Link: https://geni.us/HJnpG0h]
- Tamron 17-28mm f/2.8: A budget-friendly, high-quality beast for Sony. [Link: https://geni.us/ImA5g]
- Canon RF 15-35mm f/2.8 L: Wide and sharp. [Link: https://geni.us/canon-15-35]
Tripods & Heads
- Manfrotto 055 Aluminum: Rock solid. [Link: https://geni.us/VAVHV1]
- Manfrotto 410 Junior Geared Head: If you use a tripod, use a geared head. It makes precision leveling a breeze. [Link: https://geni.us/G26He]
Software
- AutoHDR: For automated blending. [Link: https://geni.us/autohdr]
- Adobe Creative Cloud: Lightroom and Photoshop are still essential for final tweaks. [Link: https://geni.us/D10W]
- HDPhotoHub: The only way I deliver photos and manage my business. [Link: https://geni.us/EolKNJ2]
Advanced Technique: The HDR Twilight Shoot
Twilight (or “Blue Hour”) shoots are one of the highest-margin services you can offer. This is where HDR really shines. By capturing the warm glow of the interior lights against the deep blue of the sky, you create a “stop-the-scroll” image.
Pro Tip: For twilights, I always use a tripod. The exposures are much longer, and you need that perfect stability to get a crisp shot of the home’s exterior.

FAQ: HDR Real Estate Photography
1. Is 3 brackets enough for all homes?
Yes, 99% of the time. If you are shooting a room with a direct view of a bright sun through the window, you might occasionally need 5 brackets, but +/- 2 stops on a 3-bracket set covers almost everything.
2. Should I shoot in RAW or JPEG?
Always RAW. HDR blending requires the maximum amount of data. JPEGs are “baked” and won’t give you the flexibility to fix shadows or highlights.
3. What is the best camera for handheld HDR?
I love the Sony A7 series. Their IBIS (In-Body Image Stabilization) makes handheld shooting incredibly steady.
4. Does HDR look fake?
Only if you over-process it. Modern AI tools are designed to keep the “natural” look while showing detail in the shadows and highlights.
5. How do I handle color casts (blue light from windows vs. yellow light from bulbs)?
This is the biggest challenge for HDR. AI tools are getting better at this, but sometimes you’ll need a quick “Brush” in Lightroom to desaturate the yellow or blue in specific areas.
6. Can I use a drone for HDR?
Yes! I use the DJI Air 3S for HDR aerials. It has a built-in AEB mode that works just like your handheld camera.
7. Is “flambient” better for luxury homes?
It can be, but honestly, many luxury photographers have switched to HDR because it looks more “natural” and less “studio-lit.”
8. How much should I charge for HDR photos?
It depends on your market, but I typically start at $200-$250 for a standard set of 25-30 images.
9. Do I need a geared head?
If you use a tripod, yes. A ball head is a nightmare to get level. The Benro GD3WH is a great affordable option.
10. How do I deliver the photos?
I use HDPhotoHub. It allows the agent to pay before they can download the high-res files, which solves the “chasing money” problem.
11. Does AutoHDR work with handheld shots?
Yes, it’s specifically designed to align handheld frames perfectly.
12. What focal length is best?
16mm on a full-frame camera is the sweet spot. Anything wider starts to look distorted; anything tighter doesn’t show enough of the room.
13. How do I avoid window “glow”?
This usually happens when the exposure difference between the inside and outside is too high. A 3-bracket set at -2 stops usually solves this.
14. Should I turn off the lights?
I prefer lights ON. It makes the home feel warm and lived-in. HDR handles the mixed lighting much better than it used to.
15. How long does it take to learn?
You can master the on-site shooting in a day. The real trick is setting up your automated editing workflow so you aren’t doing the work yourself.
Final Recommendation: Build a System, Not a Job
HDR photography isn’t just about taking pictures; it’s about building an efficient production system. If you spend your life in front of a computer, you can’t grow. By mastering HDR and implementing AI-driven workflows like AutoHDR, you free yourself to focus on marketing, client acquisition, and: most importantly: living your life.
Remember the RE Media Systems mission: Shoot faster, earn more, and build a better business.
Ready to level up?
- Read our Complete Guide to Drone Photography for Real Estate.
- Check out the Real Estate Photography Gear Guide to see exactly what’s in my bag.
- Watch my full workflow breakdown on the RE Media Systems YouTube Channel.
Keep shooting, keep learning, and let’s build something great.