
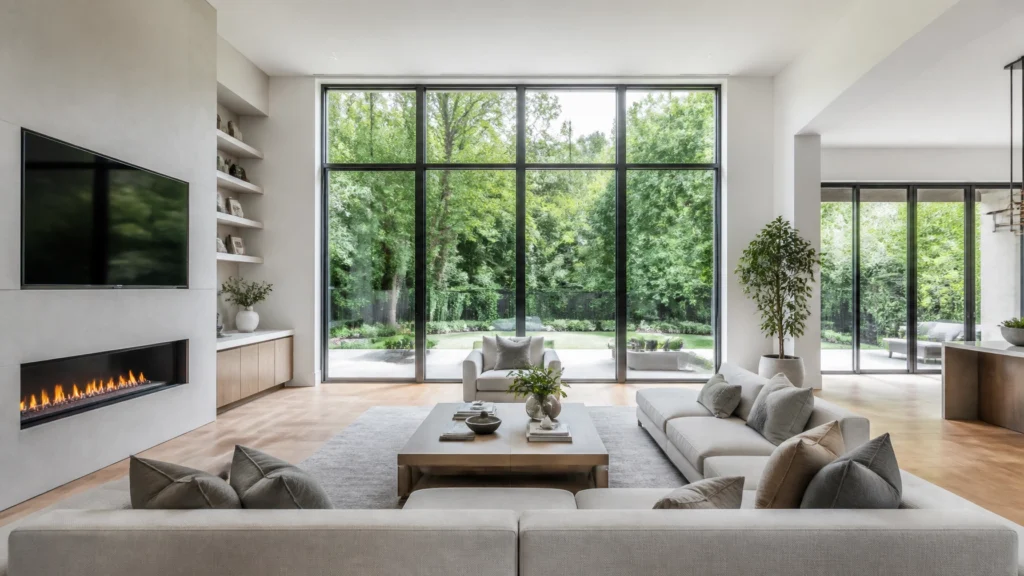
If you ask ten different real estate photographers how they shoot their interiors, you’ll get ten different answers. Some swear by a complex “Flambient” (Flash + Ambient) workflow, while others are content with a single exposure and a lot of luck.
After 14 years in the industry and over 10,000 homes photographed, I can tell you one thing with absolute certainty: HDR (High Dynamic Range) is the ultimate industry standard for anyone who wants to build a profitable, scalable real estate media business.
Why? Because in this business, time is your most valuable asset. If you can deliver high-end, magazine-quality results in half the time it takes the “flash guys,” you aren’t just a photographer, you’re a business owner with a competitive edge.
This guide is the second pillar in our cornerstone series. We’re going to strip away the fluff and look at the exact HDR workflow I use to shoot houses in 15 minutes and deliver stunning images that keep agents coming back.
The 14-Year/10,000-Home Perspective: Why I Moved from Flash to HDR
When I started RE Media Systems, I was a “flash guy.” I carried multiple speedlights, light stands, and triggers. I’d walk through a house, popping flashes in every corner, meticulously blending layers in Photoshop for hours every night.
It worked. The photos looked great. But there was a problem: I was exhausted, and my hourly rate was pathetic.
I realized that while I was spending 90 minutes on a shoot and two hours on an edit, my competitors using streamlined HDR workflows were hitting four houses a day to my two. They were earning more, working less, and, here’s the kicker, the agents couldn’t tell the difference in the final product.

The shift to HDR wasn’t about being “lazy.” It was about efficiency and systems. Today’s camera sensors, combined with advanced AI-powered editing tools like AutoHDR, have made the old arguments against HDR (like “muddy colors” or “unnatural looks”) completely obsolete.
By mastering HDR, I was able to scale from a solo operator to a high-volume business. If you want to shoot faster and earn more, you need to master the HDR workflow.
The Essential Equipment for High-Speed HDR
You don’t need a $50,000 Phase One setup to shoot real estate, but you do need gear that supports a fast, bracketed workflow.
1. The Camera (Sony is King)
I’ve used almost every brand, but Sony’s mirrorless systems are the gold standard for HDR. Their dynamic range is incredible, and the menu systems allow for rapid bracketing. I currently recommend the Sony A7 V for its incredible balance of resolution and speed.
2. Wide-Angle Rectilinear Lenses
For real estate, you need a lens that is wide but keeps your lines straight. A 16-35mm or a 12-24mm lens on a full-frame body is perfect. Stay away from “fisheye” lenses, we want architectural precision, not a funhouse mirror.
3. A Rock-Solid Tripod
HDR is impossible without a tripod. Since we are merging multiple exposures, the camera cannot move a single millimeter between shots. I use a carbon fiber tripod with a geared head for precise leveling.
4. A Reliable Shutter Release
Whether it’s a remote, a cable, or the 2-second timer on your camera, you must avoid touching the camera when the shutter fires.
Camera Settings for Flawless HDR
Getting HDR right starts in the camera. If your brackets are bad, your edit will be a nightmare.
The “Shoot Faster” Settings:
- Mode: Aperture Priority (A) or Manual (M).
- ISO: 100 to 400 (Keep it clean).
- Aperture: f/7.1 to f/9.0 (Sweet spot for sharpness and depth of field).
- Focus: Single-shot AF or Manual (Ensure the whole room is sharp).
- File Format: RAW (Always shoot RAW for HDR).
3-Shot vs. 5-Shot Bracketing
This is where most photographers overcomplicate things.
- 3-Shot (-2, 0, +2 EV): Perfect for most rooms with balanced light. It saves storage space and speeds up processing.
- 5-Shot (-4, -2, 0, +2, +4 EV): Essential for rooms with high-contrast views (like a dark living room with bright sun hitting the windows).
In my workflow, I default to 5-shot brackets for every interior shot. With modern memory cards, the extra two frames cost almost nothing in time but offer massive “insurance” during the editing phase.
The On-Site Workflow: Speed is Everything (The 15-Minute Shoot)
The goal is to move through a standard 2,000 sq. ft. home in 15 to 20 minutes. Here is the system:
- The Walkthrough: Do a 2-minute lap. Turn on all lights, open all blinds, and hide the trash cans.
- The Corner Strategy: Position your tripod in the corners or doorways to capture the flow of the room.
- Level Your Verticals: Use your camera’s built-in level. If your vertical lines aren’t straight, the photo will look amateur.
- Fire the Bracket: Set your camera to “Continuous Bracketing.” Press the shutter once, let it fire all 5 frames, and move to the next spot.
If you are doing this correctly, you should be spending no more than 60 seconds per “scene.” If you’re spending 5 minutes per room, you’re overthinking it.

Editing HDR: From Lightroom to AI-Powered AutoHDR
Post-processing is where the magic happens. For years, I used Photomatix or Aurora HDR, but the industry has moved forward.
The Lightroom Workflow
Lightroom’s built-in “HDR Merge” is great for basic work.
- Select your 5 frames.
- Right-click -> Photo Merge -> HDR.
- Check “Auto Align” and “Deghost.”
- Apply your custom RE Media Systems preset.
The Game Changer: AutoHDR and AI
If you want to truly scale, you should look into AI-powered tools. Services that utilize AutoHDR can take your RAW brackets and return a perfectly blended, color-corrected image in seconds. This eliminates the “HDR look” (that crunchy, over-processed aesthetic) and gives you the clean, bright look that agents love.
Dealing with Challenges: Windows, Color Casts, and Ghosting
Even with a great system, real-world homes throw curveballs.
1. The “Nuclear” Window
If the sun is screaming through a window, a 5-shot bracket might still leave the window “blown out” (pure white).
- Solution: Use the “Slow Your Roll” technique from our YouTube channel. Take one extra exposure specifically metered for the window view and manually mask it in during post-processing.
2. Orange Wood vs. Blue Windows (Color Casts)
Incandescent light bulbs are orange; daylight is blue. When they mix, your white walls look muddy.
- Solution: Use the White Balance eyedropper on a neutral surface (like a grey countertop or a white door). In extreme cases, use a “Color Calibration” tool in Lightroom to pull back the saturation of the offending colors.
3. Ghosting
Ceiling fans or curtains moving during your bracket will create “ghosts.”
- Solution: Most HDR software has a “Deghosting” feature. Always check your images at 100% zoom to ensure the fan blades aren’t a blurry mess.
HDR vs. Flash-Ambient: When to Use Which?
I’m an HDR advocate, but I’m also a realist.
- Use HDR for: 95% of your standard residential real estate work. It’s faster, cheaper to produce, and looks great on Zillow.
- Use Flash-Ambient for: Ultra-luxury properties (over $5M) or high-end commercial architectural work where you need absolute control over every reflection and shadow.
Pricing Your HDR Services
Don’t price based on your time; price based on the value you provide. If an HDR workflow allows you to shoot a house in 20 minutes, don’t charge less just because it was “easy.”
- Standard Package: 25 HDR Photos.
- Premium Package: 40 HDR Photos + Floor Plans.
- Add-ons: Drone, Virtual Staging, or iGUIDE Virtual Tours.
By using HDR, your profit margins on these packages will be significantly higher than a photographer stuck using slow, manual methods.
Final Recommendation: Build a System, Not Just a Portfolio
Mastering HDR real estate photography isn’t just about taking pretty pictures; it’s about building a business that doesn’t own you. By adopting a bracketed workflow, investing in the right gear, and leveraging AI editing tools, you can increase your volume without sacrificing quality.
Ready to take your business to the next level?
- Subscribe to the RE Media Systems newsletter for weekly tips on shooting faster and earning more.
- Explore our Recommended Gear list to see exactly what I use on every shoot.
FAQ: Common HDR Questions
Q: Does HDR look “fake”?
A: Only if it’s done poorly. Modern HDR, especially when processed with AI tools like AutoHDR, looks incredibly natural and mimics how the human eye sees a room.
Q: Should I use a drone for HDR?
A: Absolutely. Most DJI drones have an AEB (Auto Exposure Bracketing) mode. Always use it for exteriors to capture detail in the sky and the shadows of the house.
Q: Do I need to be an expert in Photoshop?
A: No. With a solid HDR workflow in Lightroom or using automated services, you’ll rarely need to open Photoshop for standard real estate jobs.
Q: How many brackets should I take per house?
A: For a standard home, I usually capture 25 to 35 “scenes” (5-shot brackets), resulting in 25 high-quality final images.
Pingback: The Ultimate Real Estate Photography Gear Guide: Everything You Need to Scale in 2026 - RE Media Systems
Pingback: Real Estate Photography Editing Workflow: The Proven System for High-Volume Success (2026 Edition) - RE Media Systems
Pingback: Real Estate Photography Editing Workflow (2026): The Complete Guide
Pingback: The Ultimate Real Estate Photography Gear Guide (2026): Pro Tools for Pro Results