
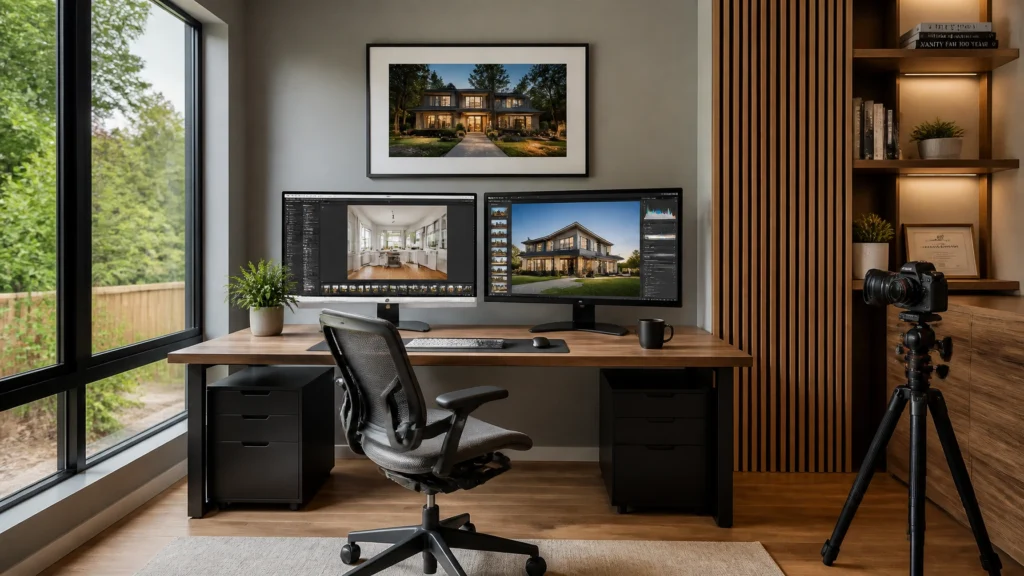
Quick Verdict: Editing is Where Profit Goes to Die
If you are spending four hours at your computer for every one hour you spend on-site, you don’t have a photography business, you have an editing job. Over the last 14 years and 10,000+ homes, I’ve learned one cold, hard truth: You don’t get paid to edit; you get paid to deliver.
The most successful real estate media companies aren’t the ones with the most complex Photoshop masks; they are the ones with the most efficient systems. Today, we are in the golden age of AI-assisted workflows. By combining smart in-camera preparation with powerful tools like AutoHDR, you can cut your editing time by 80% while delivering a higher-quality product than you ever did manually.
The Verdict: If you want to scale to six figures and beyond, you must stop “editing” and start “processing.” My hybrid AI workflow is the bridge that gets you there.
Why Your Current Workflow Is Slow (The Profit Killers)
Most photographers fall into one of two traps that murder their hourly rate:
1. The Manual Blending Trap
I call this the “hero complex.” You think that by manually hand-blending 5 exposures in Photoshop for every single room, you are providing “artisan” quality. In reality, you are creating a bottleneck. Hand-blending is inconsistent, incredibly slow, and prone to “HDR look” halos if you aren’t a master of luminosity masks. If it takes you 15 minutes to blend one living room shot, you’ve already lost money on that shoot.
2. The Overseas Editor Lottery
Outsourcing to editors in other time zones seems like a win until you get the photos back at 4:00 AM and realize the white balance is purple, the windows are blown out, and the grass is neon green. You then spend two hours fixing their mistakes. Outsourcing works for high-volume agencies, but for the solo operator or small team, the management overhead and “fix-it” time often negate the savings.
3. The 60-Minute Shoot Philosophy
At RE Media Systems, we teach the 60-Minute Shoot. This isn’t just about how fast you move your tripod; it’s about how you shoot for the edit. If your shooting style requires heavy manual labor later, you are doing it wrong. We need a workflow that handles the heavy lifting automatically so you can focus on the next client.
Scott’s Field Note: “I used to spend 4 hours a night editing. Now I spend 15 minutes. That shift alone added $40k to my bottom line without shooting a single extra house.”
The Hybrid AI Workflow: The 3-Step Process
We don’t just “click a button” and hope for the best. We use a Hybrid Workflow. This combines the speed of AI with the critical eye of a professional photographer.
- Step 1: In-Camera Preparation (Pre-conditioning the data)
- Step 2: AI Heavy Lifting (Blending and balancing with AutoHDR)
- Step 3: The Lightroom Polish (Consistency and Quality Control)
This system ensures that 95% of the work is done by the computer while you retain 100% control over the final “look” of your brand.
Step 1: In-Camera Preparation
Editing starts before you even pull the camera out of your bag. If you give an AI tool garbage data, you’ll get garbage results. To make real estate photography editing fast, you need a disciplined shooting routine.
Camera Settings for Automation
- Bracket Everything: We typically shoot 3 to 5 exposures. For 90% of homes, a 3-shot bracket at 2-stop increments (-2, 0, +2) is plenty. For luxury homes with massive windows and dark shadows, go with a 5-shot bracket at 2-stop increments.
- Aperture Priority vs. Manual: Use Aperture Priority (f/8 or f/9) with Auto-ISO turned OFF (keep it at ISO 100-400). This ensures your depth of field never changes between brackets, which is vital for AI alignment.
- Drive Mode: Set your camera to Continuous High. This allows you to fire off your brackets in less than a second, reducing the chance of ghosting from ceiling fans or pets moving through the frame.
- White Balance: Don’t use Auto White Balance (AWB). It can shift between brackets. Set it to a fixed Kelvin (around 5000K-5500K) or use the “Daylight” preset. You’ll fix the tint in Step 3, but starting with a consistent baseline is key.
For a deeper dive into the technical setup, check out The Complete HDR Real Estate Photography Guide.
Step 2: The AI Heavy Lifting with AutoHDR

Once you’re back at your desk, the magic happens. We use AutoHDR because it is specifically designed for the architectural demands of real estate. Unlike generic HDR software (like Photomatix or Aurora), AutoHDR understands that a “window” should be clear and a “ceiling” should be clean.
Why AutoHDR is the Game Changer
In the past, we had to choose between “Enfuse” (which looked natural but flat) and “Photomatix” (which looked crunchy and “fake”). AutoHDR uses machine learning to identify the different zones of a room. It knows which pixels are a window view and which pixels are a dark corner under a cabinet.
The AutoHDR Workflow:
- Import: Drag and drop your RAW files directly into the software.
- Detection: The AI automatically groups your brackets. It knows that these 3 files belong to the kitchen and those 3 belong to the master bath. You don’t have to sort them manually.
- Blending: It applies “Window Pull” logic. It looks for the best exposure in your bracket to fill in the window view while maintaining natural light on the floors.
- Sky Replacement: It can automatically detect a gray, overcast sky and swap it for a beautiful blue sky during the blending process.
- Export: It spits out a high-resolution DNG or TIFF file that is 90% “done.”
By using AutoHDR, you eliminate the need to sit and wait for Photoshop to “Merge to HDR,” which can take minutes per photo. AutoHDR batches this in the background while you grab a coffee.
Step 3: The Lightroom Polish
Even with AI, you are still the artist. The AI does the heavy lifting, but you provide the “soul” of the image. This is where we ensure the client experience remains premium.
Open Adobe Creative Cloud and import your blended files into Lightroom.
The 5-Point Polish Checklist:
- Verticals and Perspective: This is the most important step. Even if you used a geared head like the Manfrotto 410 Junior, things can shift. Use the “Transform” panel and hit “Auto” or “Level.” If the vertical lines aren’t straight, the photo looks amateur.
- The “White” Ceiling Rule: AI sometimes struggles with color casts from orange light bulbs hitting a white ceiling. Use a Temp/Tint brush to desaturate the yellow/orange on the ceilings.
Scott’s Field Note: “Never deliver a gray ceiling. If the AI doesn’t get the white balance perfect, a quick 5-second adjustment in Lightroom is worth the extra time to keep the client happy.”
- Contrast and Presence: Boost the “Dehaze” slightly (around +5 to +10) to add “pop” to the windows, and use “Clarity” sparingly.
- Sharpening and Noise Reduction: Since we shot at ISO 100, noise shouldn’t be an issue, but a light touch of luminance noise reduction (around 15-20) makes the walls look buttery smooth.
- Sync Settings: If the house has consistent lighting, edit one photo and “Sync” the basic settings across the whole gallery.
When to Use Photoshop: The “Content-Aware” Cleanup
In a perfect world, we stay in Lightroom. But real estate isn’t perfect. Sometimes there is a stray garden hose, a political sign in the yard, or a massive crack in the driveway.
Use the “Edit in Photoshop” command for:
- Complex Object Removal: The AI Generative Fill in Photoshop is a miracle for removing trash cans, cars from driveways, or distracting power lines.
- Advanced Window Masks: If the AI missed a window pull because the sun was hitting the glass directly, you may need to manually brush in the darker exposure using a layer mask.
- Reflection Cleanup: Removing your own reflection (or your tripod) from a bathroom mirror.
Managing Deliveries with HDPhotoHub
The workflow doesn’t end when the edit is done. It ends when the client has the photos and you have the money. We use HDPhotoHub for our delivery system.
Why it matters for editing:
HDPhotoHub allows you to upload your finished gallery and automatically creates a marketing kit for the agent. Most importantly, it uses a “Pay-to-Download” system. You don’t have to chase invoices. The agent gets a beautiful preview, and to get the high-res files, they must pay the bill. This automation saves me hours of administrative work every week.
Sky Replacement Strategy: Automation vs. Manual
A blue sky is the single easiest way to make a property look more expensive. I always recommend automating this. Both AutoHDR and Lightroom have built-in sky replacement tools.
Pro Tip: If the property is a luxury listing (over $1M), take the extra 2 minutes to do the sky replacement in Photoshop. It allows you to match the “temperature” of the house to the new sky more accurately, ensuring it doesn’t look like a “fake” composite.
Virtual Twilight: The High-Margin Edit

Virtual Twilight is a service where you take a photo shot in broad daylight and edit it to look like it was taken at dusk. This is a high-margin upsell that can add $50-$100 to your invoice for about 5 minutes of work.
How to Edit Virtual Twilight:
- Drop the Exposure: Lower the overall exposure by 2 stops in Lightroom.
- Shift Temperature: Move the Temp slider toward Blue (Cool).
- The Glow: Use a radial gradient or brush on the windows. Increase the Exposure (+1.50) and shift the Temperature toward Yellow/Orange. This mimics the look of interior lights being turned on.
- Sky Swap: Replace the bright blue sky with a “Golden Hour” or “Blue Hour” sky.
For a full guide on how to price these edits, see our Real Estate Photography Pricing Guide (2026).
FAQ: Real Estate Photography Editing Workflow
1. Which software is better for RE: Lightroom or Photoshop?
You need both. Lightroom is for organization, batch color correction, and 90% of the work. Photoshop is for the “surgery”, removing objects or complex compositing. Adobe Creative Cloud gives you both.
2. Can I just use the “HDR Merge” in Lightroom?
You can, but it’s slow. For a 30-photo shoot, Lightroom will take a long time to process those merges. Specialized tools like AutoHDR are significantly faster and often have better “de-ghosting” algorithms.
3. Should I shoot RAW or JPEG?
Always RAW. Real estate photography requires massive dynamic range. If you shoot JPEG, you lose the ability to recover highlights in windows or shadows in dark corners during the edit.
4. How long should a full edit take?
For a standard 2,500 sq. ft. home (approx. 25-30 photos), my goal is to be done in 15 to 20 minutes. If you are taking an hour, you are over-thinking it.
5. Do I need a powerful computer for real estate editing?
Yes. HDR processing and AI tools are CPU and GPU intensive. I recommend at least 32GB of RAM and a dedicated graphics card.
6. What is the best way to handle color casts from different lights?
Use the “HLS” (Hue, Saturation, Luminance) panel in Lightroom. If the wood floors look too orange because of halogen lights, drop the saturation of the Orange channel specifically.
7. How do I get those “crisp” window views?
This is a combination of a good dark exposure in your bracket and a “Window Pull” algorithm in AutoHDR. If it’s still not crisp, use a brush in Lightroom to lower highlights and increase contrast on the window area.
8. Is AI editing cheating?
No, it’s business. Your client wants a great photo delivered quickly. They don’t care if you spent 5 hours on it or 5 minutes. Use the tools that make you profitable.
9. Should I offer “Day-to-Dusk” edits for every shoot?
No, offer it as a premium add-on. It’s a great way to increase your Average Order Value (AOV).
10. How do I manage thousands of photos without getting lost?
Use a consistent folder structure: YYYY-MM-DD_StreetName. Within that, have folders for RAW, HDR_Blended, and Final_Delivered.
11. What are the best export settings for the MLS?
Every MLS is different, but a safe bet is 2048px on the long edge at 72 or 96 DPI. Keeping the file size under 2MB ensures fast loading on Zillow and Realtor.com.
12. How do I handle white balance in a room with mixed lighting?
Prioritize the most important part of the room (usually the main living area). If the bathroom has “Daylight” bulbs and the hallway has “Warm” bulbs, pick one as your “True White” and let the other be a natural secondary tone, or use a local adjustment brush to fix the outlier.
13. Does AutoHDR work with Mac and PC?
Yes, most modern AI editing tools are cross-platform.
14. Should I use a preset?
Yes, but only for the final “Look.” Don’t expect a preset to fix exposure or white balance. Develop a “Standard RE Media” preset that adds a touch of sharpening, lens correction, and contrast.
15. How do I deliver photos to the agent?
Use a professional delivery platform like HDPhotoHub. Never use Dropbox or Google Drive for final delivery; they look unprofessional and don’t allow for integrated payment.
Final Recommendation: Build a System, Not a Hobby
Real estate photography is a volume business. If you want to shoot 300+ homes a year (and many of our students shoot 500+), you cannot afford to be slow.
The “Ultimate Workflow” is simple:
- Shoot with the 60-minute philosophy (brackets, consistent settings).
- Automate the heavy lifting with AutoHDR.
- Refine the details in Lightroom.
- Deliver and get paid via HDPhotoHub.
Stop wasting your nights at the computer. Implement this system, get your life back, and start earning what your time is actually worth.
Ready to level up?
- Explore our Ultimate Real Estate Photography Gear Guide (2026) to make sure your hardware is keeping up with your software.
- Check out the RE Media Systems YouTube Channel for live editing walkthroughs.
- Subscribe to our newsletter for weekly workflow hacks delivered to your inbox.