
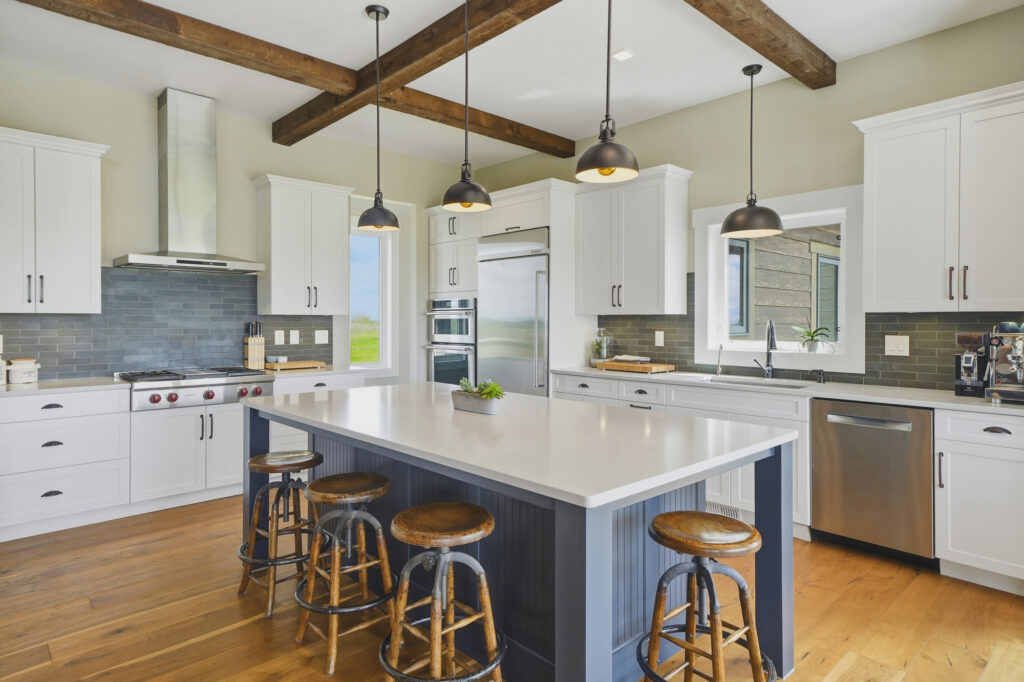
After 14 years in this industry and more than 10,000 homes photographed, I’ve seen every “game-changing” trend come and go. I’ve lived through the era of manual exposure blending, the rise and fall of over-processed HDR, and the painstaking years of Flambient (flash + ambient) dominance.
But in 2026, the game has changed completely.
If you are still spending four hours an evening hand-blending flash frames or paying external editors hundreds of dollars a week to do it for you, you aren’t running a business, you’re running a charity for your clients.
The goal of this business is simple: Shoot faster, earn more, and build a better business. To do that, your editing workflow must be a well-oiled machine, not a creative bottleneck.
In this guide, Pillar #5 of our series, I’m going to break down the exact pipeline we use today. This is the same system that allowed me to stop outsourcing to external editors after 14 years and bring the entire process back in-house using AI tools, saving me thousands of dollars and hours of frustration every month.
The Philosophy: Editing for Profitability (Speed vs. Perfection)
Most photographers are perfectionists. We want every image to be a masterpiece. But here’s the cold, hard truth: your real estate clients don’t need a masterpiece. They need a clean, bright, accurate representation of a home that will make a buyer click “Schedule a Showing.”
If you spend 20 minutes perfecting one kitchen shot, you’ve just killed your hourly rate.
Editing for profitability means finding the “Sweet Spot of Success.” This is where the quality is high enough to wow the agent and beat the competition, but the time spent is low enough to keep your margins high.
In my business, we aim for a total post-production time of less than 30 minutes per listing. That includes offloading, culling, processing, and delivery.
Why I Fired My Photo Editors After 14 Years
For over a decade, I relied on external editing teams in Vietnam and the Philippines. It was the only way to handle the volume. But it came with massive headaches:
- Consistency Issues: Every editor has a different “eye,” and my quality fluctuated daily.
- Communication Lag: If a sky replacement looked fake, I had to wait 12 hours for a correction due to time zones.
- Rising Costs: As my volume grew, so did my editing bill, often eating up 20-30% of my gross revenue.
In 2026, AI-driven tools like AutoHDR and specialized AI retouching platforms have become so sophisticated that they consistently outperform mid-level human editors. By bringing editing back in-house through automation, I regained control of my quality, slashed my turnaround times, and added a massive chunk of profit back to my bottom line.

The Death of Flambient (and the Rebirth of HDR)
If you’ve been around a while, you’ve heard the “Flambient” gospel: If you want professional results, you must use flash.
Five years ago, that was true. HDR looked crunchy, “halo-y,” and unrealistic. But the AI-driven HDR of 2026 has killed the need for Flambient in 95% of residential shoots.
Why Flambient is Dying:
- Too Slow: It takes 3-4x longer to shoot on-site and 5x longer to edit.
- Equipment Intensive: You’re lugging around flashes, triggers, and light stands.
- Unnatural Shadows: Poorly executed flash creates a “hospital” look that feels clinical and cold.
Modern AutoHDR processing uses neural networks to understand light flow. It knows how to pull detail from a window without making the room look like a cartoon. It gives you that soft, airy, magazine look in a fraction of the time.
For a deeper dive into why we’ve made the switch, check out our Complete HDR Guide.
The 5-Step High-Volume Pipeline
Here is the step-by-step workflow we use for every single property.
Step 1: Offloading & Sorting (The 5-Minute Cull)
Speed starts the second you get back to your workstation. We use fast UHS-II or CFexpress cards to offload images immediately.
- Sorting: Don’t look at every photo. Use a culling tool (like Adobe Bridge or Lightroom Library) to select the best 25-40 frames.
- The Golden Rule: If you have two similar shots, pick one and move on. Indecision is a profit killer.
Step 2: Processing (The AutoHDR Engine)
This is where the magic happens. We take our bracketed exposures (usually 3 or 5 shots per angle) and run them through an AI HDR engine.
- Batch Import: Drop all brackets into the software.
- AI Alignment: The software automatically aligns frames (even if shot handheld).
- Ghost Reduction: It removes moving elements like fans or trees blowing in the wind.
- The “Neutral” Profile: We use a custom preset that keeps colors natural and shadows open.
Step 3: AI-Enhanced Finishing
Once the base HDR is generated, we use targeted AI tools for the heavy lifting. This is where the “clinical perfection” comes in.
- Sky Replacement: If it’s a grey day, we use an AI sky swap to bring in a soft, bright blue sky with light clouds.
- Object Removal: “Remove the oil splotch on the driveway” or “Delete the power lines.” Tools like the AI Re-Edit tool handle this in seconds.
- Vertical Straightening: Perfect verticals are the hallmark of a pro. AI does this better and faster than any human.

Step 4: The Final Polish (Lightroom/Photoshop)
We bring the processed images into Lightroom for the “Scott Prokop Signature” final touch.
- White Balance: Ensure the whites are crisp, not yellow or blue.
- Clarity/Dehaze: Just a touch to make the image “pop.”
- Crop: Ensure the composition leads the eye through the room.
Step 5: Delivery (Automated Fulfillment)
We don’t send emails with attachments. We use a dedicated delivery platform that:
- Creates a beautiful property website.
- Provides multiple download sizes (MLS vs. Print).
- Collects payment before the client can download the files.
Pro Tip: Automating your payment collection at the point of delivery is the single best thing you can do for your business cash flow.
AI Tools for 2026: The “New Standard” Services
Your editing workflow isn’t just about making photos look good; it’s about adding high-margin upsells with zero extra effort.
- Virtual Staging: Instead of hiring a staging company for $2,000, we use AI virtual staging to “furnish” an empty room for pennies. It’s a $150-300 upsell that takes us 5 minutes.
- Virtual De-cluttering: Client didn’t hide the cereal boxes or the dog bed? AI can “clean” the room in post-production.
- Day-to-Dusk (Virtual Twilight): We shoot a midday exterior and turn it into a glowing sunset shot using AI. This is a massive profit generator.

Quality Control (QC) Checklist
Before you hit “Send,” run through this 10-point checklist. It takes 60 seconds but saves you from embarrassing re-shoots.
- Verticals: Are all walls and door frames perfectly straight?
- Windows: Are they clear but still look natural? (No “nuclear” glowing windows).
- Color Casts: Are the ceilings white (not orange from the lights)?
- Reflections: Am I visible in the bathroom mirror or oven door?
- Contrast: Is the image too flat, or are the shadows “muddy”?
- Dust Spots: Any sensor dust visible in the sky?
- Sky Match: Do the window views match the exterior sky?
- Crops: Are the edges of the frame clean (no stray tripod legs or light stands)?
- Consistency: Does the living room look like it belongs in the same house as the kitchen?
- AI Artifacts: Did the AI “hallucinate” anything weird in the sky or furniture?
Workflow Comparison: Which One Wins?
| Feature | Manual Flambient | Outsourced (Editors) | AI-First Workflow (2026) |
|---|---|---|---|
| Speed (On-site) | 90-120 Mins | 60 Mins | 45-60 Mins |
| Speed (Editing) | 2-3 Hours | 15 Mins (Upload) | 20-30 Mins |
| Cost per Listing | $0 (Your Time) | $15 – $30 | $2 – $5 (Software) |
| Quality Control | Total Control | Low Control | High Control |
| Turnaround | Next Day (Late) | 12-24 Hours | Same Day (Instant) |
What to Do Next: Your Workflow Roadmap
If your current workflow is a mess, don’t try to change everything overnight. Follow this path:
- Audit Your Time: On your next shoot, time exactly how long you spend editing. If it’s over 60 minutes, you have a problem.
- Master HDR Bracketing: Stop shooting single frames. Learn to shoot 3 or 5-stop brackets. (See our Ultimate Gear Guide for the best camera settings).
- Try an AI Engine: Pick one property and run it through an AI HDR tool. Compare the results to your manual edits. You might be surprised.
- Standardize Your Delivery: Move to a system where you can upload and deliver in one click.
By optimizing your workflow, you aren’t just saving time, you are creating the capacity to take on more clients, charge more for premium AI add-ons, and finally build a business that works for you, rather than you working for it.
Ready to scale?
Check out our 60-Minute Workflow Guide to see how we go from “Hello” to “Invoice Paid” in record time.
FAQ: Buying & Implementing an Editing Workflow
Q: Do I really need Photoshop for real estate?
A: Yes, but only for “surgery.” AI does 90% of the work, but you need Photoshop for complex object removals or manual window pulls on luxury homes.
Q: Is AutoHDR better than Aurora or Photomatix?
A: In 2026, AutoHDR engines are specifically trained on architectural data. They handle “window pulls” and color casts far better than old-school general-purpose HDR software.
: Does AI virtual staging look fake?
A: It used to. Modern AI staging uses realistic shadows and lighting that matches the room’s source lights. If you use a quality tool, most buyers can’t tell the difference.
Q: Should I still learn Flambient?
A: Yes. It’s a tool in your belt. For $5M+ mansions, you may still want that ultra-clean flash look. But for the 10,000+ homes I’ve shot, HDR is the profit king.
Q: How do I handle mixed lighting (yellow lights vs. blue windows)?
A: This is where AI shines. Most modern engines automatically neutralize the yellow “tungsten” glow while keeping the natural blue light from the windows balanced.
Q: Can I edit on an iPad?
A: You can, but it’s slower. A dual-monitor PC or Mac setup with a dedicated GPU is still the fastest way to process high-volume work.
Final Recommendation
The real estate media industry is moving toward automation. You can either resist it and watch your margins shrink, or embrace it and become a high-volume, high-profit machine.
My advice? Trust the technology. Use AI to handle the mundane tasks: blending, straightening, sky swaps: and use your human eye for the final 5% that makes the images sing. That is the secret to a Six-Figure Business.
Pingback: Real Estate Photography Editing Workflow (2026): The Complete Guide