
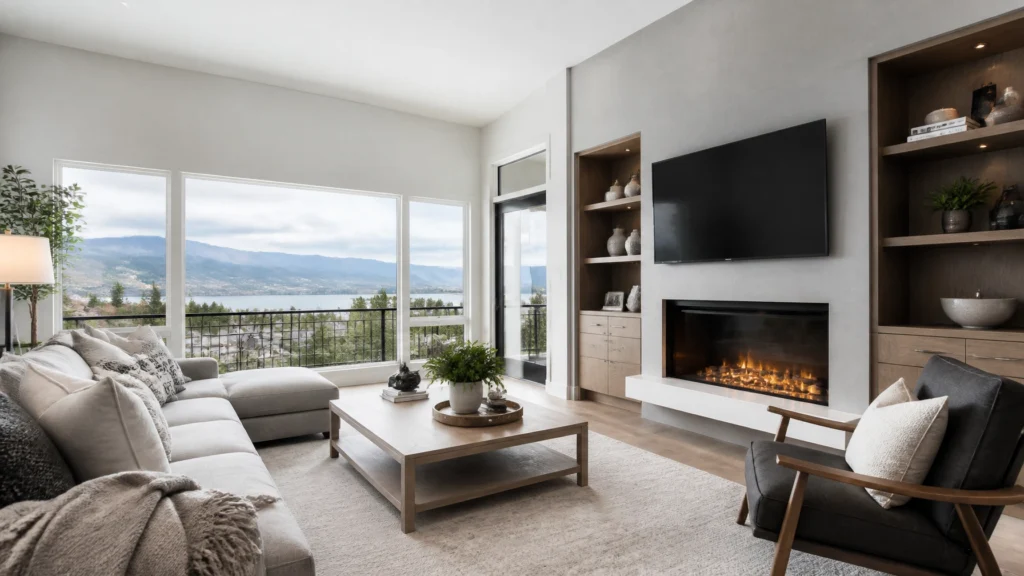
HDR real estate photography is one of the most practical techniques you can learn if you want to deliver better-looking property photos without spending your entire evening editing.
The basic idea is simple: instead of trying to capture the entire brightness range of a room in one frame, you photograph several exposures and blend them into one balanced image. The darker exposure protects the windows. The brighter exposure reveals detail in shadows. The middle exposure provides the foundation.
The difficult part is not understanding what HDR means. The difficult part is building a reliable system that produces natural-looking images quickly and consistently.
After more than 14 years in real estate photography and over 10,000 homes photographed, I’ve learned that HDR works best when you treat it as a production workflow, not as a special effect.
Your goal is not to make an image look “HDR.” Your goal is to create a believable photograph that helps the agent market the property, while keeping your shooting and editing time under control.
What Is HDR Real Estate Photography?
High dynamic range photography combines multiple exposures of the same composition into one final image.
A typical interior may contain:
- Bright windows showing the exterior
- Dark corners or hallways
- Midtone walls and furniture
- Reflective countertops and floors
- Mixed artificial and natural lighting
A single exposure often forces you to choose between a bright room with blown-out windows or a properly exposed view outside with a nearly black interior.
A bracketed HDR sequence gives you more usable information:
- Underexposed frame: Protects windows, skies, and bright highlights
- Base exposure: Captures the room’s general midtones
- Overexposed frame: Reveals shadow detail in corners, cabinets, and darker furniture
The editing software then combines the useful parts of those frames.

Scott’s Field Note: HDR is not automatically better than a single exposure. It is better when the scene contains more contrast than your camera can capture cleanly in one frame. Use the simplest technique that produces the quality your client expects.
Why HDR Is So Useful for Real Estate Photographers
HDR remains popular because it solves a very specific real estate photography problem: interiors are often much darker than the view through the windows.
It can also help you:
- Photograph rooms quickly without setting up multiple flashes
- Preserve attractive exterior views
- Maintain detail in dark kitchens, basements, and bathrooms
- Batch-process large property galleries
- Create consistent results across different homes
- Reduce the amount of manual Photoshop masking required
This matters commercially. A technique that saves five minutes per property may not sound important. But if you photograph 300 homes per year, that is 25 hours recovered, more than three full working days.
The best workflow is the one that helps you shoot faster, earn more, or deliver better quality. A well-designed HDR system can help with all three.
Recommended HDR Camera Settings
There is no single setting that works for every camera, room, and client. However, these settings are a reliable starting point for most residential interiors.
Shoot RAW
RAW files preserve significantly more information than JPEG files. That additional information gives you more flexibility when recovering highlights, lifting shadows, correcting white balance, and merging brackets.
If your camera offers compressed and uncompressed RAW options, choose the setting that fits your storage and processing workflow. The most important thing is to avoid JPEG as your primary capture format.
Use a Low ISO
Start at ISO 100 whenever possible. If shutter speeds become impractical, increase ISO gradually, often to ISO 200 or 400.
Low ISO helps reduce:
- Shadow noise
- Color noise in darker rooms
- Smudging after noise reduction
- Loss of fine detail in walls and cabinetry
HDR can reveal noise in the brighter exposure because you are lifting information from areas that were originally underexposed. Keeping ISO under control gives your software better source material.
Set the Aperture Around f/8
For most wide-angle interior photography, f/8 is a useful starting point. Depending on the lens and camera, f/7.1 through f/11 can also work well.
This range usually provides:
- Good depth of field
- Strong corner-to-corner sharpness
- Consistent focus across the bracket
- Reasonable shutter speeds
Avoid changing the aperture between bracketed frames. The depth of field and lens characteristics should remain consistent throughout the sequence.
Use a Fixed White Balance
Auto white balance can shift slightly between exposures. That can make blending more difficult, especially in rooms with mixed lighting.
Use a fixed Kelvin value, Daylight, or another consistent white balance setting. You can fine-tune the final color later in Lightroom or your HDR software.
There is no magic Kelvin value for every home. I often start somewhere around 5,000K to 5,500K, then adjust based on the actual room.
Use Manual Focus or Focus Lock
Once you have focused on the room, lock focus or switch to manual focus before taking the bracket.
This prevents the camera from refocusing differently between frames. A focus shift can create softness or alignment problems during the merge.
Use a Tripod Whenever Practical
A tripod improves more than sharpness. It helps keep the composition consistent, makes vertical correction easier, and ensures that every bracket lines up.
A sturdy option such as the Manfrotto 055 Aluminum Tripod is a dependable choice for full-time real estate work. Pair it with a geared head such as the Manfrotto 410 Junior Geared Head if you want precise control over height, tilt, and vertical lines.

A tripod is not mandatory for every simple, well-lit room. But if the room contains bright windows, reflective surfaces, or strong contrast, it is usually the fastest way to create a clean result.
How Many Exposures Should You Shoot?
The two most useful HDR bracket patterns are three exposures and five exposures.
Three-Exposure Bracket
A common three-shot sequence is:
- -2 EV
- 0 EV
- +2 EV
This is often enough for:
- Standard living rooms
- Bedrooms
- Moderately lit kitchens
- Rooms with cloudy or shaded windows
- Properties with relatively even lighting
A three-shot bracket is fast and produces fewer files to process. For many homes, it is the most efficient default.
Five-Exposure Bracket
For a high-contrast interior, use:
- -4 EV
- -2 EV
- 0 EV
- +2 EV
- +4 EV
Five exposures give you more information when a room is very dark and the windows are very bright.
Use a five-shot sequence for:
- Large windows facing direct sunlight
- Dark rooms with bright outdoor views
- Luxury properties with complex lighting
- Rooms with dark cabinetry or ceilings
- Interiors where the three-shot bracket still clips highlights or shadows
Some cameras allow five exposures at one-stop intervals, such as -2, -1, 0, +1, +2. That can work, but I generally prefer wider spacing when the scene has substantial contrast.
The correct bracket is the smallest sequence that gives your editor enough information. More frames are not automatically better.
Bracketing Versus Flambient Photography
HDR is not the only way to balance an interior. Another common approach is flambient photography, which combines ambient exposures with flash frames.
These techniques solve similar problems, but they fit different business models.
| Approach | Strengths | Limitations | Best Use |
|---|---|---|---|
| Pure HDR | Fast, simple, easy to batch, minimal equipment | May show mixed color casts or flatter light | High-volume MLS and standard residential work |
| Flambient | More control over color, contrast, and direction of light | Slower on location and more complex to edit | Luxury listings and premium architectural work |
| Single ambient + flash blend | Can improve color and depth without a full bracketed workflow | Requires careful flash placement and masking | Selective problem rooms and hero images |
| HDR with flash | Combines exposure range with additional fill light | More files and more complicated blending | Difficult interiors where ambient HDR is not enough |
For most standard homes, pure HDR is the fastest reliable method. It allows me to move through a property efficiently and process a full gallery consistently.
Flambient can produce an excellent result, but it is not automatically the right choice for every client. If a $400 listing package requires you to spend several extra hours manually blending every room, the technique may reduce your effective hourly rate.
I use controlled lighting when the property, client, or final image justifies the extra time. For routine volume work, a disciplined bracketed workflow is usually more practical.
If you are learning flash, the Godox V1 Round-Head Flash and Godox XPro Wireless Trigger are useful tools to have available. Just remember that owning flash equipment does not mean every image needs to be flash-blended.
Step-by-Step HDR Shooting Workflow
Here is the field workflow I recommend.
1. Prepare the Room
Before setting up the camera:
- Turn on or turn off lights consistently throughout the property
- Open blinds and curtains where appropriate
- Remove obvious distractions
- Straighten furniture
- Hide cords, remotes, bins, and personal items
- Check mirrors for your reflection
- Decide whether the room needs one composition or several
Good HDR starts with good composition. Software cannot fix a cluttered room or a weak camera position.
2. Choose the Camera Height
Interior camera height affects how spacious and natural the room feels.
As a general starting point, position the camera around chest height or slightly below eye level. Keep the camera level and avoid excessive upward or downward tilt.
If you tilt the camera upward, vertical lines begin to converge. You can correct some of this in Lightroom, but correcting it later may require cropping and reduce the usable image area.
3. Compose and Level the Frame
Use the widest focal length that shows the room honestly without creating distracting distortion.
For a full-frame camera, a lens such as the Sony FE 16-35mm f/2.8 GM II is a versatile choice. On a tighter budget, the Tamron 17-28mm f/2.8 can provide strong results with less weight and cost.
Check:
- Vertical walls
- Door frames
- Window frames
- Cabinet edges
- Horizon lines
- The amount of floor and ceiling included
4. Set the Exposure
Choose your aperture and ISO first. Then meter the room from an average midtone area, not directly from a window and not from the darkest corner.
You want the base exposure to represent the room reasonably well. The bracketed frames will handle the extreme highlights and shadows.
5. Activate AEB
Set your camera’s Auto Exposure Bracketing to three or five frames, depending on the scene.
AEB is generally faster and more consistent than manually changing shutter speed for every exposure. Ensure the aperture, ISO, focus, and white balance remain fixed.
6. Use Continuous Drive and a Timer
Continuous drive helps capture the bracket quickly. A short self-timer or remote shutter release reduces camera movement caused by pressing the shutter.
A fast sequence also reduces ghosting from:
- Ceiling fans
- Curtains moving near windows
- People walking through the frame
- Pets
- Tree branches visible outside
7. Review the Sequence
After taking the bracket, check that:
- All frames were captured
- The camera did not move
- The darkest frame contains window detail
- The brightest frame contains shadow detail
- The composition is level
- No person or pet moved into the image
Do not assume the camera completed the sequence simply because you pressed the shutter. A missed bracket can create a problem you do not discover until editing.
HDR Editing Software: AutoHDR, Lightroom, and Photomatix
AutoHDR
For a high-volume real estate workflow, I recommend looking closely at AutoHDR.
The reason is not simply that it merges exposures. Many programs can merge exposures. The business value comes from automating repetitive tasks such as:
- Grouping bracketed images
- Blending exposures
- Handling window pulls
- Correcting white balance
- Straightening images
- Removing camera or tripod visibility in some situations
- Applying consistent processing across a gallery
AutoHDR is designed around the needs of real estate media production rather than creative HDR effects. That distinction matters. You want natural rooms, clean windows, accurate colors, and repeatable output.

My recommended approach is still hybrid:
- Shoot carefully in camera
- Let AutoHDR handle the repetitive processing
- Review the results
- Make final creative and quality-control adjustments
- Deliver consistently
AI does not replace judgment. It gives you more time to apply judgment where it matters.
Lightroom HDR Merge
Adobe Creative Cloud includes Lightroom and Photoshop, and Lightroom’s built-in HDR Merge is a useful option.
A typical Lightroom workflow is:
- Import the bracketed RAW files
- Select the matching exposures
- Choose Photo Merge > HDR
- Enable Auto Align
- Use de-ghosting only when movement requires it
- Create the HDR DNG
- Adjust exposure, highlights, shadows, white balance, and contrast
- Correct lens distortion and perspective
- Sync appropriate settings across similar images
Lightroom is a strong choice if you already work inside the Adobe ecosystem or only process a moderate number of images.
The limitation is speed. Merging many brackets manually can become a bottleneck when you are processing multiple homes per day.
Photomatix
Photomatix is a dedicated HDR application with tools designed specifically for merging and tone mapping bracketed exposures. Its real estate HDR tutorial provides a useful overview of camera setup and exposure bracketing.
Photomatix can be a good fit if you want:
- Dedicated HDR controls
- More tone-mapping options
- Batch processing
- A standalone HDR application
- More control than a basic Lightroom merge
Use the software carefully. Aggressive tone mapping can create halos, crunchy textures, exaggerated colors, and an artificial “HDR look.”
How to Keep HDR Looking Natural
The best real estate HDR image should not announce how it was created.
Use these guidelines:
- Keep highlights controlled but not gray
- Lift shadows enough to show detail without flattening the room
- Preserve realistic contrast
- Avoid excessive saturation
- Reduce clarity if walls and textures look harsh
- Watch for halos around windows and rooflines
- Keep ceilings neutral
- Correct mixed color casts selectively
- Avoid making every room equally bright
- Maintain a believable relationship between interior and exterior light
A window view should look like it belongs in the room. If it looks pasted in, the blend is too obvious.
Likewise, a dark room should not look as though every light has been turned on with a giant studio softbox. Natural variation gives the property depth.

Common HDR Mistakes
1. Shooting Only Three Frames in Every Situation
Three frames are efficient, but they are not always enough. If the darkest frame still clips the windows or the brightest frame leaves black shadows, use five exposures.
2. Moving the Camera Between Exposures
Even small shifts can create double edges, ghosting, and soft details. Use a tripod, continuous drive, and a timer.
3. Changing the Aperture Between Brackets
This changes depth of field and can complicate the merge. Keep the aperture fixed.
4. Using Auto White Balance
A changing white balance can produce inconsistent color across the sequence. Set it manually.
5. Overprocessing the Image
HDR is not an excuse to maximize every slider. If the image looks dramatic on your editing monitor but unnatural on an MLS listing, back off.
6. Ignoring Vertical Lines
A bright, detailed image still looks amateur if walls and door frames lean. Keep the camera level and correct perspective during editing.
7. Including Too Much Window
Very wide lenses can make a room feel distorted and reduce the visual importance of the actual interior. Use the widest focal length that represents the space accurately.
8. Forgetting to Check Reflections
Mirrors, black appliances, glossy floors, and windows can reveal your camera, tripod, or reflection. Check them before leaving each room.
My Recommended HDR Processing Workflow
After years of processing real estate galleries, I prefer a simple three-stage system.
Stage 1: Capture Consistent Source Files
Use repeatable settings, fixed white balance, a level camera, and the appropriate three- or five-frame bracket.
Stage 2: Automate the Repetitive Work
Use AutoHDR for fast grouping, blending, and consistent processing. If you prefer a manual workflow, use Lightroom HDR Merge or Photomatix.
Stage 3: Perform a Human Quality Check
Review every final image for:
- Straight verticals
- Natural window views
- Accurate white balance
- Clean ceilings
- Realistic shadows
- Missing or duplicated objects
- Reflections and tripod visibility
- Consistent color across the gallery
If you need advanced cleanup, use Photoshop only where it adds value. Do not send every image through a complicated manual process simply because the software is available.
For a broader system, see the Real Estate Photography Editing Workflow and the 60-Minute Real Estate Photography Workflow.
HDR Real Estate Photography FAQ
Is HDR still relevant with modern cameras?
Yes. Modern cameras have excellent dynamic range, but interiors with bright windows can still exceed what a single exposure captures cleanly. HDR remains useful when the scene contains extreme contrast.
Should I always use a tripod for HDR?
A tripod is strongly recommended, especially for interiors with bright windows. Handheld bracketing can work with newer cameras in bright rooms, but a tripod improves alignment and precision.
Is three-shot HDR enough for real estate?
Often, yes. Start with -2, 0, and +2 EV. Use five exposures when the room contains very bright windows, direct sunlight, or deep shadows.
Should I shoot HDR with flash?
You can, but pure HDR and flash blending are different workflows. On-camera flash can look harsh and unnatural. If using flash, control it carefully and blend it intentionally.
Is flambient better than HDR?
Neither is universally better. Flambient provides more control but takes longer. HDR is usually faster and easier to automate. Choose based on the property, client expectations, and price of the service.
Can I use JPEG files for HDR?
You can, but RAW is the better choice. RAW files provide more information for highlight recovery, shadow detail, white balance, and color correction.
Should I use Lightroom or AutoHDR?
Lightroom is a capable all-purpose editor and works well for smaller galleries. AutoHDR is more useful when you want faster grouping, blending, and batch processing across many real estate shoots.
Does Photomatix create a realistic result?
It can. The final appearance depends heavily on your tone-mapping settings. Use restrained processing and avoid extreme presets.
How do I prevent ghosting?
Capture the bracket quickly, use continuous drive, keep the camera stable, and watch for moving objects. Software de-ghosting can help, but it cannot always repair significant movement.
Why do my HDR images look gray?
You may be lifting shadows too far, reducing contrast excessively, or using an overactive tone-mapping preset. Real rooms contain contrast. Preserve some shadow depth.
Why are my windows still blown out?
Your darkest exposure may not be dark enough. Add a lower exposure to the bracket or use a five-shot sequence with wider EV spacing.
Why are my walls and ceilings different colors?
Mixed lighting is often the cause. Turn lights on or off consistently during capture, use a fixed white balance, and make local color corrections during editing.
Can HDR replace good lighting?
No. HDR can balance exposure, but it cannot fix poor composition, ugly light, clutter, or inaccurate color. Capture quality still matters.
How long should HDR editing take?
For a standard home, your target should be measured in minutes rather than hours. Automation, presets, and a consistent review process can significantly reduce editing time.
Final Recommendation
HDR is one of the most useful systems in real estate photography because it provides a practical balance between quality and speed.
Start with:
- RAW capture
- ISO 100–400
- Approximately f/8
- Fixed white balance
- A level tripod
- Three exposures at -2, 0, +2 EV
- Five exposures when the contrast demands it
- Natural, restrained processing
For many photographers, the biggest improvement will not come from buying another camera. It will come from making the capture and editing process repeatable.
Use AutoHDR if you want to automate more of the repetitive work. Use Lightroom and Photoshop through Adobe Creative Cloud if you prefer a flexible manual workflow. Consider Photomatix if you want dedicated HDR controls and batch-processing options.
The goal is straightforward: capture better data, process it consistently, and deliver images that help your clients market homes effectively: without sacrificing every evening to editing.
For more equipment recommendations, read the Ultimate Real Estate Photography Gear Guide. Then explore the RE Media Systems guides for practical workflows covering photography, editing, business systems, and automation.