
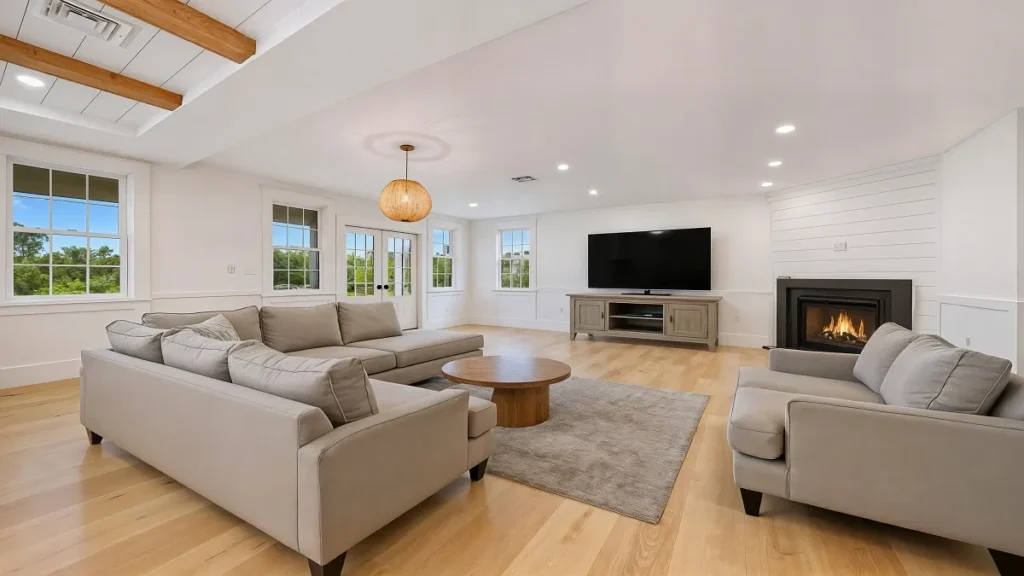
HDR is one of the most useful techniques in real estate photography, but only when you use it as part of a repeatable system.
The goal is not to create an exaggerated “HDR look” with heavy saturation, halos, and unnatural shadows. The goal is to produce a clean, realistic photograph that shows the interior, preserves the window view, and gives your client a finished image they can use to market the property.
After more than 14 years as a full-time real estate photographer and photographing over 10,000 homes, I have found that the best HDR workflow is the one that remains reliable when you are working quickly.
It needs to work in:
- Bright living rooms with large windows
- Dark basements
- Mixed-light kitchens
- Tight bathrooms
- Luxury properties with extreme contrast
- Exterior scenes with moving trees, clouds, and vehicles
- High-volume schedules where editing time directly affects your profit
In this guide, I’ll walk through the complete HDR process I recommend, from camera setup and bracketing to merging, window pulls, quality control, and delivery.
Scott’s Field Note: You are not paid for how long you spend blending exposures in Photoshop. You are paid for delivering high-quality media on time. Every HDR decision should help you shoot faster, deliver better quality, or improve your profit margin.
What Is HDR Real Estate Photography?
HDR stands for High Dynamic Range.
In real estate photography, HDR usually means capturing multiple exposures of the same composition and combining them into one final image.
A typical bracket contains:
- A darker exposure to preserve bright windows and exterior highlights
- A middle exposure for the room’s primary tones
- A brighter exposure to capture detail in dark corners and shadows
The problem is that real estate interiors often contain more brightness range than a single exposure can record cleanly.
If you expose for the room, the windows may become completely white. If you expose for the windows, the furniture and corners may become too dark.
HDR gives you additional source material so you can balance those areas during editing.

HDR does not automatically improve composition, focus, color, or perspective. You still need to:
- Place the camera carefully
- Keep vertical lines straight
- Choose an appropriate focal length
- Stabilize the camera
- Capture enough exposure range
- Blend the images naturally
HDR is a capture-and-editing system, not a button you press at the end.
Why HDR Is Essential for Real Estate Photography
Real estate photography has a specific visual challenge: you need to show a property as bright, spacious, and inviting while still representing it honestly.
That becomes difficult when the room contains:
- Bright windows
- Dark cabinetry
- Recessed lights
- Reflective floors
- White walls
- Dark furniture
- Mixed daylight and artificial lighting
A successful HDR image helps the viewer understand the room. They can see the floor, walls, furniture, fixtures, and exterior view without one part of the photograph becoming distracting or unusable.
This improves quality in several ways:
- Window views remain visible.
- Dark corners retain shape and texture.
- The room looks brighter without looking artificial.
- The final image is more consistent with the rest of the gallery.
- You spend less time trying to rescue a poorly exposed single frame.
The most important point is that HDR should support the property, not overpower it.
A real estate image should still look like a photograph of a real home.
My Standard HDR Bracketing Workflow
For most residential work, I keep my bracketing system simple.
My standard workflow is:
- Shoot RAW
- Use manual exposure
- Set the aperture around f/8
- Keep ISO at 100 whenever practical
- Focus once, then switch to manual focus
- Use a sturdy tripod
- Shoot three exposures at 2-stop intervals
- Move to five exposures at 2-stop intervals when contrast requires it
- Use seven exposures only in unusual, extremely high-contrast situations
- Fire the sequence quickly to reduce movement between frames
The smallest bracket that reliably captures the scene is usually the best bracket.
More frames do not automatically produce a better image. They create more files to manage and more opportunities for movement, ghosting, and inconsistent blending.
Three-Frame Bracketing: My Default
For most rooms, I use three exposures:
- -2 EV
- 0 EV
- +2 EV
This is fast, easy to organize, and usually provides enough information for a natural interior blend.
Three frames are generally suitable when:
- The room has moderate window contrast
- The windows are not facing direct sunlight
- The interior is reasonably bright
- The room is relatively static
- The image is primarily for MLS and online marketing
- The darkest frame preserves the window detail you need
A three-frame bracket is also useful for many exterior photographs. Exteriors usually have less contrast than interiors, although direct sunlight and bright skies can change that.
Pro Tip: After your first bracket, check the darkest frame. If the window view is still completely clipped, do not simply hope the software will fix it. Capture a darker exposure or switch to a five-frame bracket.
Five-Frame Bracketing: For Difficult Rooms
When the contrast is more extreme, I use five exposures at 2-stop intervals:
- -4 EV
- -2 EV
- 0 EV
- +2 EV
- +4 EV
Five frames are useful for:
- Large living rooms with bright windows
- Sunrooms
- Rooms facing direct sunlight
- Dark basements
- Interiors with important exterior views
- Luxury homes with polished, reflective surfaces
- Rooms where the three-frame bracket does not cover the full tonal range
The extra dark frame gives you more information for window pulls. The extra bright frame provides additional shadow detail.
I do not use five frames simply because they sound more professional. If three exposures solve the scene, three exposures are faster and easier.
Seven-Frame Bracketing: When It Makes Sense
Seven-frame bracketing is not part of my normal residential workflow.
A seven-frame sequence creates more data, but it also increases:
- Capture time
- File-management requirements
- Processing time
- Risk of movement between frames
- Potential for ghosting
- Possibility of inconsistent artificial lighting or flicker
Seven frames can be useful for an unusually high-contrast, completely static scene where five exposures still do not capture enough information.
A common approach is to use a narrower 1-stop spacing across a wider range, such as:
- -3 EV
- -2 EV
- -1 EV
- 0 EV
- +1 EV
- +2 EV
- +3 EV
However, I would not make this your default without a specific reason.
For most real estate interiors, I would first try:
- Three frames at ±2 EV
- Five frames at ±2 EV
- An additional dark exposure only if the windows still clip
That approach keeps the workflow efficient while solving the majority of lighting situations.
Bracketing Decision Table
| Scene | Recommended bracket | Reason |
|---|---|---|
| Balanced bedroom | 3 frames at ±2 EV | Fast and usually sufficient |
| Standard living room | 3 frames at ±2 EV | Good starting point for most homes |
| Room with several bright windows | 3 frames, then check the darkest frame | Move to five if windows clip |
| Bright sunroom | 5 frames at ±2 EV | Protects highlights and window views |
| Dark basement | 5 frames at ±2 EV | Provides more shadow information |
| Exterior in even light | Single RAW or 3 frames at ±2 EV | Avoids unnecessary processing |
| Extreme, static contrast | 7 frames if needed | Maximum flexibility, but slower and more prone to movement |
Manual Exposure vs. AEB
Both manual exposure and Auto Exposure Bracketing, or AEB, can work.
For a consistent professional workflow, I prefer manual exposure.
Manual exposure lets me control the important variables:
- Aperture remains fixed
- ISO remains fixed
- White balance remains fixed
- Only shutter speed changes between bracketed frames
That consistency is valuable when merging files. Depth of field does not change, exposure behavior is predictable, and the files are easier to process consistently.
Manual Exposure Setup
A practical starting point is:
- Mode: Manual
- Aperture: f/8
- ISO: 100
- Shutter speed: Set for the base exposure
- White balance: Fixed Kelvin or a fixed preset
- Drive mode: Continuous
- Focus: Manual after initial focus
- Bracketing: Adjust shutter speed across the exposure sequence
AEB can be useful if your camera operates it reliably in Manual mode.
Before depending on AEB, confirm that your camera changes only the shutter speed. You do not want the camera changing aperture or ISO between frames because that can affect depth of field, noise, and image consistency.
The important principle is not whether you use a physical AEB menu or manually change shutter speed. The important principle is that the aperture, ISO, focus, and white balance remain consistent.
Camera Settings for HDR Real Estate Photography
Aperture: Start Around f/8
I typically start around f/8 for interiors.
This provides a useful balance between:
- Depth of field
- Lens sharpness
- Shutter speed
- Diffraction control
- Overall consistency
You can use f/9, f/10, or f/11 when the scene requires additional depth of field, but f/8 is a practical starting point for many wide-angle interior compositions.
Do not choose an aperture simply because it is written in a guide. Check the room, the lens, and the depth you need.
ISO: Keep It Low
Use ISO 100 whenever practical.
A tripod allows you to use slower shutter speeds while keeping image quality high. In a dark room, ISO 200 or ISO 400 may be reasonable if it helps you reduce excessive exposure times.
The goal is to avoid unnecessary noise while still producing a reliable bracket.
Shoot RAW
RAW files provide more flexibility for:
- Highlight recovery
- Shadow adjustments
- White-balance correction
- Color correction
- Noise reduction
- HDR merging
JPEG files are already processed and compressed in the camera. They give you less room to recover difficult windows and shadows.
White Balance: Keep It Consistent
Use a fixed white balance rather than allowing it to shift between frames.
You can use:
- A fixed Kelvin value
- Daylight
- Cloudy
- A custom white-balance setting
The exact temperature depends on the property and lighting. The important thing is consistency across the bracket.
Mixed lighting is still difficult even with a fixed white balance. A room may contain warm lamps, cool daylight, and colored reflections from wood floors. That problem is usually solved with local adjustments during editing.
Focus Once, Then Lock It
Use autofocus to establish focus, then switch to manual focus before taking the bracket.
A practical sequence is:
- Compose the image.
- Focus on an appropriate area of the room.
- Confirm sharpness.
- Switch the lens to manual focus.
- Fire the complete bracket.
This prevents the camera from refocusing on a nearby chair, window frame, or foreground object between exposures.
Tripod Stability and Camera Position
A tripod is still one of the most valuable pieces of HDR equipment.
It helps you:
- Keep bracketed frames aligned
- Use low ISO
- Maintain consistent camera height
- Compose architectural lines carefully
- Use slower shutter speeds
- Reduce the need for aggressive alignment in post
The Manfrotto 055 Aluminum Tripod is a strong option when stability and durability are priorities. For photographers who need a lighter travel setup, the Sirui Carbon Fiber Travel Tripod is worth considering.
A tripod is only useful if it is positioned correctly. Avoid placing it on unstable flooring, loose rugs, or surfaces that move when you walk.
A geared head can also make composition faster and more precise. The Manfrotto 410 Junior Geared Head is designed for small, controlled adjustments that help you level the camera and keep vertical lines straight.
Choosing a Wide-Angle Lens
Your lens has a direct effect on the realism of the final image.
Use the widest focal length that solves the composition without making the room look distorted.
For Sony full-frame cameras, the Sony FE 16-35mm f/2.8 GM II is a versatile choice. If you need a wider field of view, consider the Sony FE 12-24mm.
For Canon RF users, the Canon RF 15-35mm f/2.8 L is a practical option. Nikon users can consider the Nikon Z 14-30mm f/4 S.
A lens that is too wide can stretch furniture, enlarge foreground objects, and make a small room appear misleadingly large.
For more gear recommendations, see the Ultimate Real Estate Photography Gear Guide and the Recommended Gear page.
Step-by-Step Interior HDR Capture Workflow
1. Prepare the Room
Before setting up the camera:
- Remove obvious clutter
- Straighten furniture
- Hide cables
- Open blinds or curtains when appropriate
- Turn on useful lights
- Turn off ceiling fans
- Move pets and people out of the frame
- Check mirrors and reflective surfaces
HDR cannot fix a poor composition or a distracting room.
2. Find the Hero Angle
Walk through the room before placing the tripod.
Look for the angle that best communicates:
- Room size
- Flow between spaces
- Architectural features
- Windows and natural light
- Built-in cabinetry
- Fireplaces
- Kitchen islands
- Important finishes
Do not photograph every room from the same angle if that angle does not show the room well.
3. Set Camera Height and Level
Use a consistent camera height throughout the property.
Keep the camera level to maintain straight vertical lines. Tilting the camera upward or downward can cause walls and door frames to converge.
Fixing perspective in post is useful, but getting the camera level in the room is faster and usually produces a better result.
4. Set Exposure and Focus
Set:
- RAW capture
- Manual exposure
- f/8
- ISO 100
- Fixed white balance
- Manual focus
- Three- or five-frame bracketing
Set the middle exposure so it represents a natural base exposure for the room.
5. Fire the Bracket Quickly
Use continuous drive mode and fire the complete sequence without touching the camera between frames.
A remote release or a short timer can help reduce camera shake. The faster the bracket is completed, the less chance there is for people, curtains, trees, or lights to move.
6. Check the Difficult Areas
You do not need to inspect every frame in detail.
Review:
- The first bracket of the property
- Rooms with large windows
- Dark basements
- Scenes with moving objects
- Any unusual lighting situation
Check the darkest frame for window detail and the brightest frame for usable shadow detail.
Exterior HDR Photography
Exterior scenes often need fewer exposures than interiors, but HDR can still be useful when the property is in strong sunlight.
A practical exterior starting point is:
- RAW
- ISO 100
- f/8 to f/11
- Three frames at ±2 EV
- Tripod when practical
- Fixed white balance
- Fast capture sequence
Be aware of movement from:
- Trees
- Grass
- Clouds
- Flags
- Cars
- People
- Water
- Wind-blown plants
If the exterior is evenly lit, a single RAW file may be enough. HDR is not mandatory for every photograph.
If you use a bracket, capture it quickly. A moving tree or cloud can create ghosting and inconsistent edges during the merge.
Editing HDR Images: Three Practical Workflows
There are three common approaches:
- Manual blending in Photoshop
- Lightroom HDR Merge
- Automated processing with AutoHDR
Each has a place in a professional workflow.
Workflow 1: Manual Blending in Photoshop
Manual blending offers the greatest control.
Use it when:
- A window pull is especially difficult
- The room contains complicated masks
- Reflections need detailed correction
- A hero image requires extra care
- Automated software produces an unnatural result
A basic manual blend looks like this:
- Develop the bracketed RAW files consistently.
- Open the relevant exposures as layers in Photoshop.
- Use Auto-Align Layers if necessary.
- Place the balanced interior exposure as the base layer.
- Add the darker exposure above it.
- Add a layer mask to the darker layer.
- Paint the window detail into the glass area.
- Use a soft brush around window frames.
- Inspect edges for halos and color transitions.
- Reduce layer opacity if the window looks too dark.
- Flatten or save the layered file according to your workflow.
Manual blending is powerful, but it is slow. I do not recommend hand-blending every image in a standard residential gallery unless your pricing supports that time.
Workflow 2: Lightroom HDR Merge
Lightroom’s HDR Merge is useful when you want to remain inside the Adobe workflow.
The general process is:
- Import the RAW files.
- Select the three, five, or seven exposures for one composition.
- Right-click and choose Photo Merge > HDR.
- Enable Auto Align if there was any camera movement.
- Start with Deghost: None when the scene is static.
- Use Low, Medium, or High deghosting only when movement is visible.
- Create the HDR DNG.
- Adjust white balance, exposure, highlights, shadows, and contrast.
- Correct perspective and straighten the image.
- Apply local adjustments to windows and dark areas.
- Sync appropriate settings across similar images.
Adobe recommends Auto Align when there is movement between frames, particularly with handheld brackets. On a stable tripod, it may not be necessary, but it can still help with minor shifts.
Deghosting should be used carefully. If there is no ghosting, do not apply it automatically. Deghosting replaces affected areas with information from a single exposure, which can sometimes produce unexpected results.
You can learn more through Adobe’s official Lightroom HDR Merge documentation.
Workflow 3: Automated Processing with AutoHDR
For high-volume real estate photography, automation can save significant time.
AutoHDR is designed around bracketed real estate images and presents tools for functions such as:
- HDR blending
- Window pulls
- White-balance correction
- Perspective correction
- Image straightening
- Sky replacement
- Camera removal
- Color correction
The exact features and workflow can change, so review the current product information before building your process around a specific tool.
My preferred approach is a hybrid workflow:
- Capture consistent brackets.
- Upload the files to AutoHDR.
- Allow the software to process the routine images.
- Review every image for quality.
- Correct obvious color, masking, and perspective problems.
- Move only the difficult images into Photoshop.
- Export using a standardized delivery process.
This is where Adobe Creative Cloud, including Lightroom and Photoshop, remains valuable. Automation handles repetitive work, while Adobe tools provide detailed control when an image needs manual correction.
Pro Tip: Automation does not mean you never inspect the images. It means you stop spending equal amounts of time on easy images and difficult images.
Window Pulls: Capture Them Correctly First
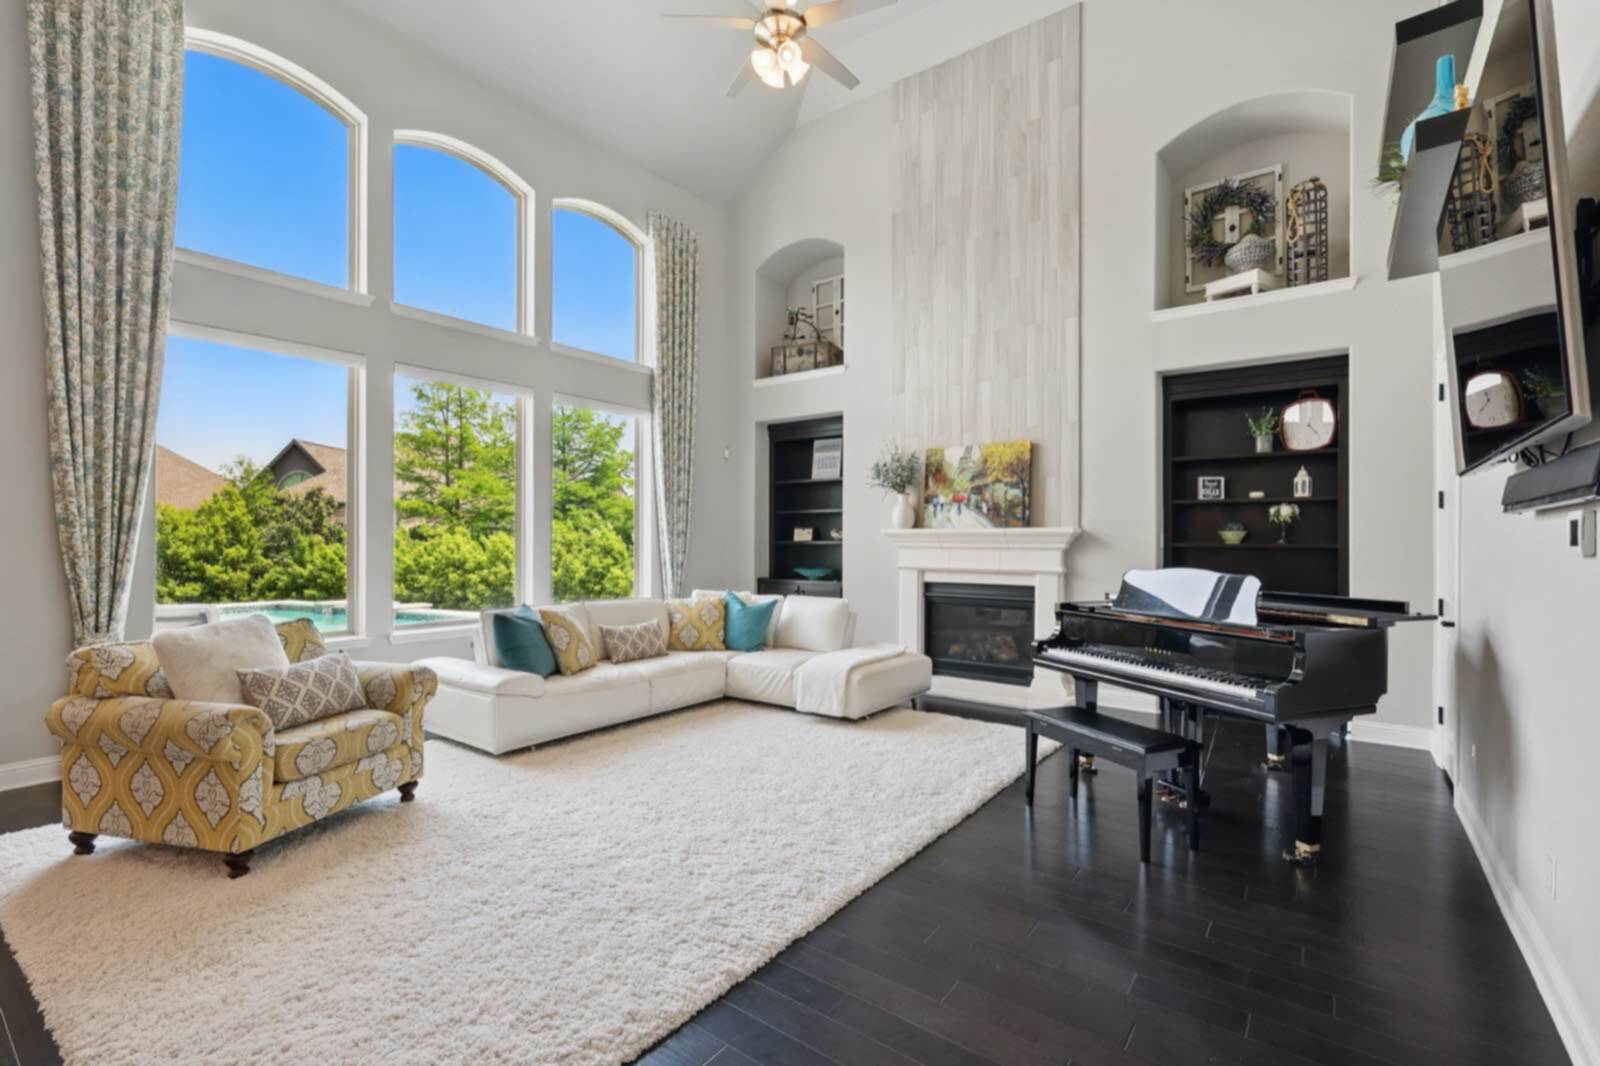
A window pull is a blend that preserves the exterior view while keeping the room naturally exposed.
The most important window-pull decision happens during capture.
If the darkest frame contains no usable detail in the window, the software cannot recover information that was never recorded.
Before leaving a difficult room, ask:
- Can I see trees, clouds, buildings, or landscape detail in the darkest frame?
- Are the window highlights clipped?
- Is the window frame sharp?
- Does the room still look natural?
- Is direct sunlight creating a severe contrast problem?
If the answer is no, capture a darker frame or move from three brackets to five.
Common HDR Mistakes and Fixes
Ghosting
Ghosting appears when objects move between exposures.
Common causes include:
- Curtains
- Ceiling fans
- Trees
- Cars
- People
- Pets
- Plants
- Water
- Flickering lights
Prevent it by using a tripod, firing quickly, and removing movement where possible.
In Lightroom, begin with no deghosting if the image is clean. If ghosting appears, try Low first and increase it only when necessary.
Color Shifts
Mixed lighting can produce orange, green, or blue color casts.
To reduce color shifts:
- Use fixed white balance
- Keep the same white balance across the bracket
- Correct large areas globally
- Use local adjustments for isolated light sources
- Avoid removing all warmth from lamps and wood surfaces
A room should look balanced, not colorless.
Haloing
Halos often appear around:
- Window frames
- Rooflines
- Furniture
- Bright wall edges
- Trees against the sky
They are usually caused by excessive tone mapping, clarity, dehaze, sharpening, or poor masking.
Reduce the adjustment strength and inspect edges at 100 percent.
Over-Processed HDR
The classic artificial HDR look usually includes:
- Excessive saturation
- Gray or lifted shadows
- Heavy clarity
- Dark halos
- Bright windows
- Flat contrast
- Unrealistic color
Real estate photography benefits from restraint. The finished image should look bright, clean, and polished: but believable.
Blown-Out Windows
If the window is white in the darkest frame, you need a darker exposure.
Do not try to fix every blown-out window with sliders. Capture the information correctly in the first place.
Camera Movement
Camera movement produces soft edges and misaligned frames.
Use:
- A sturdy tripod
- A geared head when appropriate
- A remote release or timer
- Continuous drive mode
- A stable surface
- Auto Align when needed during merging
Distorted Rooms
HDR does not make a room look larger. Excessive wide-angle use and aggressive perspective correction can.
Choose the widest lens that accurately represents the space. Keep the camera level and avoid stretching the edges of the frame.
HDR Quality-Control Checklist
Before delivering a gallery, inspect the following.
Capture
- The correct number of bracketed files exists
- The camera remained stable
- Focus did not shift
- The darkest frame contains window information
- The brightest frame contains usable shadow detail
- No significant movement occurred between frames
Editing
- Vertical lines are straight
- Windows look natural
- Shadows retain shape
- White walls and ceilings are neutral
- Warm lights remain believable
- There are no halos
- There is no ghosting
- Saturation is controlled
- The home still looks like the home
Business
- The entire gallery has a consistent look
- File names and folders are organized
- RAW files are backed up
- Exports meet the client’s requirements
- The gallery is delivered on time
- Difficult images are identified for workflow improvement
How HDR Helps You Shoot Faster and Earn More
HDR improves profitability when it is connected to a larger workflow.
A reliable system helps you:
- Make fewer exposure decisions on location
- Spend less time rescuing windows
- Reduce manual Photoshop work
- Process more homes per week
- Deliver galleries more consistently
- Train another photographer or editor
- Protect your turnaround time
- Maintain quality while increasing volume
This is why I teach HDR as part of a business system rather than as an isolated camera technique.
Your clients are not paying for the number of layers in your Photoshop file. They are paying for useful, attractive media delivered reliably.
If your capture process is inconsistent, editing becomes slow. If your editing process is inconsistent, quality control becomes difficult. If both are standardized, you can improve your hourly rate without necessarily shooting more hours.
The 60-Minute Real Estate Photography Workflow explains how HDR can fit into a faster room-by-room shooting system.
For the business side, use the Real Estate Photography Pricing Guide to make sure your pricing reflects the time, equipment, editing, and delivery involved in your service.
Frequently Asked Questions
1. What is the best HDR setting for real estate photography?
Start with three RAW exposures at -2, 0, and +2 EV, using manual exposure, ISO 100, and an aperture around f/8. Move to five exposures at ±2 EV when the scene has extreme contrast.
2. Should I use three or five HDR exposures?
Use three exposures for most rooms. Use five when the darkest three-frame exposure does not preserve the window view or when the brightest frame does not contain enough shadow detail.
3. Should I use seven exposures?
Seven exposures are rarely necessary for standard residential work. Consider them only for unusually high-contrast, static scenes where five exposures do not provide enough usable information.
4. Should I shoot HDR in RAW?
Yes. RAW files give you more flexibility for exposure, highlight, shadow, white-balance, and color adjustments.
5. Do I need a tripod for HDR?
A tripod is the most reliable option. It keeps bracketed images aligned, supports low ISO, and helps you compose straight architectural lines.
6. Should I use manual exposure or AEB?
I prefer manual exposure because it keeps aperture, ISO, white balance, and focus consistent while the shutter speed changes. AEB can work if your camera’s behavior is predictable and correctly configured.
7. What aperture is best for real estate HDR?
Start around f/8. You can move toward f/9, f/10, or f/11 when you need more depth of field, but choose the aperture based on the room and lens.
8. How do I prevent ghosting?
Use a tripod, continuous drive mode, and a fast bracket sequence. Turn off ceiling fans, keep people and pets still, and watch for moving trees and curtains.
9. Why do my HDR interiors look orange?
Mixed lighting is usually the cause. Use fixed white balance, then correct orange and yellow color casts with global and local adjustments.
10. How do I create better window pulls?
Make sure the darkest exposure contains actual detail in the window. If it does not, capture a darker frame or use a five-frame bracket.
11. Is AutoHDR better than Lightroom HDR Merge?
They serve different workflows. Lightroom is useful for photographers who want to merge and edit within Adobe. AutoHDR is useful for photographers who want more automation and higher-volume processing. Both require quality control.
12. Do I still need Photoshop if I use AutoHDR?
Sometimes. Photoshop remains useful for difficult window masks, reflections, object removal, and images that need detailed manual correction.
13. Can HDR fix a poorly composed photograph?
No. HDR can improve tonal range, but it cannot fix poor camera placement, excessive distortion, clutter, or weak composition.
14. Should I use deghosting on every HDR merge?
No. Start with no deghosting when the scene is static. Apply Low, Medium, or High only when movement creates visible ghosting.
15. How can I learn more about a complete real estate media workflow?
Start with the RE Media Systems Guides, then build a repeatable process covering capture, HDR editing, delivery, pricing, and client communication.
Final Recommendation
A professional HDR workflow is built on consistency, not complexity.
My recommended starting system is:
- Use a sturdy tripod.
- Compose with straight vertical lines.
- Shoot RAW.
- Set manual exposure.
- Use ISO 100 whenever practical.
- Start around f/8.
- Focus once, then switch to manual focus.
- Shoot three frames at -2, 0, and +2 EV for most rooms.
- Use five frames at -4, -2, 0, +2, and +4 EV for difficult contrast.
- Reserve seven frames for rare, static scenes that truly need them.
- Check the darkest frame for window detail.
- Use AutoHDR or Lightroom for efficient merging.
- Use Photoshop for images that need detailed correction.
- Keep color, contrast, and saturation natural.
- Perform a quality-control review before delivery.
When you capture the right information, HDR makes the rest of your workflow easier. You spend less time rescuing images, deliver more consistent galleries, and create a process that can support a profitable real estate media business.
That is the real purpose of HDR at RE Media Systems: helping you shoot faster, earn more, and deliver better quality.
Next Steps
- Follow the Real Estate Photography Editing Workflow.
- Explore AutoHDR for automated bracket processing.
- Get Adobe Creative Cloud for Lightroom and Photoshop.
- Review the Ultimate Real Estate Photography Gear Guide.
- Visit the Recommended Gear page.
- Watch practical workflow training on the RE Media Systems YouTube channel.