
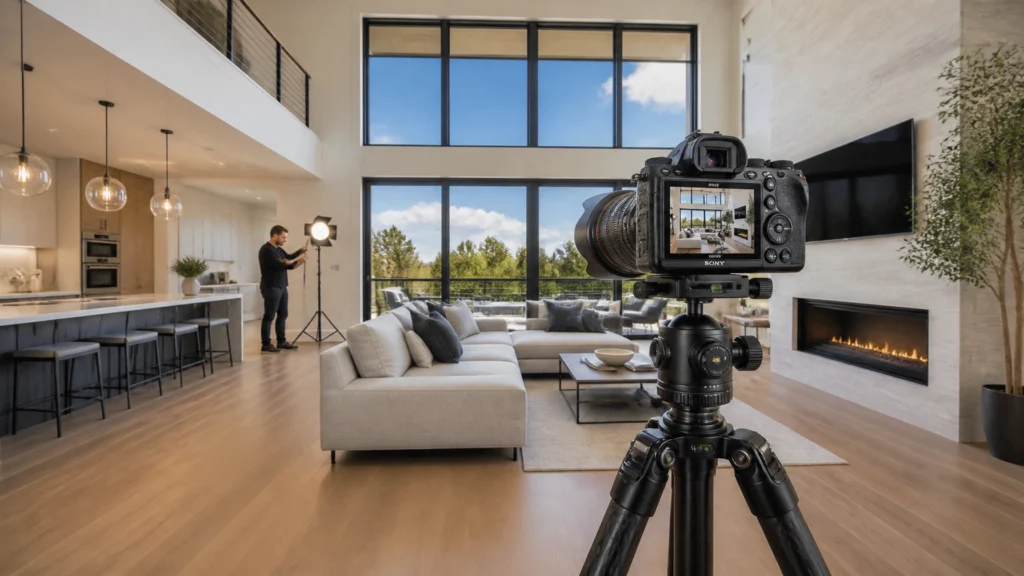
If you are serious about learning how to start a real estate photography business, you need more than a camera recommendation and a few generic marketing tips. You need a business model, a startup plan, a pricing framework, a repeatable workflow, and a clear path to getting profitable clients.
That is what this guide is built to provide.
Scott Prokop has spent more than 14 years as a full-time real estate photographer and has photographed more than 10,000 homes in the real world. That matters because this business looks very different from the outside than it does when you are shooting multiple properties every week, managing deadlines, handling agents, maintaining gear, controlling editing time, and protecting margins.
A lot of new photographers fail for predictable reasons. They buy too much gear too early. They underprice. They spend too much time editing. They market inconsistently. They never build systems. The result is a business that stays stressful, inconsistent, and less profitable than it should be.
This article is designed to be the most comprehensive and practical guide available on the internet for starting a real estate photography business in 2026. It is written for photographers who want to build a real company, not just pick up occasional side work. It is also written from the perspective of a working professional who has already made the mistakes, refined the systems, and proven what works over thousands of shoots.
If your goal is to shoot faster, earn more, and build a better real estate media business, start here.
1. Choose Your Business Model
Before you buy gear, build a website, or start messaging agents, decide what type of business you want to run. This choice affects your pricing, workflow, service menu, editing style, and target clients.
In real estate media, the biggest mistake is trying to be everything to everyone too early.
| Model | Target Client | Quality Level | Typical Positioning | Pricing |
|---|---|---|---|---|
| High-Volume HDR | Budget-conscious agents, teams, property managers | Standard HDR | Fast turnaround and competitive rates | Low ($150 – $225) |
| Mid-Tier Professional | Established agents and growing teams | Strong HDR or efficient flash-assisted workflow | Consistent quality, fast service, reliable systems | Mid ($225 – $500) |
| Luxury / Architectural | Luxury agents, builders, designers, architects | Magazine-level detail and higher production value | Premium branding and specialty expertise | High ($800 – $2,000+) |
Which model makes the most sense for beginners?
For most photographers, the best starting point is the mid-tier professional model. It gives you room to charge profitable rates without requiring a full luxury production workflow on day one. It also aligns well with what many agents actually need: reliable quality, consistent turnaround, and a service provider who helps them market listings better.
Scott has photographed more than 10,000 homes, and one pattern shows up repeatedly: the photographers who last are not always the most artistic. They are the ones with the clearest positioning and the most repeatable systems.
What your business model should answer
Before moving forward, define these five items:
- Who is your ideal client? Solo agents, teams, brokerages, builders, Airbnb hosts, or luxury specialists.
- What is your core offer? Stills only, stills plus drone, or full-service media packages.
- What is your quality standard? Fast and clean HDR, flash-assisted interiors, or premium architectural polish.
- What is your turnaround promise? Same day, next morning, or 24-hour standard delivery.
- What is your revenue target per shoot? This determines whether your model is sustainable.
If you are unclear on these points, your marketing and pricing will stay inconsistent.
2. Startup Roadmap: The First 90 Days
Most new photographers waste their first three months bouncing between gear research, social media scrolling, and random practice. A better approach is to treat the first 90 days like a structured launch period.
The goal is simple: become legally operational, build a usable portfolio, get your first paid clients, and install the systems you need to grow.
30-60-90 Day Roadmap
| Phase | Primary Objective | Action Steps |
|---|---|---|
| Days 1-30 | Build the foundation | Register your business, choose a business name, open a business bank account, secure liability insurance, research drone licensing requirements, choose your camera/lens/tripod setup based on budget, practice core shooting techniques, build a starter portfolio, create a Google Business Profile, launch a basic website, set up business email, create invoicing and contract templates, and organize file storage and backup. |
| Days 31-60 | Start getting paid | Offer strategic portfolio-build shoots, convert sample work into packaged deliverables, publish pricing, begin agent outreach, visit brokerages, refine your on-site workflow, track editing time, test turnaround standards, collect first testimonials, and begin posting work consistently on Google, Instagram, and Facebook. |
| Days 61-90 | Build consistency and prepare to scale | Focus on repeat clients, review profitable service types, add drone or floor plans if demand supports it, improve editing with presets or outsourcing, review financials, tighten contracts and communication, reinvest profits into weak areas of your setup, and create a growth plan for months 4-6. |
Days 1-30: Build the foundation
In the first 30 days, avoid the temptation to overbuild. You do not need a huge portfolio, a complex brand strategy, or every service under the sun. You need a legal business, a working kit, a basic online presence, and the technical ability to produce solid listing photos consistently.
Legal setup
At minimum, complete the following:
- Register your business according to your local requirements
- Open a dedicated business bank account
- Get general liability insurance
- Understand local business licensing rules
- Review tax obligations and bookkeeping requirements
- If you plan to offer drone services, begin the licensing process immediately
If you are in the US, that means understanding FAA Part 107 requirements before flying commercially. If you are in Canada, review the applicable RPAS rules. Do not treat this as optional.
Gear acquisition by priority
Your first purchases should be based on what will make you operational fastest.
Priority order:
- Camera body
- Wide-angle lens
- Sturdy tripod
- Memory cards and extra batteries
- Editing computer and monitor
- Software
- Drone
- Floor plan tools
- Video tools
That order matters. Too many photographers buy a drone before they own a stable tripod or a usable lens. That is backwards.
Portfolio building strategy
A starter portfolio does not need to be large. It needs to show competence.
Focus on:
- Bright living rooms
- Kitchens
- Bathrooms
- Bedrooms
- Exterior front and rear
- Twilight-style edits only if you can do them well
- One or two high-quality drone examples later, not immediately if you are not licensed
Use vacant homes, friends’ homes, family properties, Airbnb hosts, or model homes if you can get access. The key is to produce portfolio images that look like the work agents actually hire for.
Learn the technical fundamentals
Before charging, make sure you understand:
- Composition for interiors
- Straight vertical lines
- Exposure bracketing or flash-assisted capture
- White balance consistency
- Window pulls or balanced interiors
- Basic HDR workflow
- Efficient culling and file organization
If you need technical help, direct readers to your HDR resources and tutorials. Suggested internal links:
Set up your business systems
You need a minimum viable system stack before you start booking jobs:
- Business email
- Contract template
- Invoice template
- Payment collection method
- Calendar scheduling tool
- Cloud storage
- Local backup
- Job naming convention
- Delivery method
Simple systems beat complicated systems. Scott’s approach after thousands of shoots has always been to remove friction first.
Create your Google Business Profile and website
Your website does not need to be fancy. It does need to communicate trust.
Include:
- Homepage
- Portfolio
- Services
- Service area
- About page
- Contact page
- Clear call-to-action
Your Google Business Profile should include:
- Accurate business category
- Service areas
- Business hours
- Website
- Phone number
- Portfolio photos
- Short service description
- Review request system
3. Realistic Startup Budget
One of the most common questions in this industry is how much it actually costs to start. The honest answer is that you can start lean, but there is a big difference between a cheap setup and a sustainable setup.
Startup budget comparison
| Setup Level | Budget Range | Typical Gear | Best For | Limitations |
|---|---|---|---|---|
| Budget Setup | $2,000-$3,500 | Entry-level APS-C camera, kit lens or affordable wide-angle, basic tripod, low-cost memory cards, free or low-cost software, no drone | Photographers testing the market or starting part-time | Lower image quality margin, less flexibility in low light, limited upgrade runway, no drone upsells |
| Recommended Professional Setup | $5,000-$8,000 | Sony A7III/A7IV or equivalent full-frame body, 16-35mm f/2.8 or f/4, sturdy tripod, DJI Mini-series drone, Lightroom + Photoshop, basic editing monitor | Most serious new businesses | Higher upfront cost, still may need later upgrades for volume, scanner and backup body often not included |
| Premium Long-Term Investment | $10,000-$15,000+ | Sony A7RIV/A7RV or high-resolution full-frame, 16-35mm f/2.8 GM, professional tripod, DJI Air/Mavic drone, backup body, high-end monitor, Matterport or iGUIDE scanner, multiple lenses, premium backpack and storage system | Operators planning full-time growth and full-service packages | Highest startup cost, can create unnecessary pressure if demand is not established |
Trade-offs of each approach
Budget setup: lowest risk, slower growth
A budget setup can work if you already understand photography and need to enter the market carefully. The problem is that lower-end gear often creates more friction. Autofocus may be weaker. Dynamic range may be more limited. Build quality may be less reliable. You can still produce strong work, but your margin for error is smaller.
Recommended professional setup: best balance
For most people, this is the smart range. A solid full-frame camera, a 16-35mm lens, a strong tripod, and a small drone cover the majority of real estate work. This setup supports stills, exteriors, interior HDR, and drone add-ons without pushing you too deep into unnecessary gear spending.
Premium setup: best if demand already exists
A premium setup makes sense if you already have client demand, previous experience, or a plan to offer higher-value services quickly. The advantage is efficiency, backup capacity, better file quality, and stronger upsell options. The downside is obvious: if you do not yet have bookings, expensive gear can create financial pressure.
What to prioritize first
If your budget is limited, prioritize in this order:
- A reliable camera body
- A quality wide-angle lens
- A sturdy tripod
- A computer that can handle editing
- Backup storage
- Software
- Drone
- Scanner
- Video tools
This is also where Scott’s experience matters. After more than 10,000 homes, the gear that consistently pays for itself is not always the flashiest gear. It is the gear that saves time, reduces failure risk, and supports a repeatable workflow.

Recommendation: If you want a practical starting point, review our Recommended Gear page and build around one strong stills kit before adding every extra service.
4. Complete Equipment Checklist
Gear should support speed, consistency, reliability, and profitability. It should not exist just because it looks impressive on a YouTube shelf.
Camera Body
- Full-frame mirrorless is recommended
- Good dynamic range matters more than extreme burst speed
- Dual card slots are ideal for paid work
- Examples: Sony A7III, A7IV, A7RIV, A7RV, or equivalent full-frame options from other brands
Wide-Angle Lens
- A 16-35mm full-frame lens is the money lens in this business
- It handles small bathrooms, bedrooms, kitchens, and exteriors without fisheye distortion
- If there is one lens category to prioritize, this is it
Backup or Travel Lens
- A 24-70mm or 24-105mm is useful for tighter exteriors, detail shots, branding photos, and general business use
- Not required on day one, but useful quickly
Sturdy Tripod
- Use a tripod that stays stable on uneven floors and exterior surfaces
- A ball head and quick-release plate improve efficiency
- Cheap tripods create hidden costs through blur, leveling issues, and wasted time
Drone
- DJI Mini, Air, or Mavic series are the standard choices for many real estate shooters
- Match the drone to your market and service level
- Start only after you are licensed and comfortable flying commercially
Memory Cards
- Keep at least 4x 128GB or larger SD or CFexpress cards depending on your camera
- Rotate cards consistently and replace questionable cards early
Batteries
- At least 3 batteries for your camera
- At least 3 or more batteries for your drone
- Dead batteries are workflow failures, not minor inconveniences
Editing Computer
Recommended minimums:
- Modern multi-core CPU
- 16GB RAM minimum, 32GB preferred
- Dedicated GPU for heavier editing and video
- Fast internal SSD
- Reliable ports or dock if using a laptop
External Hard Drives and Backup System
Use both:
- Local backup
- Cloud backup
A practical baseline:
- Working drive
- Local clone backup
- Cloud backup
Editing Monitor
- Color-accurate display
- 4K preferred
- Consistent brightness and calibration support
- A poor monitor leads to inconsistent color and brightness delivery
Software Stack
- Adobe Lightroom Classic
- Adobe Photoshop
- HDR tools if needed
- Delivery platform
- CRM and scheduling software
- Accounting system
Floor Plan Scanner
Depending on your business model:
- CubiCasa
- iGUIDE
- Matterport
Each has different cost structures, learning curves, and deliverable formats.
Gimbal
- Useful for walkthroughs, reels, and short-form video
- Not mandatory on day one if stills are your immediate focus
Camera Bag or Backpack
- Choose a system that protects gear and speeds up access
- Comfort matters if you are shooting multiple properties in a day
Accessories
Do not overlook small items:
- Rocket blower
- Lens cloths
- Portable SSD
- Card wallet
- Extra quick-release plate
- Tethering cable if relevant
- Rain cover
- Small flashlight
- Business cards
Equipment checklist summary
Use this as a simple packing reference:
- Camera body
- 16-35mm wide-angle lens
- 24-70mm or 24-105mm backup lens
- Tripod with ball head
- Drone
- Memory cards
- Camera batteries
- Drone batteries
- Laptop or desktop editing system
- Local and cloud backup
- 4K editing monitor
- Lightroom and Photoshop
- Floor plan scanner
- Gimbal
- Backpack
- Cleaning and storage accessories
Suggested internal link: Recommended Gear
5. Sample Pricing Structure and Profitability Framework
A lot of articles tell you what to charge. Fewer explain how to think about pricing. That is the more important skill.
If you do not understand your costs, you will underprice without realizing it. If you only copy competitors, you can end up matching someone else’s bad business model.
Cost-plus pricing vs. value-based pricing
Cost-plus pricing
This method starts with your costs and adds profit.
You calculate:
- Shooting time
- Editing time
- Travel
- Software
- Insurance
- Gear wear
- Delivery costs
- Taxes
- Profit target
This gives you a floor price. It tells you the minimum you can charge and still operate sustainably.
Value-based pricing
This method considers what your service is worth to the client.
A top-producing agent is not buying your photos because they care about your camera. They are buying:
- Faster listing launch
- Better presentation
- Better brand positioning
- More seller confidence
- More repeat business
Value-based pricing is why two photographers in the same city can charge very different rates for similar deliverables.
Understand your COGS
You need to know your cost of goods sold (COGS) or at least your direct job-related costs.
Include:
- Gear depreciation
- Software subscriptions
- Editing labor or outsourcing
- Travel costs
- Fuel and vehicle wear
- Cloud storage and delivery costs
- Insurance
- Taxes
- Admin time
- Payment processing fees
If you ignore these costs, you are not calculating profit. You are guessing.
Three-tier package structure
A simple package structure is usually the easiest to sell.
| Package | Deliverables | Positioning |
|---|---|---|
| Base | Stills only | Entry package for smaller listings and budget-sensitive clients |
| Standard | Stills + drone | Best fit for most residential listings |
| Premium | Stills + drone + floor plan and/or video | Higher perceived value and stronger average order value |
Example pricing framework
Actual numbers vary by market, but the structure below is practical:
- Base Package: 25-35 edited listing photos
- Standard Package: 25-35 edited photos plus drone photos
- Premium Package: 25-35 edited photos plus drone plus floor plan or short-form video
Square footage modifiers
Do not charge the same price for every property. Use square footage tiers or time-based modifiers.
Example structure:
- Up to 1,500 sq ft
- 1,501-2,500 sq ft
- 2,501-3,500 sq ft
- 3,501-5,000 sq ft
- 5,000+ sq ft custom quote
This protects your time and helps clients understand why larger homes cost more.
How to calculate your minimum profitable rate
Use this simple framework:
- Add your monthly business costs
- Add your target salary
- Add your tax reserve
- Divide by the number of shoots you can realistically complete
- Add margin for growth and reinvestment
For example, if your monthly operating costs and income target require $8,000, and you can realistically complete 25 profitable shoots per month, you need to average at least $320 per shoot before accounting for extra margin and growth.
That is why underpricing is so dangerous. Small pricing errors multiply quickly.
Why photographers underprice
Common reasons include:
- They compare themselves to the cheapest competitor
- They feel insecure because they are new
- They do not understand their real costs
- They think low prices are the easiest way to get clients
- They confuse being busy with being profitable
How to fix underpricing
- Build packages instead of selling random add-ons one at a time
- Raise rates in small but deliberate steps
- Add square footage tiers
- Improve communication and presentation
- Increase perceived value through consistency, speed, and reliability
- Track profit, not just revenue
Profit margin targets
A healthy real estate media business should aim for approximately 50-70% gross margins, depending on your model, outsourcing level, and market. If your margins are much lower, investigate:
- Over-editing
- Too much driving
- Weak package structure
- Unprofitable add-ons
- Underpriced large homes
- Excessive manual labor
Annual pricing review strategy
Review pricing at least once per year.
Trigger points for raising prices include:
- Higher software or insurance costs
- Increased editing labor
- New services or better deliverables
- Stronger demand than capacity
- Better portfolio and brand positioning
Scott’s real-world experience supports one clear lesson here: profitable businesses survive market changes better than cheap businesses.
6. Professional Workflow: Shoot Faster, Earn More
Efficiency is the engine of profitability. If a standard listing takes too long to shoot, too long to edit, and too long to deliver, your margins disappear.
After 14+ years in the field, Scott’s perspective is simple: speed alone is not the goal. Controlled speed is the goal. You need a workflow that is fast, repeatable, and consistent.
The RE Media Systems workflow
- Pre-shoot preparation
- Send a prep checklist before the appointment
- Confirm access, lockbox details, and deliverables
- Review weather and sunlight direction if drone or exteriors matter
- Arrival and walk-through
- Turn on lights
- Turn off fans
- Open or adjust blinds as needed
- Walk the house before shooting
- Identify problem rooms and priority spaces
- Capture in a logical order
- Start at the front exterior or entry sequence
- Work with the natural flow of the home
- Keep camera height consistent
- Bracket or light consistently
- Avoid random room order that causes omissions
- Post-production
- Cull efficiently
- Apply presets or batch corrections
- Blend windows and exposure carefully
- Maintain natural colors and realistic brightness
- Deliver a consistent final gallery
- Delivery and follow-up
- Deliver on time
- Include download instructions
- Request reviews
- Ask for referrals when the client is happy
The 60-minute shoot workflow
One of the biggest growth advantages in this business is learning to complete a standard listing efficiently. A useful benchmark for many average homes is a 60-minute stills shoot, depending on size, condition, and services included.
A practical target for a standard property:
- 5-10 minutes: walk-through and setup
- 35-40 minutes: still photo capture
- 10 minutes: drone if applicable
- 5-10 minutes: final checks and pack out
That speed only works if your process is disciplined. It does not happen by rushing. It happens by reducing wasted decisions.
Ways to reduce workflow friction
- Use a consistent lens and focal length range
- Shoot with a repeatable room sequence
- Standardize camera height
- Use templates for file naming
- Batch edit where possible
- Avoid over-delivering unnecessary images
- Use checklists for every appointment

Suggested internal links:
7. Marketing and Client Acquisition
You do not build a real estate photography business by waiting for agents to discover you. Client acquisition needs to be systematic.
Google Business Profile optimization
For many local service businesses, Google Business Profile is one of the highest-leverage assets you can build.
Optimize:
- Primary category
- Service descriptions
- Service areas
- Real portfolio images
- Review collection process
- Posts featuring recent work
- Accurate NAP information
Ask every satisfied client for a review. Reviews influence trust and local visibility.
Local SEO for real estate photographers
Your website should target local search terms naturally, including:
- Real estate photographer in your city
- Drone photography for real estate in your area
- Floor plans for listings in your area
Create pages for:
- Primary city
- Secondary service areas
- Individual services
- Portfolio categories
- About page with experience and credibility
YouTube channel strategy
A YouTube channel can build authority faster than most photographers expect.
Useful content ideas:
- Behind-the-scenes listing shoots
- Editing breakdowns
- Drone tips
- Gear recommendations
- Agent-focused listing presentation advice
- Before/after transformations
This works well because it demonstrates both competence and personality. It also supports long-term SEO and trust.
Instagram and Reels strategy
Instagram still matters because agents live there.
Post:
- Strong listing highlights
- Carousel before/afters
- Reels showing fast transformations
- Short educational clips
- Drone snippets
- Consistent branding and captions
Your goal is not vanity engagement. Your goal is agent attention and familiarity.
Facebook for local visibility
Facebook remains useful for:
- Local agent groups
- Brokerage communities
- Neighborhood business groups
- Referral discussions
- Business page reviews
Use it strategically. Engage locally instead of posting blindly.
Brokerage relationships and office visits
This is still one of the best growth channels.
Bring:
- Printed sample work
- A concise service menu
- Business cards
- A clean explanation of your turnaround and reliability
Top agents value service providers who reduce friction. Show them how you do that.
Direct mail and printed marketing materials
Printed materials still work when done professionally.
Consider:
- Mini portfolio cards
- Service one-sheets
- Intro mailers to top-producing agents
- Leave-behind brochures for brokerage visits
Referral systems
Do not wait passively for referrals. Create a process.
Ask after:
- A successful shoot
- A positive testimonial
- A repeat booking
- A strong delivery experience
Use language like:
“If you know another agent who needs consistent media and fast turnaround, I’d appreciate an introduction.”
Email marketing
Email is underused in this industry.
Use it for:
- Monthly newsletters
- Seasonal marketing tips for agents
- New service announcements
- Listing presentation ideas
- Reminder emails to inactive clients
Networking with related service providers
Build relationships with:
- Stagers
- Home inspectors
- Realtors
- Broker owners
- Builders
- Designers
- Videographers
- Sign companies
- Marketing agencies serving real estate
These referral channels often produce better clients than random cold outreach.
Before/after portfolio presentations
Before/after comparisons help agents see your value quickly. Show:
- Straight vertical correction
- Balanced HDR
- Clutter reduction where appropriate
- Sky replacement restraint
- Better composition choices
Free portfolio-build shoots
Yes, free shoots can work. No, they should not become your business model.
Offer them strategically:
- To strong agents with visible listing volume
- For desirable portfolio homes
- With a clear limit
- With clear expectations
- With a follow-up system

Suggested internal links:
8. Systems, Automation, and Scaling
At the beginning, talent helps you get noticed. Over the long term, systems determine whether you stay profitable.
This is one of the clearest lessons from running a real-world real estate media business over thousands of shoots. The businesses that scale are not built on heroic effort. They are built on repeatable systems.
Why systems matter more than talent
A talented photographer with no systems often struggles with:
- Missed messages
- Slow turnaround
- Inconsistent files
- Pricing confusion
- Scheduling issues
- Burnout
A solid system turns good work into reliable work.
Scheduling and calendar management
Use tools that reduce back-and-forth:
- Online booking requests
- Appointment confirmations
- Automated reminders
- Calendar blocking for editing and travel
- Buffer time between shoots
Client communication automation
Create templates for:
- Inquiry replies
- Quote delivery
- Prep checklists
- Confirmation emails
- Delivery emails
- Review requests
- Referral requests
This saves time and improves consistency.
Editing automation
Use:
- Presets
- Batch processing
- AI masking
- AI sky replacement where appropriate
- Noise reduction
- Standard export templates
Automation should reduce repetitive work, not replace judgment.
Delivery platforms and proofing systems
Use delivery tools that keep the client experience clean.
Examples:
- Pixiset
- HDPhotoHub
- ShootProof
- Custom gallery systems
You want fast delivery, easy download access, and clear organization.
Outsourcing editing
Outsource when:
- Editing is limiting your booking capacity
- Your turnaround is slipping
- Your margins support it
- Your style is clearly defined enough to hand off
Keep in mind that outsourced editing only works well if your capture process is consistent.
Standard operating procedures
Create SOPs for:
- Pre-shoot communication
- On-site checklist
- File import and backup
- Editing sequence
- Delivery steps
- Invoice follow-up
- Review request timing
Scalable pricing structures
Scaling becomes easier when your pricing is standardized. Avoid highly customized quoting for every small job unless you are operating at the luxury end of the market.
How automation creates freedom
Automation does not just save time. It gives you:
- More scheduling flexibility
- Better client experience
- Less admin fatigue
- Faster delivery
- Higher capacity
- More room to focus on profitable work
For photographers who want to grow beyond a one-person bottleneck, this is a major shift.
9. Essential Software Stack
Software choices affect speed just as much as camera gear. The right stack helps you deliver faster, stay organized, communicate better, and protect margins.
Photo editing
- Adobe Lightroom Classic for culling, cataloging, global corrections, and workflow control
- Adobe Photoshop for advanced blending, window pulls, object cleanup, sky work, and finishing touches
HDR and blending software
Depending on your workflow:
- Aurora HDR
- Photomatix
- Manual blending in Photoshop
Some photographers prefer full control with manual blending. Others prioritize speed. Choose based on your service model and desired look.
AI editing tools
Useful categories include:
- AI sky replacement
- Subject selection
- Noise reduction
- AI masking
- Object removal
Use these to save time, not to make homes look fake.
Floor plan software
- CubiCasa for simple app-based floor plans
- iGUIDE for more advanced property data and floor plan workflows
- Matterport for 3D tours and spatial capture
Virtual tour platforms
- Matterport
- CloudPano
- Kuula
- EyeSpy360
Your choice depends on client demand, monthly cost, and how integrated you want your service stack to be.
Delivery and proofing
- Pixiset
- HDPhotoHub
- ShootProof
- Custom galleries
A clean delivery experience improves perceived professionalism immediately.
CRM and scheduling
- HoneyBook
- 17hats
- Dubsado
- Calendly
A CRM is especially useful once you have repeat clients, multiple open jobs, and follow-ups to manage.
Accounting
- QuickBooks
- FreshBooks
- Wave
Do not run your finances from memory and a random spreadsheet forever.
Automation tools
- Zapier
- IFTTT
- Custom workflows between forms, calendars, emails, and delivery tools
AI tools for photographers
- ChatGPT for copywriting, email drafts, blog outlines, service descriptions, and content ideas
- AI editing tools for repetitive post-production tasks
Website builders
- WordPress
- Squarespace
- Wix
Choose the one you can maintain consistently. A simple site that stays updated is better than a complex site you never finish.
Email marketing
- Mailchimp
- ConvertKit
- Flodesk
YouTube and video tools
- DaVinci Resolve
- Premiere Pro
- CapCut
Suggested internal links:
10. Common Mistakes New Real Estate Photographers Make
Most beginner mistakes in this business are not unique. They are predictable. That is good news, because predictable mistakes can be avoided.
1. Underpricing services
Low pricing feels safe, but it usually leads to poor margins, burnout, and weak clients.
2. Buying too much gear too soon
Expensive gear does not fix weak composition, bad workflow, or unclear positioning.
3. Not having a contract
A contract protects expectations, payment terms, usage terms, cancellation rules, and liability.
4. Delivering inconsistent quality
Agents value consistency more than occasional brilliance.
5. Not specializing
Trying to do weddings, portraits, headshots, events, and real estate all at once usually slows progress.
6. Ignoring the business side
Bookkeeping, taxes, insurance, and margins matter as much as camera settings.
7. Poor client communication
Late replies and vague expectations damage trust fast.
8. Not having insurance
This is a basic business requirement, not an optional upgrade.
9. Slow turnaround times
In this industry, speed matters. Delayed delivery costs clients momentum.
10. Not marketing consistently
One good month of posting or outreach does not build a pipeline.
11. Over-editing or using flashy edits
Agents want clean, natural, marketable photos. Heavy effects usually reduce credibility.
12. Failing to network with brokerages
Brokerages are still one of the highest-value relationship channels.
13. Not asking for referrals
Happy clients often refer, but many need a prompt.
14. Spending too much time editing manually
If every image becomes a custom art project, your business model breaks.
15. Not having a backup system for gear and data
A failed drive or damaged card can become a business crisis.
16. Accepting every job regardless of profitability
Not every inquiry is a good fit. Some jobs lose money.
17. Shooting without a consistent workflow
Random processes create missed shots, uneven quality, and slower editing.
18. Not setting clear client expectations upfront
Clarify prep requirements, turnaround, deliverables, weather limitations, and rescheduling terms.
A good rule is this: if a mistake creates rework, confusion, or margin loss, build a system to prevent it.
11. Frequently Asked Questions
1. How much money do I need to start a real estate photography business?
Most people can start between $2,000 and $8,000, depending on whether they begin with a lean setup or a more professional full-frame kit. A more complete long-term setup can reach $10,000-$15,000+.
2. Do I need a drone to start?
No. You can start with still photography only. A drone becomes valuable once your market demands it and you are properly licensed.
3. How long until I can make a full-time income?
That depends on your market, pricing, consistency, and marketing. Many photographers can build toward full-time income in 6 to 12 months, but only if they treat this like a business.
4. What camera should I buy as a beginner?
A reliable full-frame mirrorless body is the best long-term choice for most people. Models like the Sony A7III or A7IV remain strong starting points.
5. Do I need a business license or insurance?
In most markets, yes. At minimum, review local business registration requirements and secure liability insurance before shooting paid jobs.
6. How do I find my first real estate clients?
Build a clean starter portfolio, optimize your website and Google Business Profile, reach out to agents directly, visit brokerages, and use a few strategic portfolio-build shoots.
7. Should I offer free shoots to build my portfolio?
Yes, but only strategically. Limit them, target agents who can send repeat business, and use them to build a portfolio that reflects the type of work you want.
8. How many photos should I deliver per shoot?
For many standard listings, 25-35 delivered images is enough. Larger homes may need more, but avoid over-delivering just to inflate numbers.
9. What’s the best editing software for real estate?
For most photographers, Adobe Lightroom Classic and Photoshop are the core tools. Add HDR or AI tools based on your workflow.
10. How do I handle homes that are dirty or cluttered?
Set expectations before the appointment. Provide a prep checklist. If the home is not ready, either shoot as-is or reschedule based on your policy.
11. Do I need to offer video right away?
No. Start with stills, then add video once your still photography workflow and client base are stable.
12. Should I outsource my editing?
Outsourcing can make sense once you have enough volume and a consistent style. It often becomes worthwhile when editing limits your capacity or hurts turnaround.
13. How do I price my services competitively without undervaluing my work?
Know your costs, build packages, use square footage tiers, and position around reliability and outcomes rather than price alone.
14. What kind of contract should I use?
Use a service agreement that covers scope, payment terms, turnaround, cancellations, rescheduling, weather limitations, licensing, and liability.
15. How do I transition from part-time to full-time?
Track demand, revenue consistency, margins, and repeat bookings. Move full-time when your systems and client base are stable enough to support it.
16. Is real estate photography still profitable in 2026?
Yes. It remains profitable for photographers who build efficient systems, offer useful add-ons, market consistently, and price correctly.
17. Do I need Part 107 to fly a drone commercially?
In the US, yes. You need a Part 107 certificate for commercial drone work. Follow your local regulations if you are outside the US.
18. What’s the best way to learn real estate photography?
Learn from photographers who actually run the kind of business you want to build. Study technical shooting, editing, pricing, systems, and client acquisition together, not as separate topics.
12. Summary of Key Takeaways
- Choose a clear business model. Do not try to serve every client type with every service on day one.
- Start with a realistic 90-day plan. Structure beats guesswork.
- Buy gear in the right order. Camera, lens, tripod, editing setup, then add-ons.
- Price for profit, not just activity. Revenue without margin is not a stable business.
- Build systems early. Scheduling, delivery, communication, editing, and backup all affect profitability.
- Market consistently. Google, local SEO, brokerages, referrals, and social channels all matter.
- Use software and automation deliberately. Save time without sacrificing quality.
- Avoid predictable beginner mistakes. Many business failures are operational, not artistic.
- Think long term. The goal is not just to book a few shoots. The goal is to build a business that gets stronger every quarter.
13. What To Do Next
If you want to turn this guide into action, use the following progression.
- Download the 60-Minute Shoot Blueprint
Start with the operational side. Use our Free Downloads to build a faster on-site workflow. - Study the gear guides on the Recommended Gear page
Review the gear Scott actually recommends on the Recommended Gear page. - Master HDR workflow
Learn how to create clean, balanced interiors through our HDR and editing content on the blog. - Learn drone photography basics
Study licensing, safety, and real estate drone workflow before adding aerial services. - Study pricing strategy guides
Work through pricing resources so you understand margins, square footage tiers, and package design. - Explore AI tools and automation guides
Use AI and automation to reduce repetitive work, improve turnaround, and create more schedule flexibility. - Learn editing workflows and outsourcing
Build a process that lets you maintain quality without getting trapped in manual editing all day. - Study marketing and client acquisition guides
Focus on local SEO, outreach, referrals, brokerage relationships, and authority-building content. - Explore course offerings for advanced training
If you want a deeper system, visit the Start Here page and related training resources. - Subscribe to the newsletter and YouTube channel
Stay current with new workflows, gear updates, marketing ideas, and business systems from RE Media Systems.
If you want to build a better business faster, keep learning from people who have already done the work at scale. Scott’s 14+ years in the field and 10,000+ homes photographed are the reason RE Media Systems focuses so heavily on practical systems, not theory. That is also the mission behind this site: helping photographers shoot faster, earn more, and build better real estate media businesses.
Suggested Image Placements
To support the expanded article without exceeding six total images, use images strategically in the following sections:
- Cover image at the top of the article showing a professional real estate photography setup in a modern home.
- Gear layout image in the startup budget or equipment checklist section showing camera body, 16-35mm lens, tripod, drone, batteries, and accessories.
- Workflow image or diagram in the professional workflow section showing on-site shooting sequence, file flow, or editing pipeline.
- Pricing framework graphic or table screenshot in the pricing section to reinforce package structure and square footage tiers.
- Brokerage or marketing image in the marketing section showing portfolio presentation, client meeting, or brand materials.
- Editing workstation or automation image in the software/systems section showing a clean workstation, calibrated display, and organized editing environment.
Internal Links to Explore:
- Recommended Gear
- Free Downloads / 60-Minute Shoot Blueprint
- Start Here
- The RE Media Systems Blog
- About Scott Prokop and RE Media Systems
- Courses and Training
- Contact Us for Mentorship
{“name”:”How to Start a Real Estate Photography Business in 2026″,”step”:[{“name”:”Choose your business model”,”text”:”Decide whether you will focus on high-volume HDR, mid-tier flambient, or luxury architectural photography.”,”@type”:”HowToStep”},{“name”:”Acquire essential gear”,”text”:”Invest in a full-frame mirrorless camera, a 16-35mm wide-angle lens, a sturdy tripod, and a drone.”,”@type”:”HowToStep”},{“name”:”Set your pricing”,”text”:”Create tiered packages based on square footage and add-ons like drone photos and floor plans.”,”@type”:”HowToStep”},{“name”:”Build a portfolio”,”text”:”Offer introductory shoots to top agents to build a high-quality portfolio of 3-5 properties.”,”@type”:”HowToStep”},{“name”:”Implement a repeatable workflow”,”text”:”Standardize your shooting and editing process to ensure fast turnarounds and consistent quality.”,”@type”:”HowToStep”}],”@type”:”HowTo”,”image”:”https://cdn.marblism.com/TAd0fJk7rwC.webp”,”@context”:”https://schema.org”,”totalTime”:”P12M”,”description”:”A comprehensive guide on starting a successful real estate photography business, covering gear, pricing, marketing, and professional workflows.”,”estimatedCost”:{“@type”:”MonetaryAmount”,”value”:”3000-7000″,”currency”:”USD”}}