
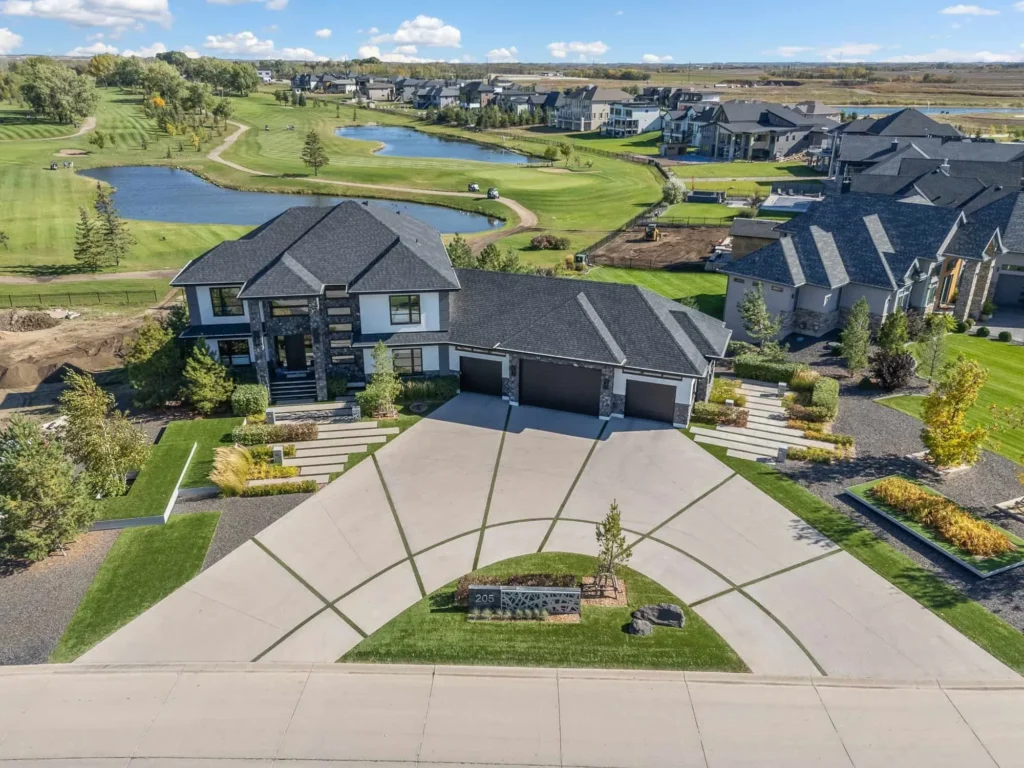
Drone photography has transformed from a “luxury add-on” to an absolute requirement in the real estate industry. If you aren’t offering aerial media, you’re leaving money on the table and, quite frankly, losing clients to photographers who do.
I’m Scott Prokop, and over the last 14 years, I’ve photographed more than 10,000 homes. Today, I fly a drone on the vast majority of my bookings. Why? Because it’s the most efficient way to show a property’s context, scale, and neighborhood value in a single frame.
At RE Media Systems, our mission is to help you shoot faster, earn more, and build a better business. This guide is the blueprint for doing exactly that with a drone. We’re going to skip the fluff and dive straight into the equipment, the legalities, the exact shots you need, and, most importantly, how to price it for maximum profit.
1. Licensing and Legal Requirements: Don’t Skip This
Before you even power up your propellers, you need to be legal. Real estate photography is a commercial activity. Whether you’re charging $50 or $5,000, if the end goal is to help sell a property, you are a commercial pilot.
United States: FAA Part 107
In the U.S., you must hold a Remote Pilot Certificate under the FAA’s Part 107.
- The Test: You must pass a 60-question knowledge test covering airspace, weather, and regulations.
- Registration: Every drone used for work must be registered with the FAA ($5 for three years).
- Recurrent Training: You must keep your knowledge current through the FAA’s online portal every 24 months.
Canada: Transport Canada
If you’re north of the border, things are slightly different. You need a Pilot Certificate (Basic or Advanced).
- Basic Certificate: For flying in uncontrolled airspace, at least 30 meters from bystanders.
- Advanced Certificate: Required for controlled airspace or flying closer to people.
- Drone Registration: All drones between 250g and 25kg must be registered and marked.
Pro Tip: Do not fly without insurance. Standard business liability often excludes “aviation.” Get a specific drone policy or use on-demand insurance like SkyWatch or Verifly to protect your business.
2. Equipment: Stop Overspending on Drones
One of the biggest mistakes new photographers make is thinking they need a $5,000 drone to get professional results. I covered this in depth in my video, “Stop Overspending on Drones!”
For real estate, you need three things: a stable gimbal, a decent sensor, and reliable flight time.
The Budget Champion: DJI Mini 5 Pro
The Mini series is incredible because it’s under 240g, meaning it falls under many restrictive regulations in some countries (though you still need your license for commercial work).
- Pros: Ultra-portable, great for tight urban spaces, handles vertical video natively.
- Cons: Struggles in high winds, smaller sensor than the Air series.
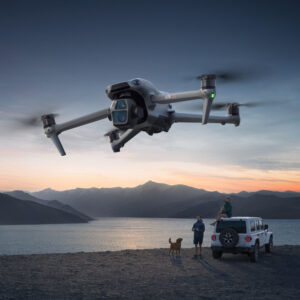
The Professional Standard: DJI Air 3
This is currently the “Goldilocks” drone for real estate. It features a dual-camera system (24mm wide and 70mm telephoto).
- The 70mm Advantage: The medium-telephoto lens allows you to get “compressed” architectural shots that look professional and high-end, without having to fly dangerously close to the house.
- Battery Life: 40+ minutes of flight time means you can easily hit 2-3 properties on a single charge.
The Legacy King: DJI Air 2S
If you are on a tight budget, the Air 2S is still a beast. Its 1-inch sensor provides fantastic dynamic range for stills, though it lacks the dual-lens versatility of the Air 3.
3. The 6-Shot Checklist: The “Secret” Shots Realtors Demand
I’ve developed a systematic workflow that ensures I never miss a shot. In my video, “The Secret Drone Shots That Top Realtors Demand,” I break down these six essential angles. If you deliver these, you’ll look like a seasoned pro every time.
- Front Hero Shot (10-30ft altitude): Hover just above the gutter line, centered on the front door. This provides a “elevated curb appeal” look that a tripod simply can’t reach.
- Front Yard / Curb Appeal (20-40ft altitude): Pull back to show the driveway and the street context. This helps buyers understand how the home sits on the block.
- Back of House (10-30ft altitude): Capture the connection between the house and the backyard. Ensure the sliding doors or deck are visible.
- Backyard Lifestyle Shot: Lower your altitude. Focus on the “fun” stuff, pools, fire pits, or pergolas. This is about selling the experience, not just the structure.
- Top-Down Lot View: Fly high and tilt the camera 90 degrees straight down. This is the “map” shot. It shows the property boundaries and the lot size perfectly.
- Neighborhood Amenities: Fly to a medium-high altitude and look toward nearby parks, schools, or water features. This shows the value of the location.
4. Composition and Camera Settings
Drone photography is still photography. All the rules of composition still apply.
- Keep Verticals Straight: Use a rectilinear perspective. If the house looks like it’s leaning, your gimbal is likely tilted too far up or down. Correct this in post or by flying further back.
- Use the Grid: Turn on the 3×3 grid lines in your DJI Fly app. Use the rule of thirds to place the home in a compelling spot in the frame.
- Auto vs. Manual: For 90% of real estate work, DJI’s Auto settings are excellent. However, if you are shooting into the sun, switch to Manual (M) and bracket your shots (AEB – Auto Exposure Bracketing). This ensures you have enough data to recover shadows and highlights in post-processing.
5. Safety First: The Professional Mindset
A single crash can ruin your reputation and your profit margin.
- Visual Line of Sight (VLOS): Always keep your eyes on the drone. If you’re looking only at your screen, you’ll miss the power line or the tree branch creeping into frame.
- Check Airspace: Use apps like B4UFLY or OpenSky before you take off. If you are near an airport, you may need LAANC authorization.
- Weather: Don’t fly in winds over 20-25 mph or in any precipitation. It’s not worth the risk.
6. Post-Processing and Property Lines
Raw drone photos often look flat. You need a solid editing workflow to make them pop.
- HDR Merging: If you shot bracketed photos, merge them in Lightroom to get that clean, high-dynamic-range look.
- Color Balance: Match the colors of your drone shots to your interior/exterior ground shots for a consistent brand look.
- Property Lines: One of our most popular videos explains how to add property lines to drone shots. This is a high-value service. Use a simple stroke or “glow” effect in Photoshop to outline the lot. This helps buyers visualize the land they are actually purchasing.

7. Pricing Strategy: How to Earn More
Don’t just “throw in” drone shots for free. If you do, you are devaluing your skill and your equipment. In my guide, “My Exact Drone Pricing Formula Revealed,” I suggest three models:
- The Add-on Model: Charge a flat fee (e.g., $75–$150) to add 5-10 aerial photos to any standard package.
- The Drone-Only Package: For land listings or commercial lots, charge a premium (e.g., $250+) for a dedicated aerial-only shoot.
- The “Elite” Bundle: Include drone photos AND video in your top-tier package. This is where you significantly increase your per-shoot average.
Example Upsell:
“I see this home has a beautiful pool and backs onto a park. I’d highly recommend our Aerial Essentials package to show off that location. It’s only an extra $95 and usually helps these listings get significantly more clicks on Zillow.”
8. Common Mistakes to Avoid
- Flying Too High: Most real estate shots look best between 15 and 50 feet. If you fly at 400 feet, the house looks like a toy and loses all detail.
- Crooked Horizons: Always double-check your horizon line. A 1-degree tilt makes the whole photo look amateur.
- Ignoring the Neighbors: Be respectful. Don’t hover over the neighbor’s pool for 10 minutes. Get your shot and move on.
FAQ: Drone Real Estate Photography
Q: Do I need a drone license for every house?
A: Yes. If you are using the photos for business purposes, you need a Part 107 (US) or Pilot Certificate (Canada).
Q: Can I fly in the rain?
A: No. Drones are not waterproof, and water on the lens will ruin your shots anyway.
Q: What is the best drone for beginners?
A: The DJI Mini 4 Pro is the best entry point for professional-quality results with minimal regulatory hassle.
Q: How many drone photos should I deliver?
A: For a standard residential listing, 6-10 high-quality angles are usually plenty. Quality over quantity.
Next Steps: Build Your Aerial Business
Mastering the drone is one of the fastest ways to scale your real estate media business. Start by getting legal, then practice the 6-shot checklist until it’s muscle memory.
Ready to level up?
- Watch my full breakdown: The Secret Drone Shots That Top Realtors Demand
- Check out my Recommended Gear List for the exact drones I use.
- Download our Free Workflow Guide to see how I integrate drones into a 60-minute shoot.
Stay tuned: tomorrow we’re diving into the “Ultimate Guide to HDR Photography” to ensure your ground shots look as good as your aerials.